Monthly Archives: June 2013

Braided Yeast Bread with Walnut Filling – Hefezopf mit Walnussfüllung

Braided Yeast Bread with Walnut Filling – Hefezopf mit Walnussfüllung

Hey folks! 

Always wanted to say that 😀

Braided Yeast Bread with Walnut Filling – Hefezopf mit Walnussfüllung by gingerlemonandspice

Well here I am with a great new recipe for you: It is a yeasted and braided bread with a filling of ground walnuts (from our own tree in the backyard!!)! It is sooo pretty and tastes incredibly good! You can’t stop eating once you started 🙂

Braided Yeast Bread with Walnut Filling – Hefezopf mit Walnussfüllung by gingerlemonandspice

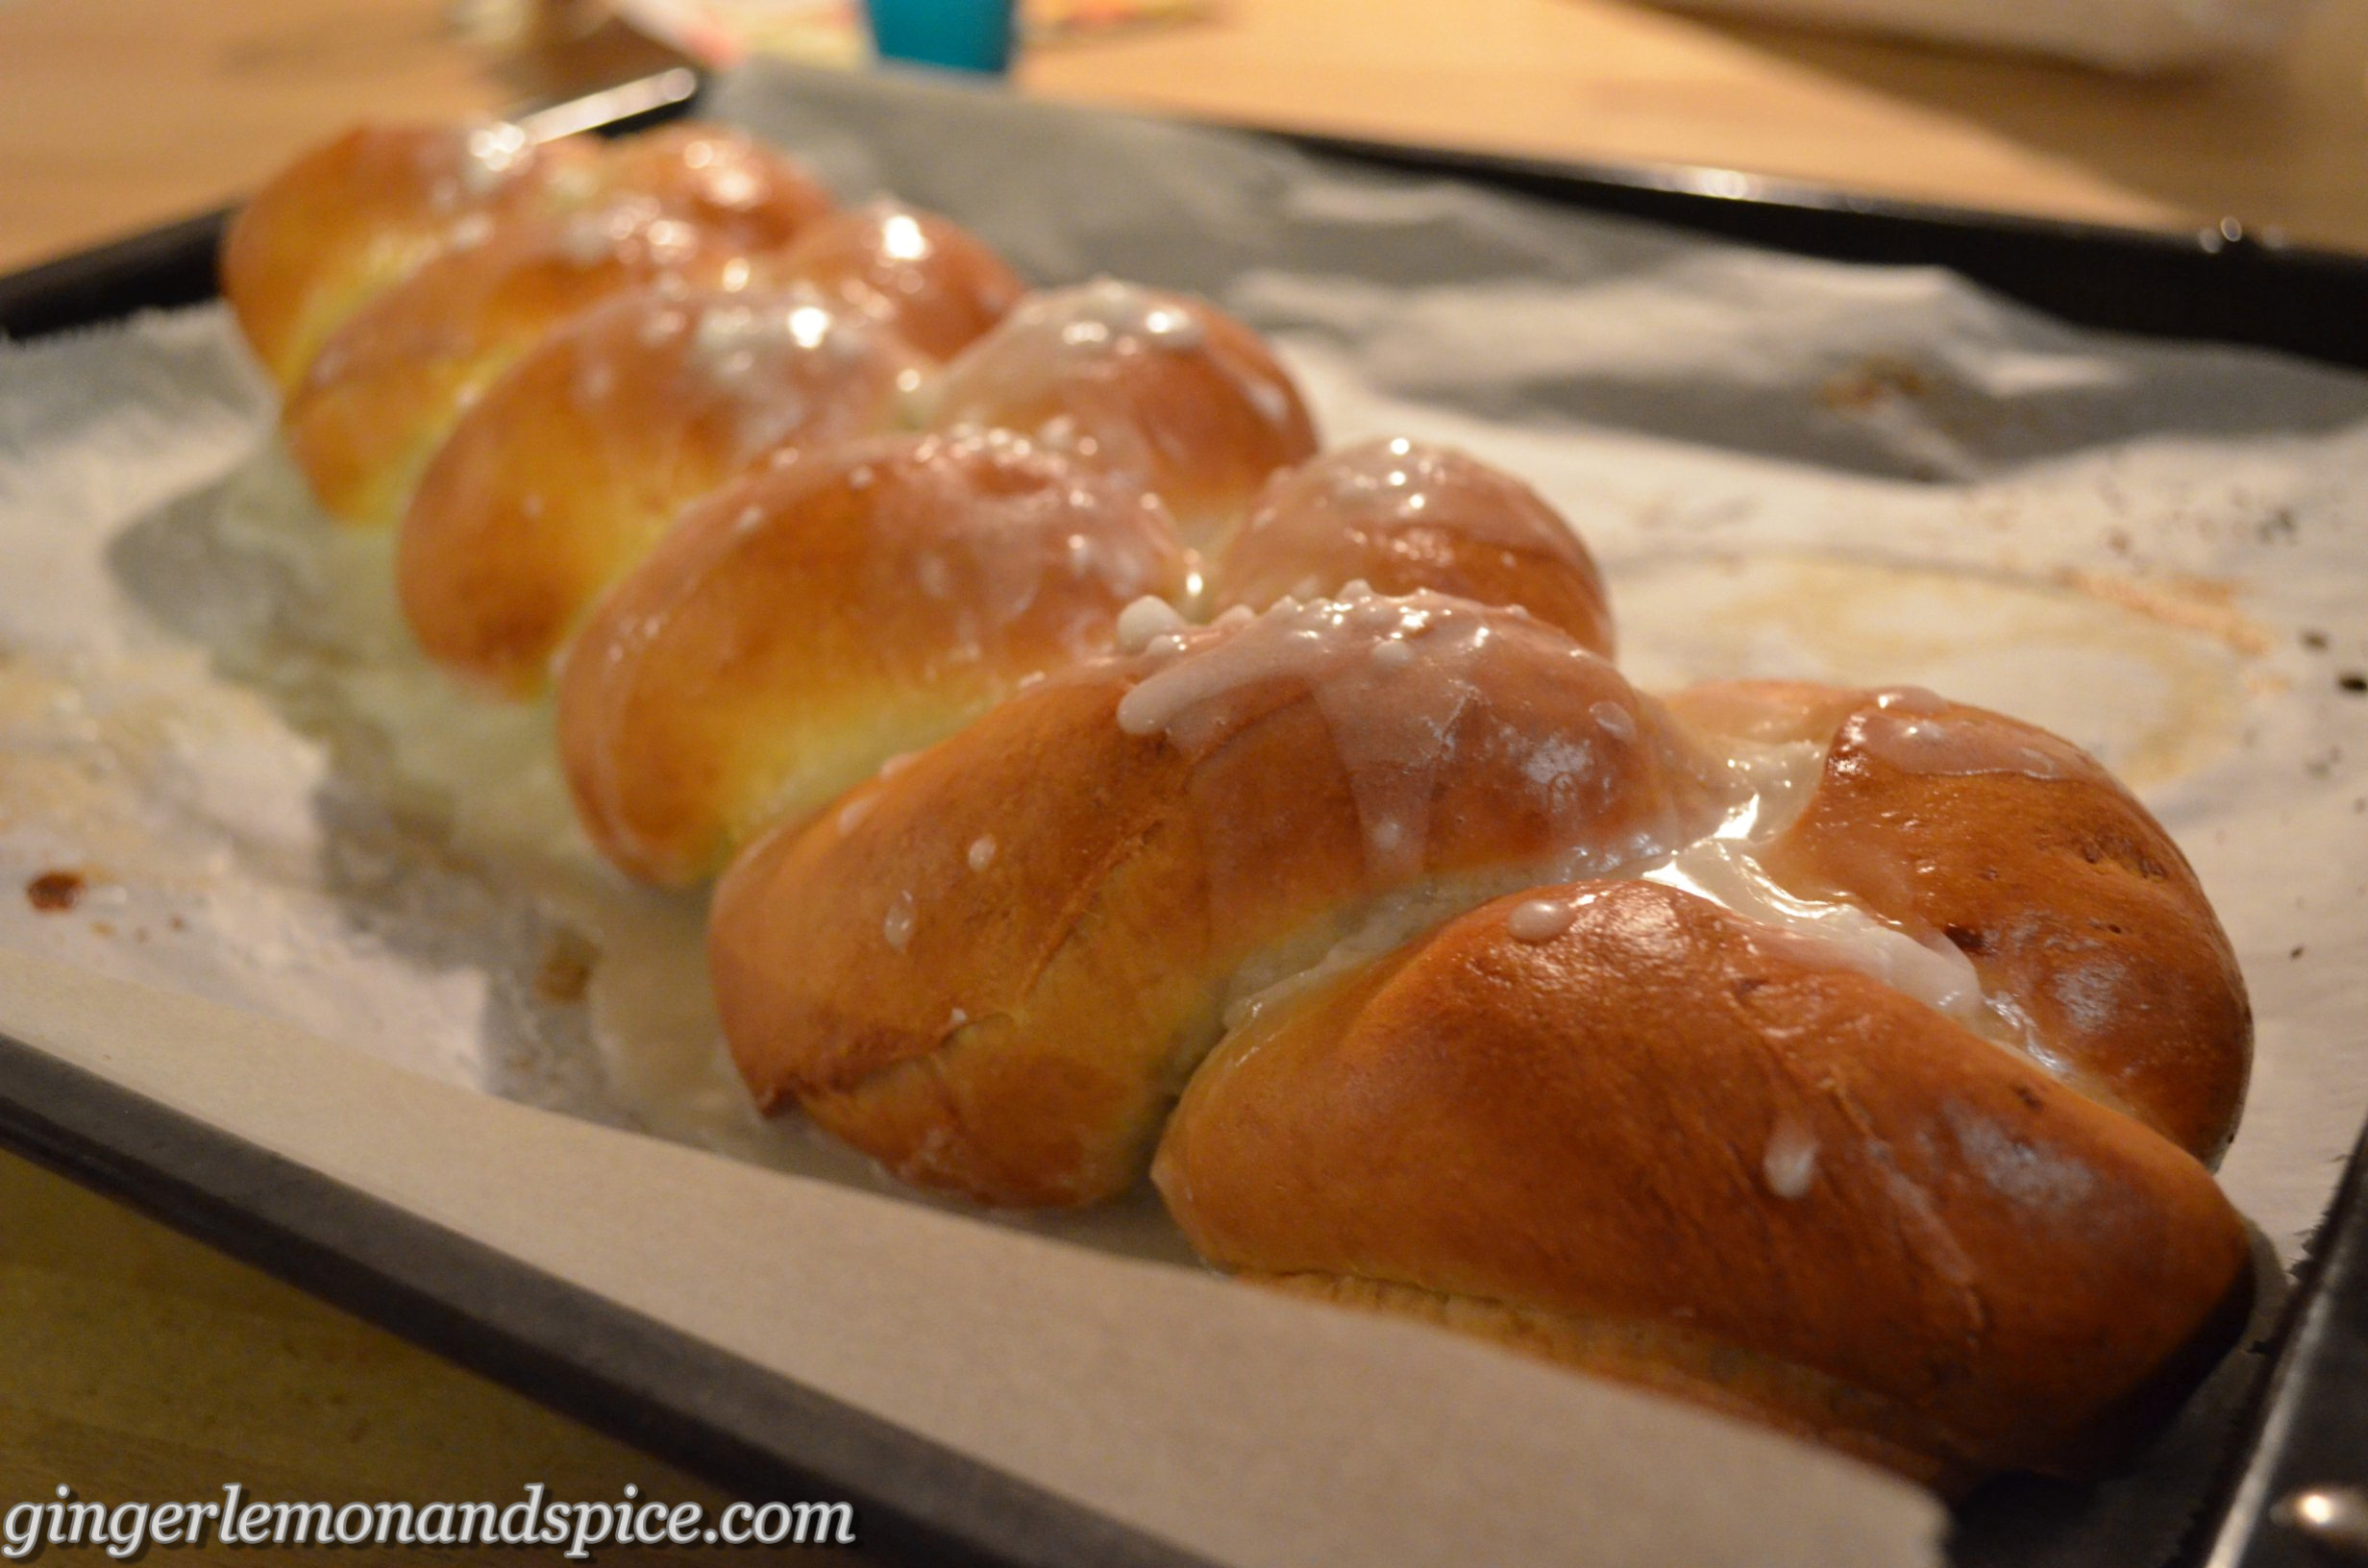
I made this braid with my godchild because she wished for it as she had never done one before. You see, I can’t see here as often as I want to because I live and study in another city but I really wanted to make her wish come true! So we made a date and just started baking 🙂 It was awesome!! I really enjoyed the time being with her and doing stuff I love and makes her happy too! 🙂 We were very proud of the outcome and I’d say we were right to be!!

I took a lot of pictures to show you every step of how it’s done! But because I didn’t want you to have to scroll over soo many pictures until you finally reach the recipe I installed a little feature: A slideshow!! Hope you like it 🙂

And here is the recipe:

Braided Yeast Bread with Walnut Filling
 
Prep time
Cook time
Total time
 
Elegant, soft and yummy yeast bread that is perfect for any coffee table!
Author:
Recipe type: Sweet Bread
Cuisine: German
Serves: about 12
Ingredients
Dough
  • 500g (4¼ cups) flour
  • 1 sachet of dry yeast
  • 1 pinch of salt
  • 50g (1/4 cup) sugar
  • 50g (1/4 cup) butter, softened
  • 200ml (3/4 cup) lukewarm milk
Filling
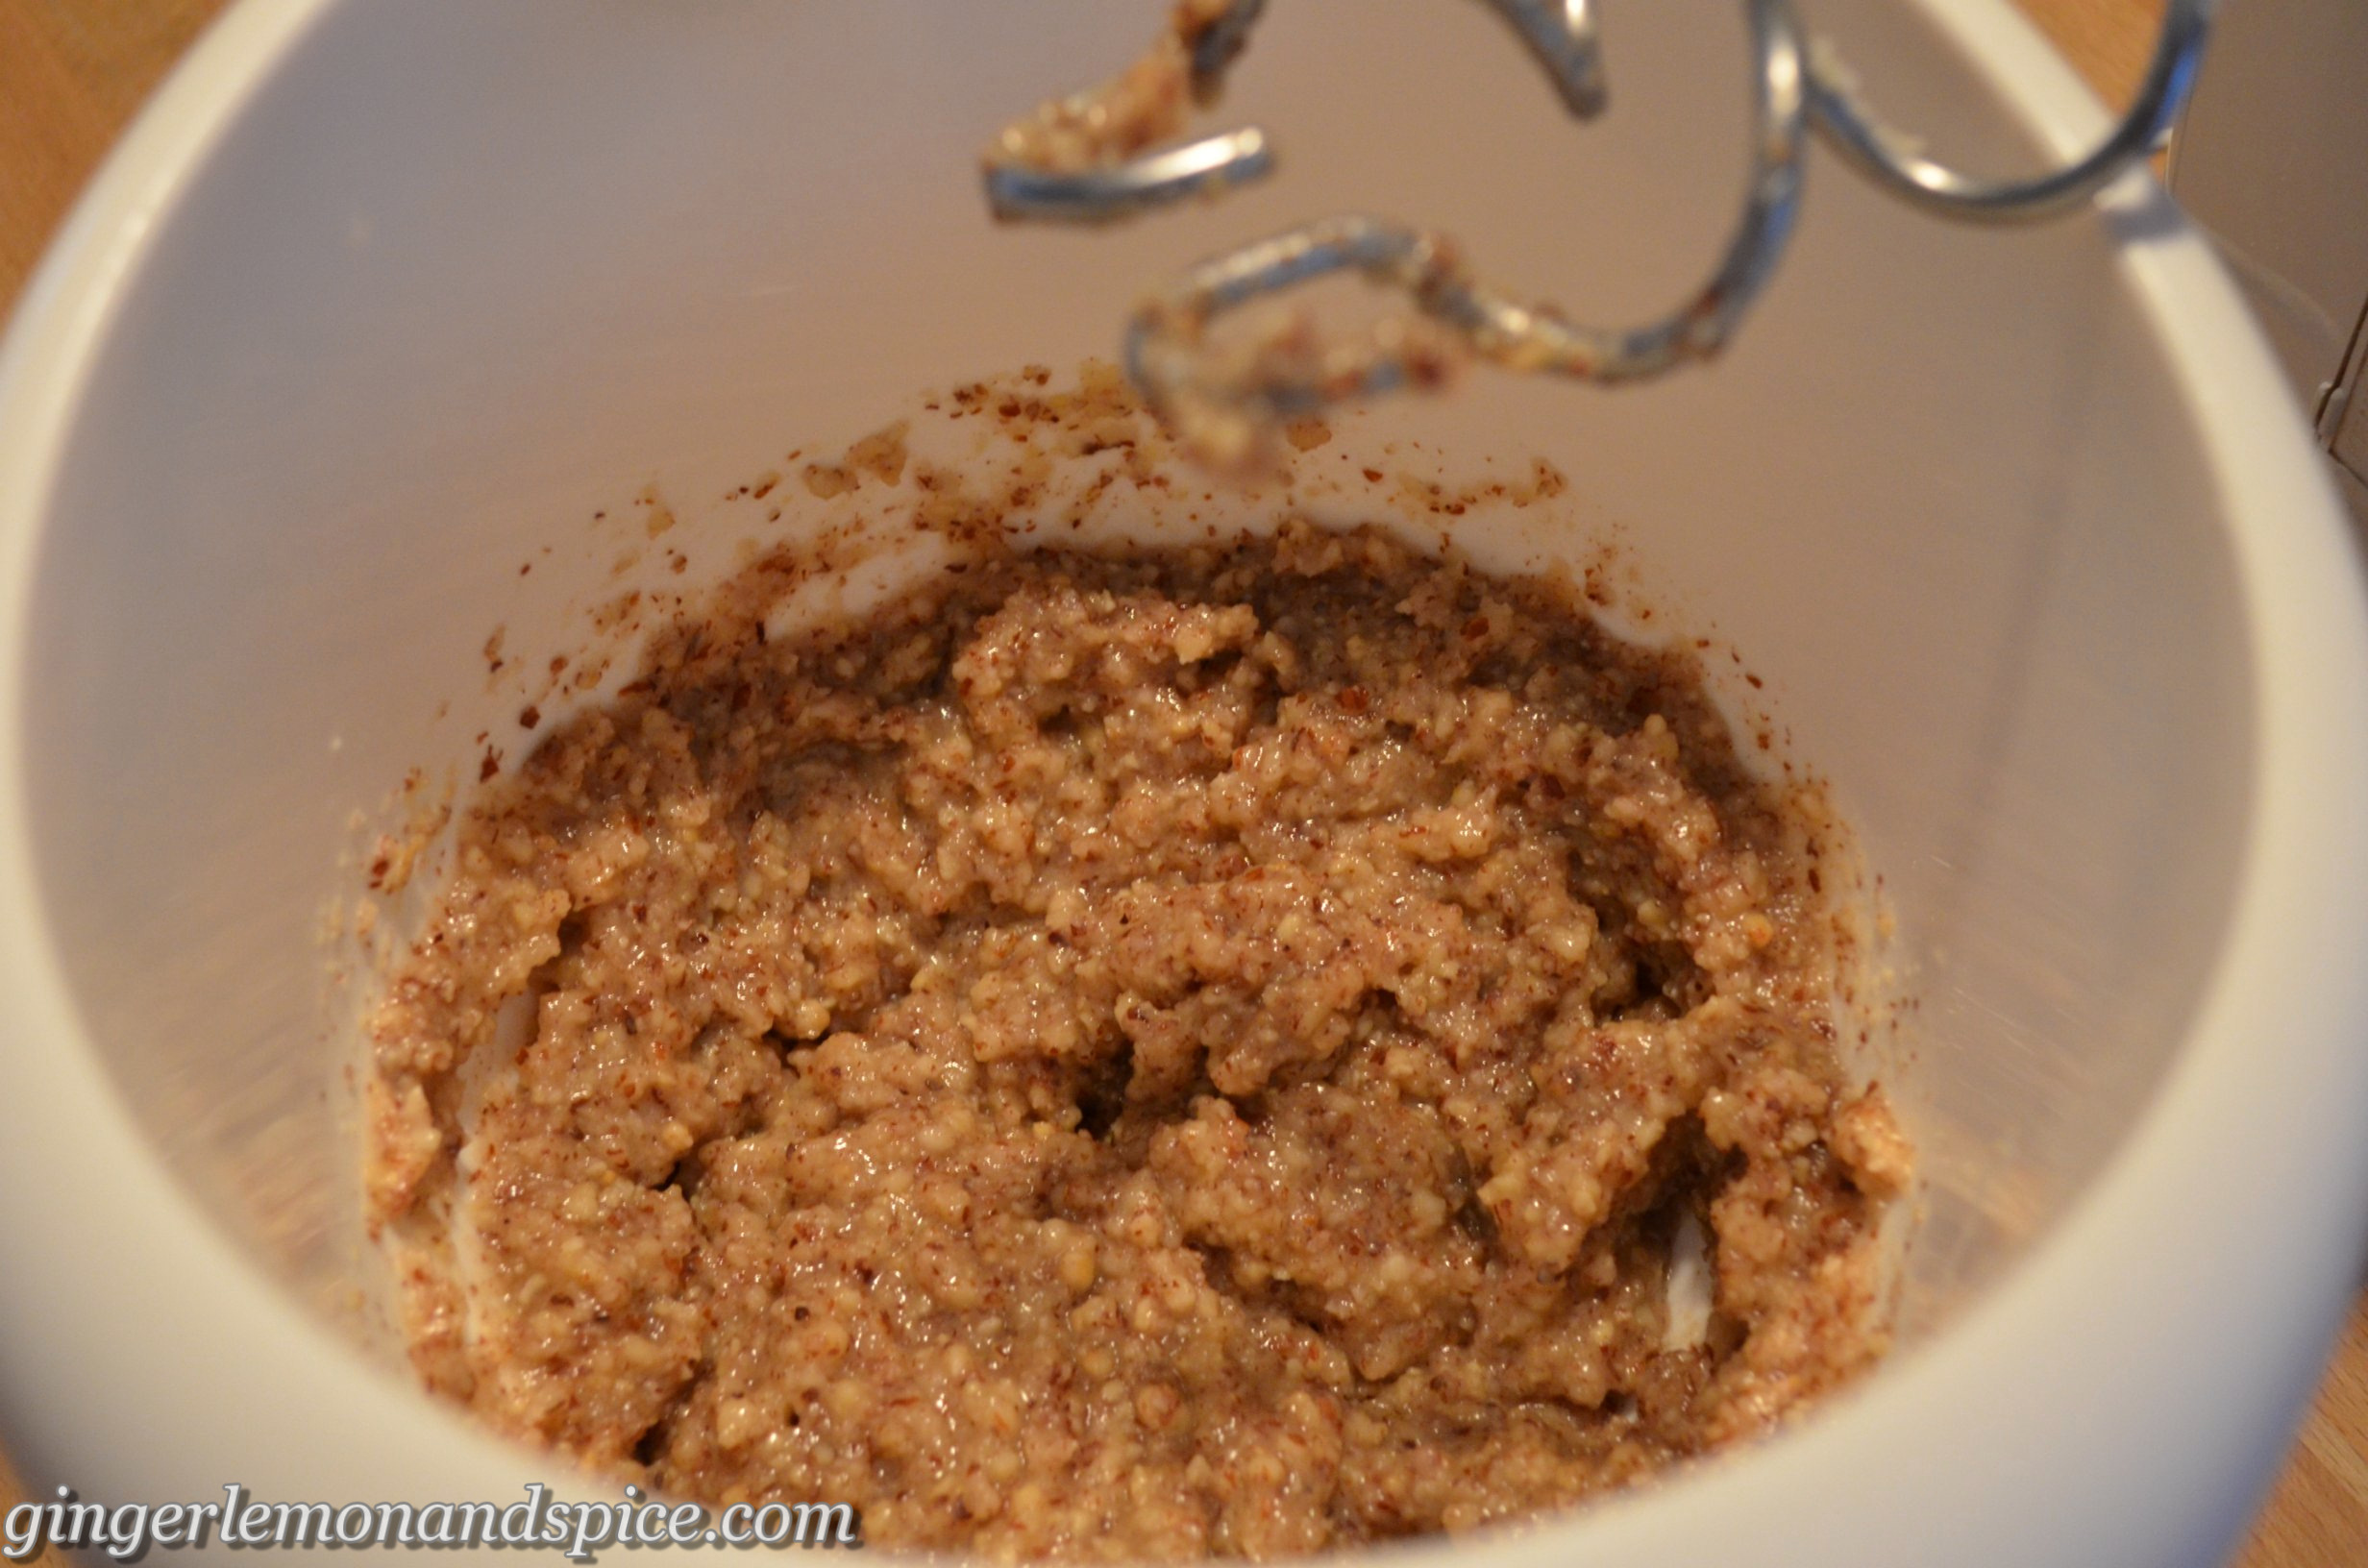
  • 150g (1¼ cup) grounded walnuts
  • 75g (1/3 cup) sugar
  • 1 tablespoon vanilla sugar (or 1 teaspoon extract)
  • 1 tablespoon bread crumbs
  • 6 tablespoons cream
  • 1 egg white
  • if you want: apricot marmelade
Finish
  • 1 egg yolk
  • 1 tablespoon of milk
Glaze
  • 40g (1/3 cup) powdered sugar
  • about 1 teaspoon milk or lemon juice or mixture of both
Instructions
Dough
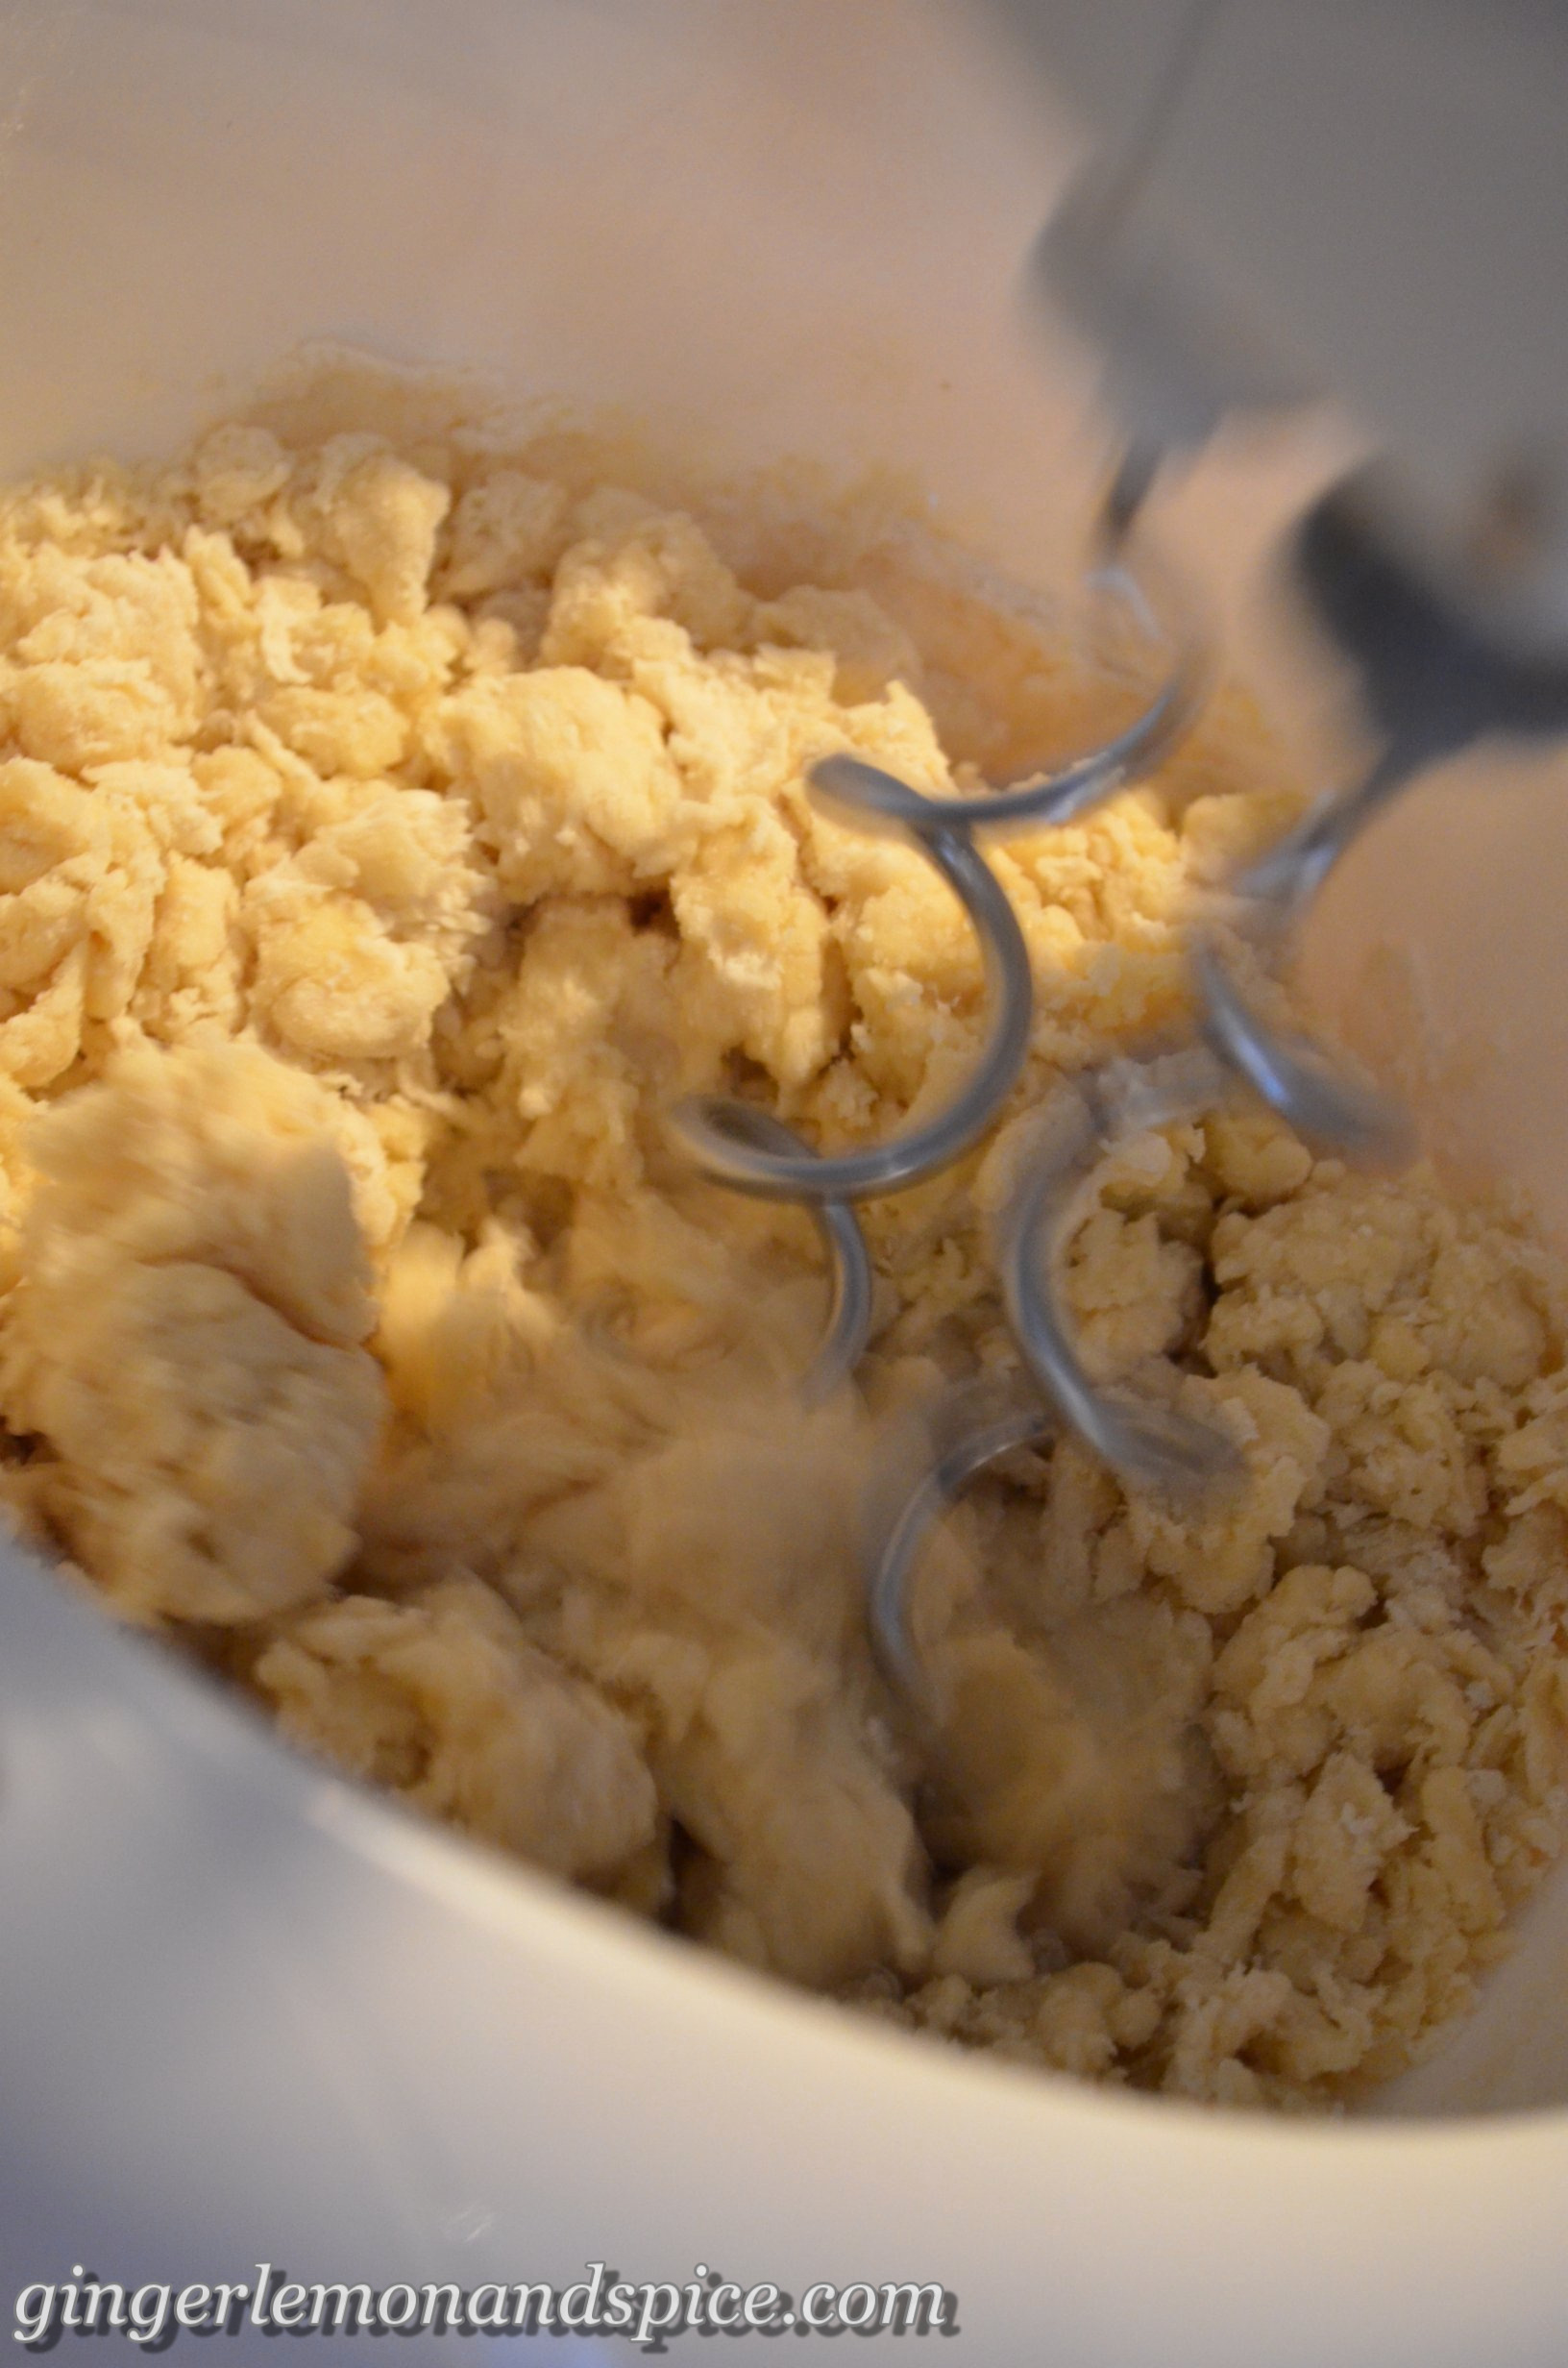
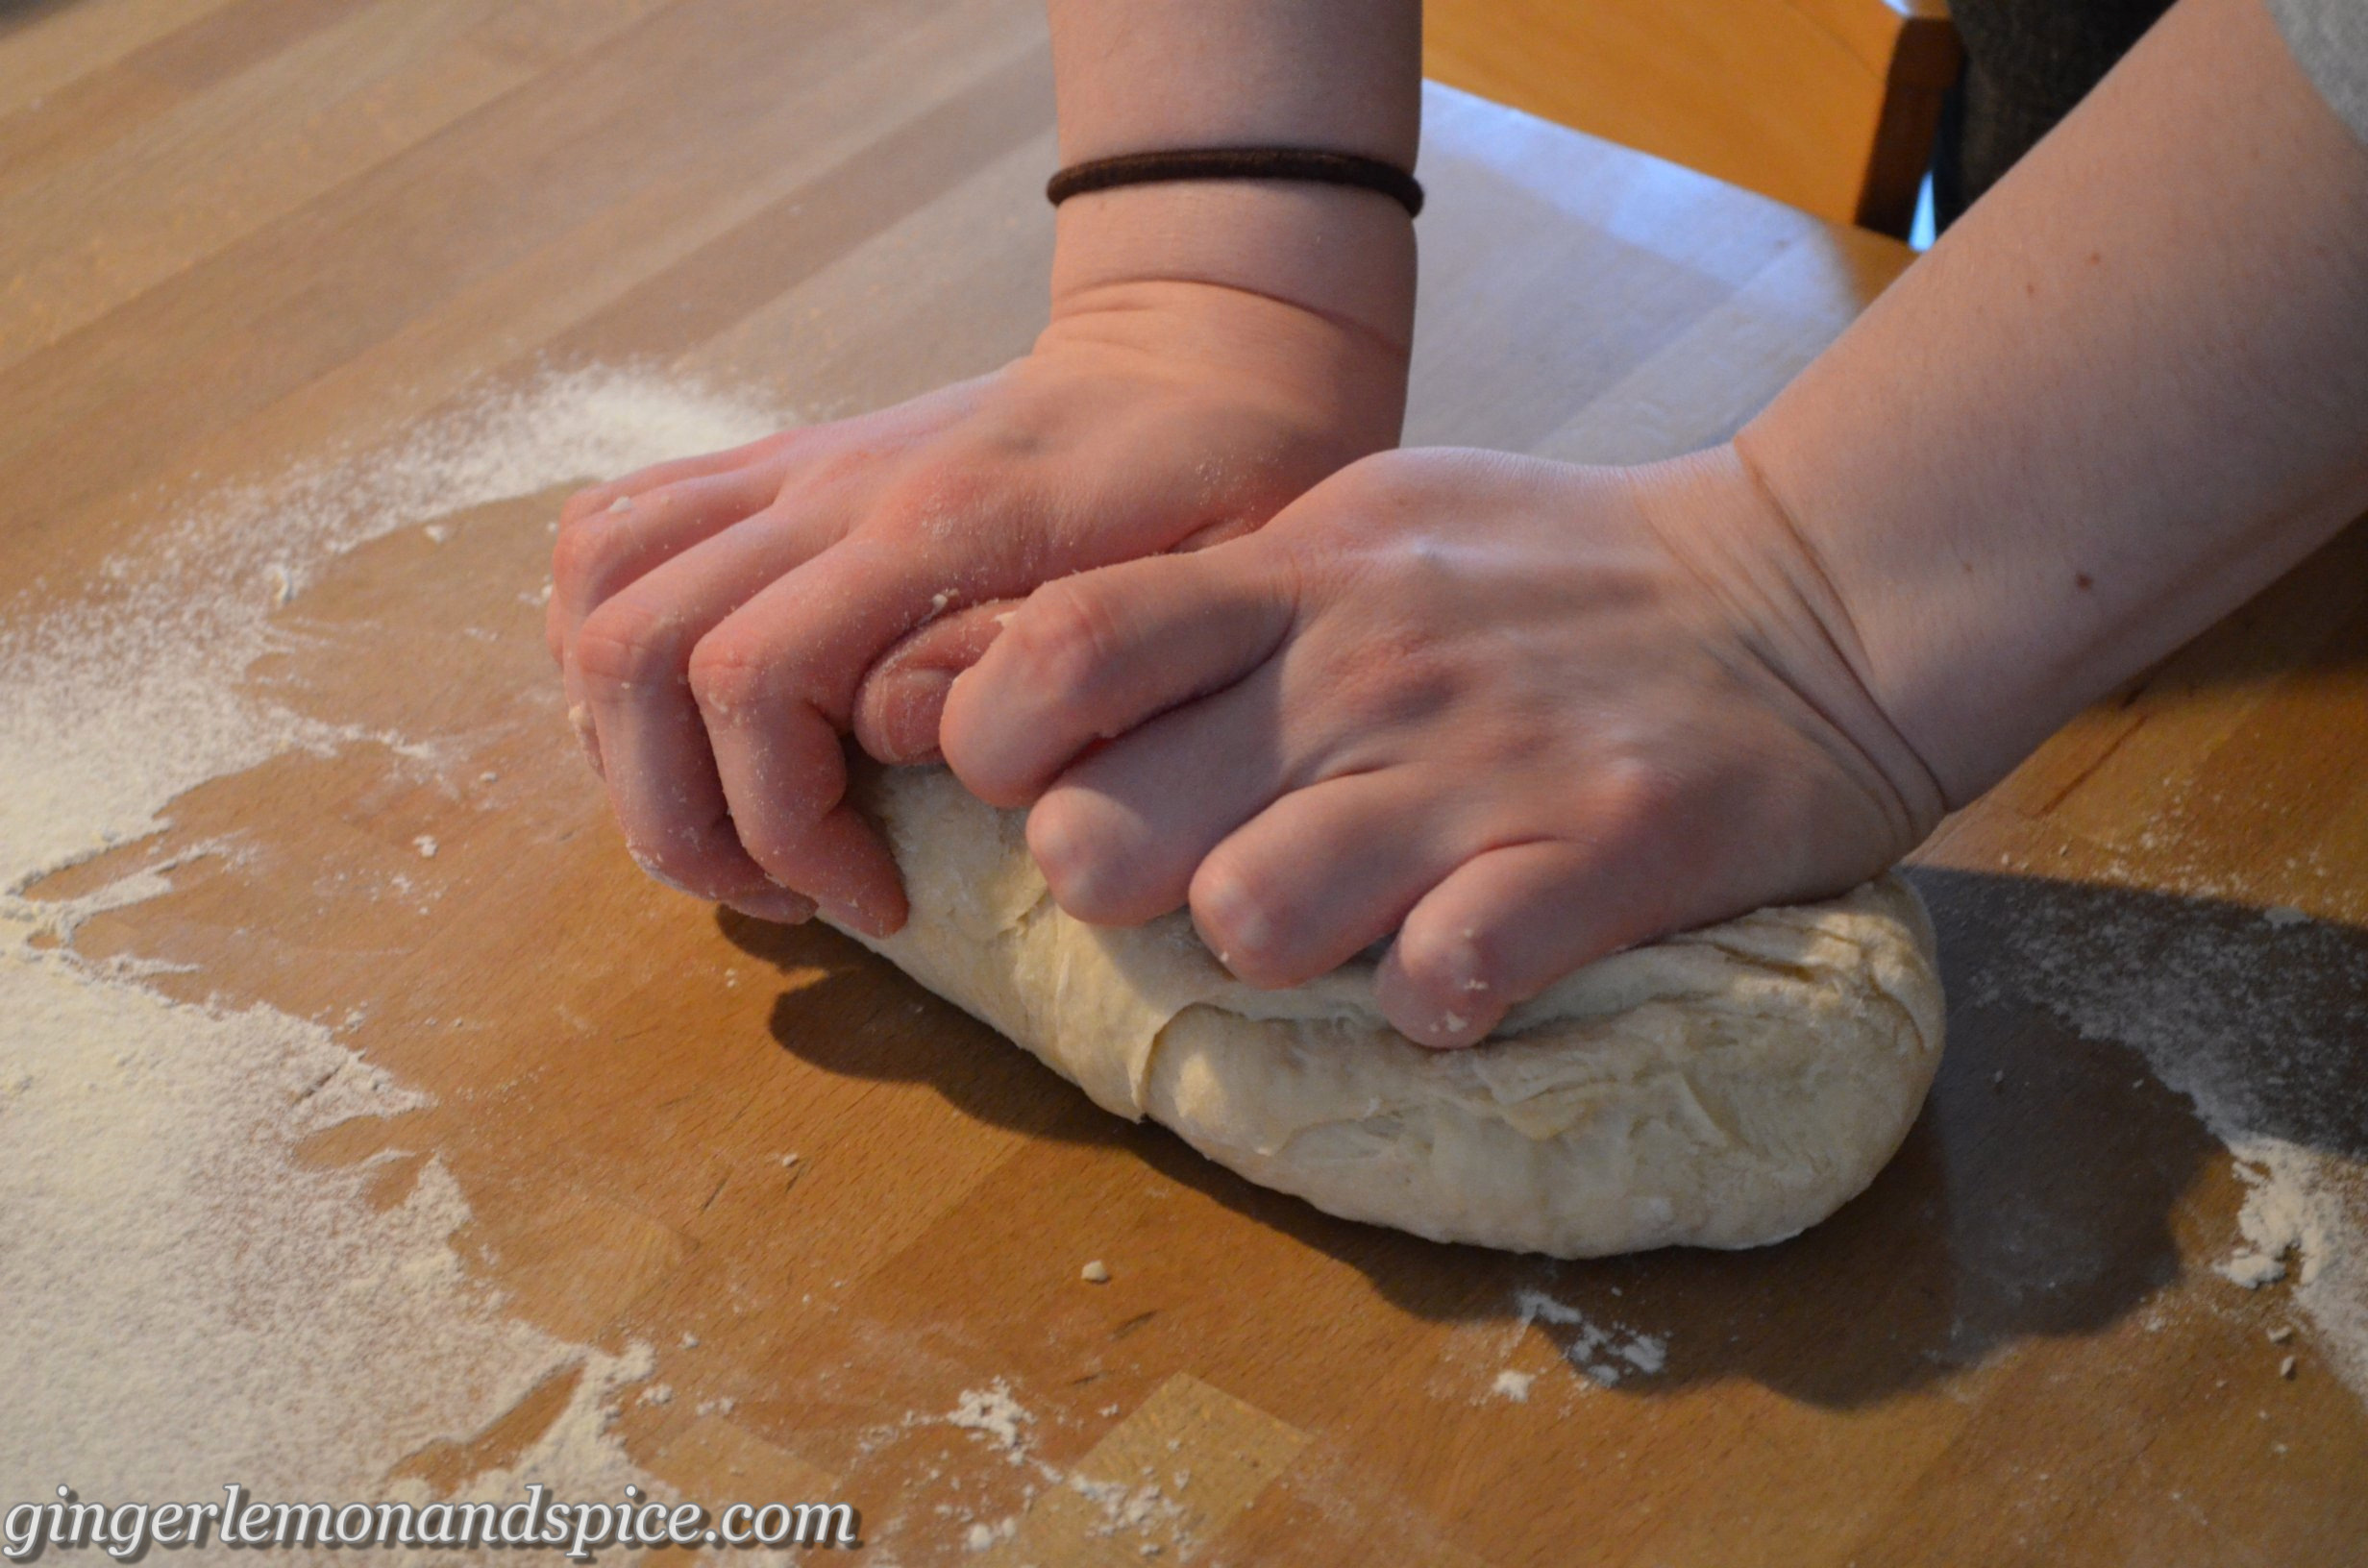
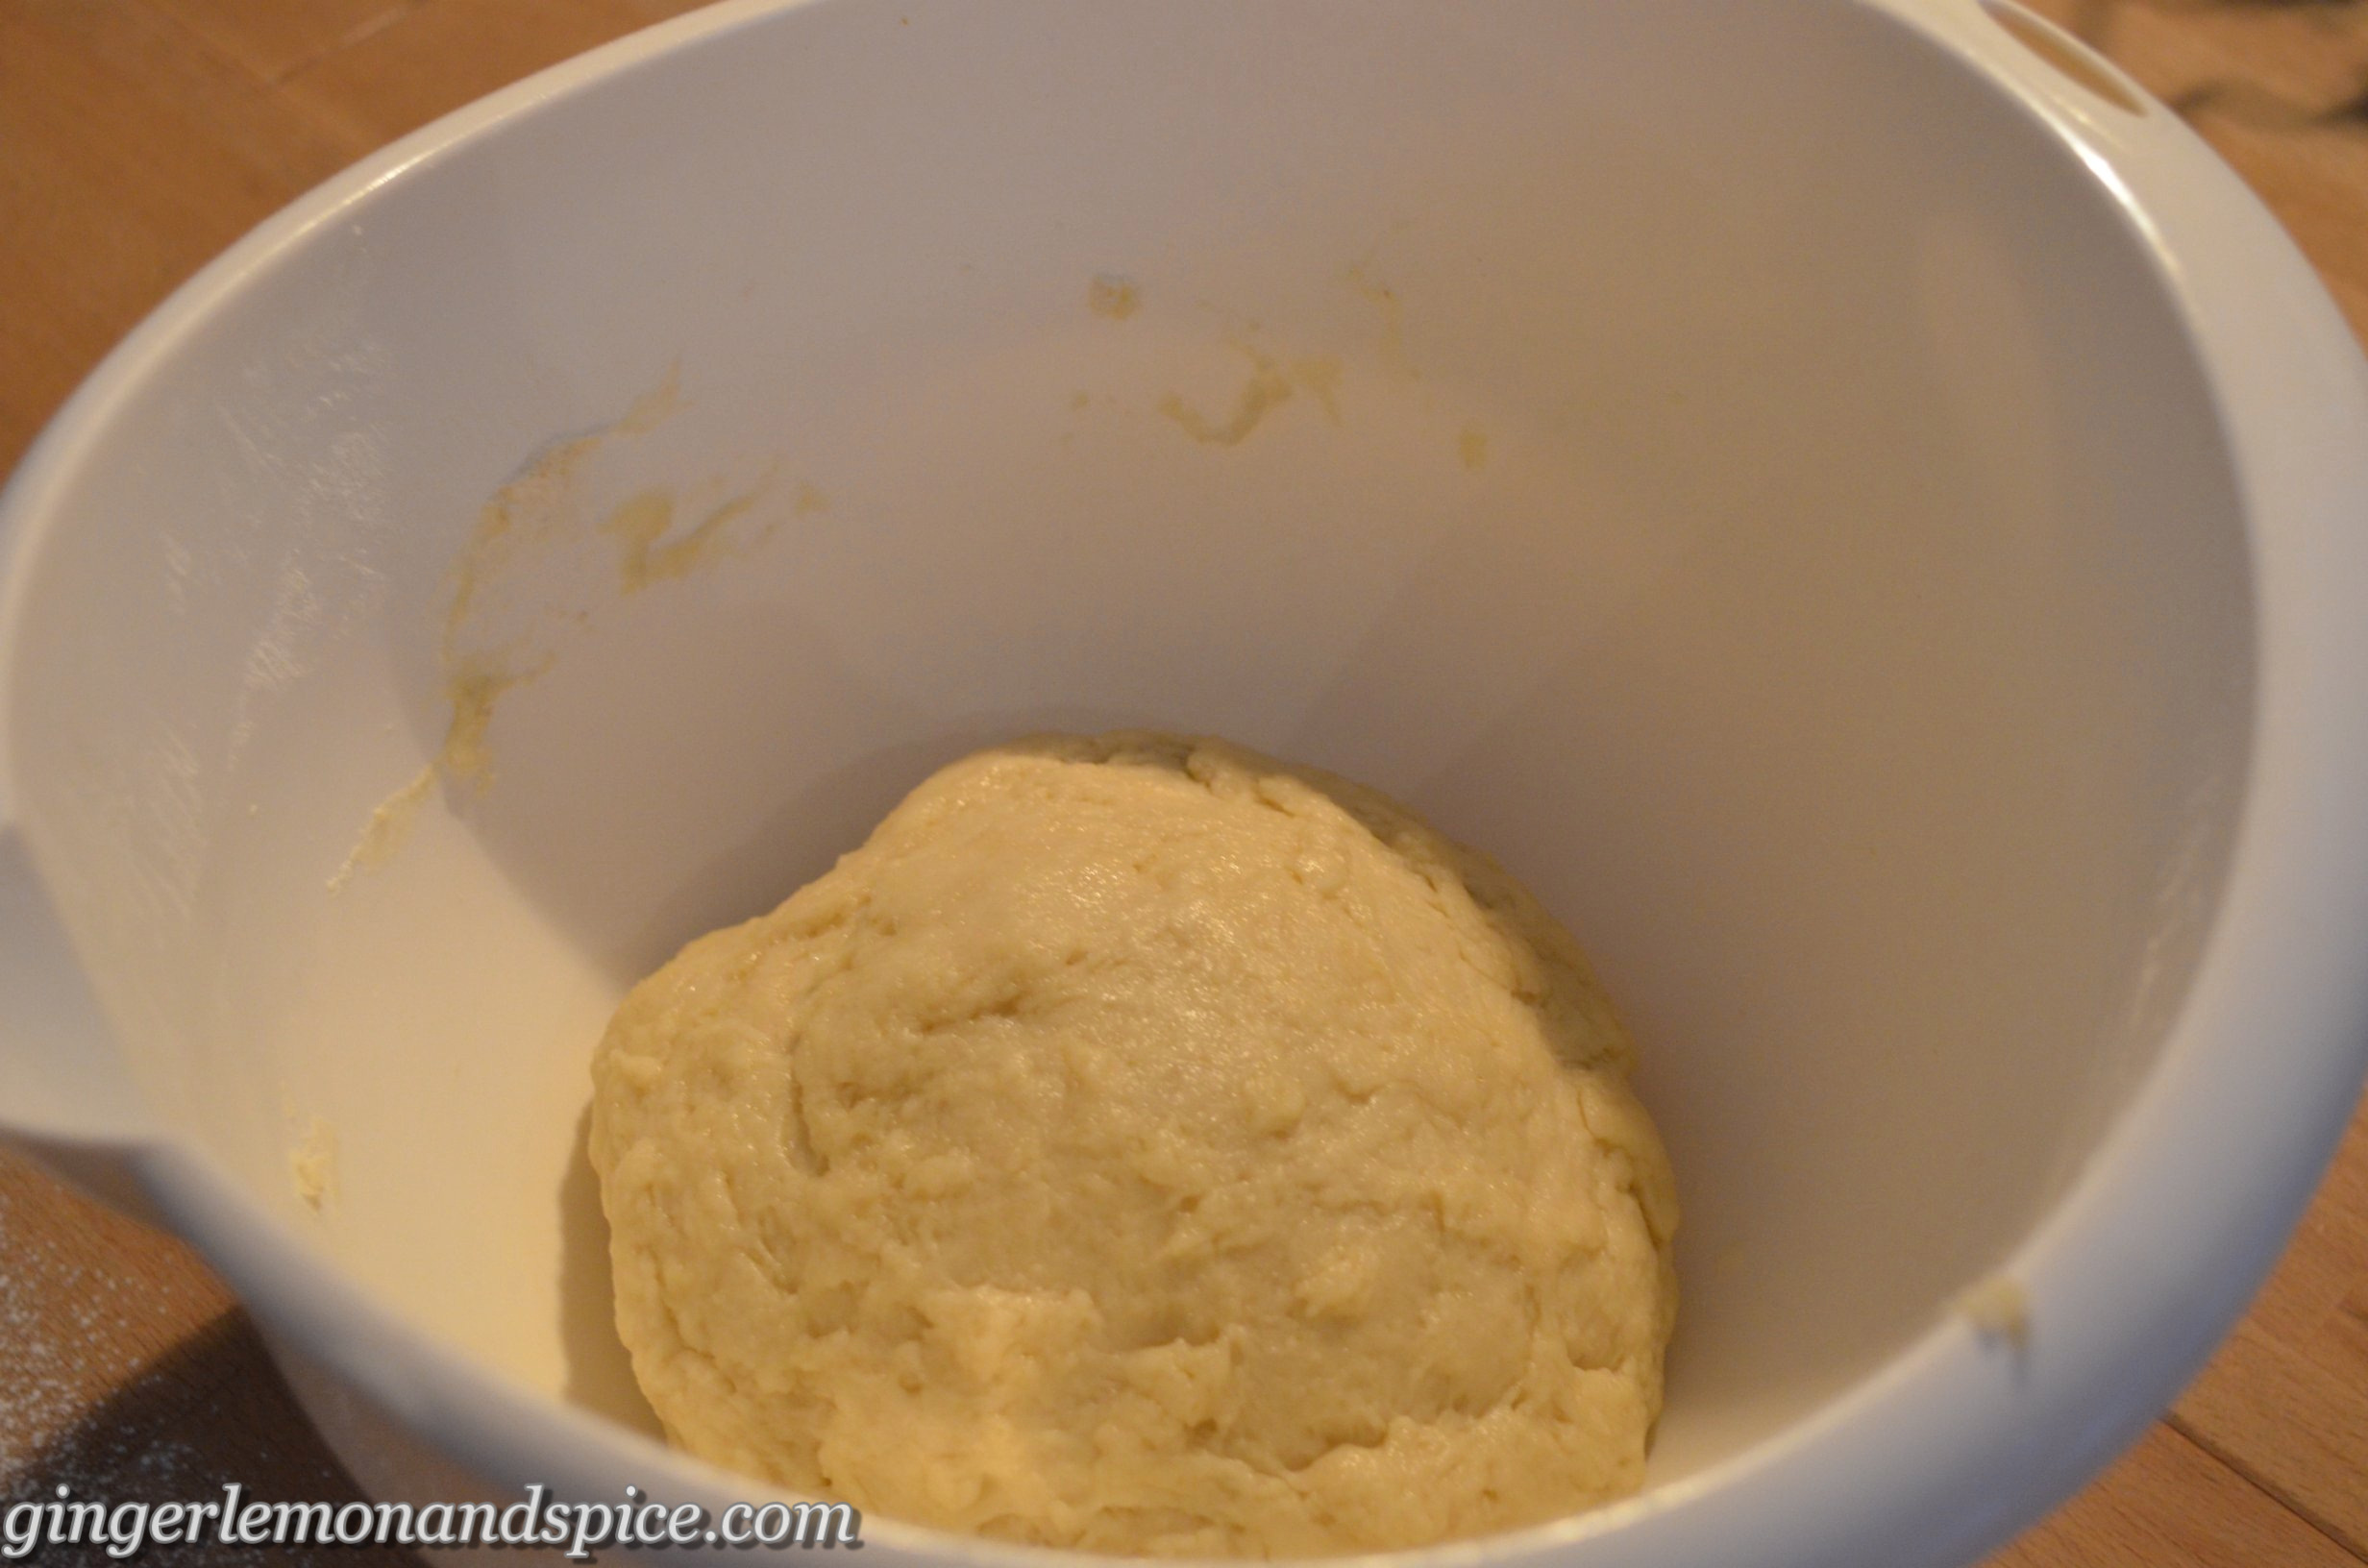
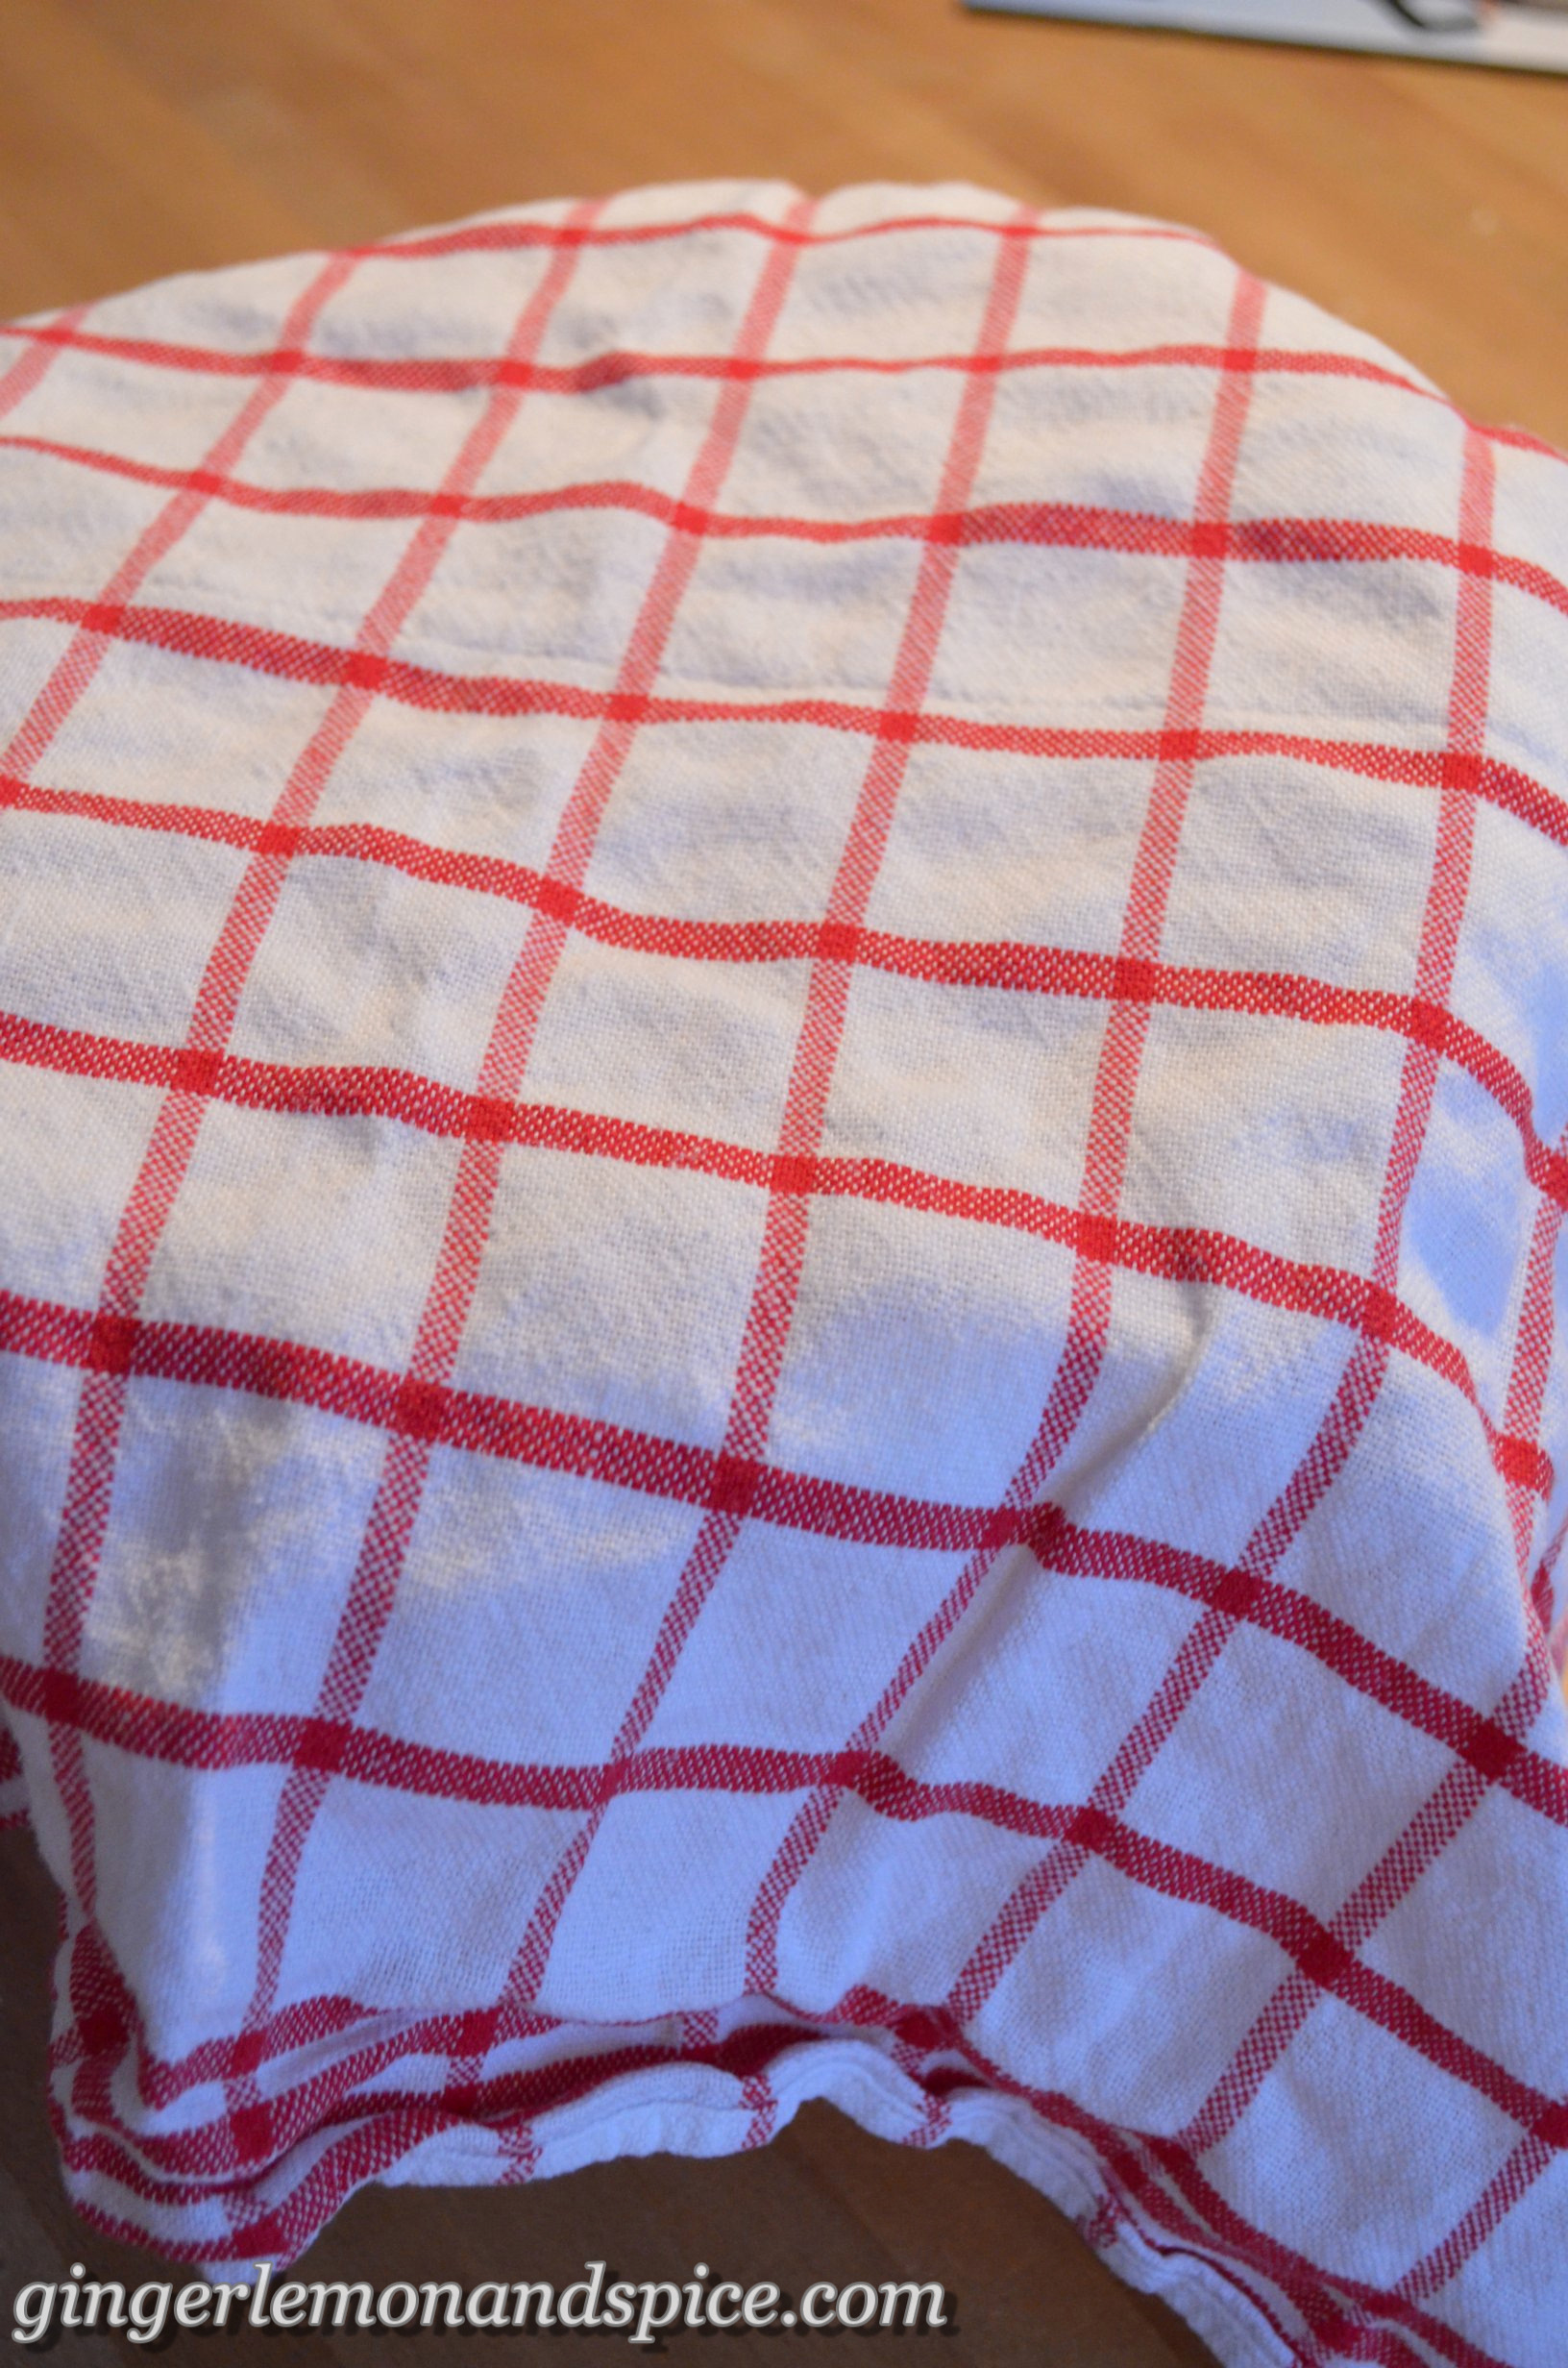
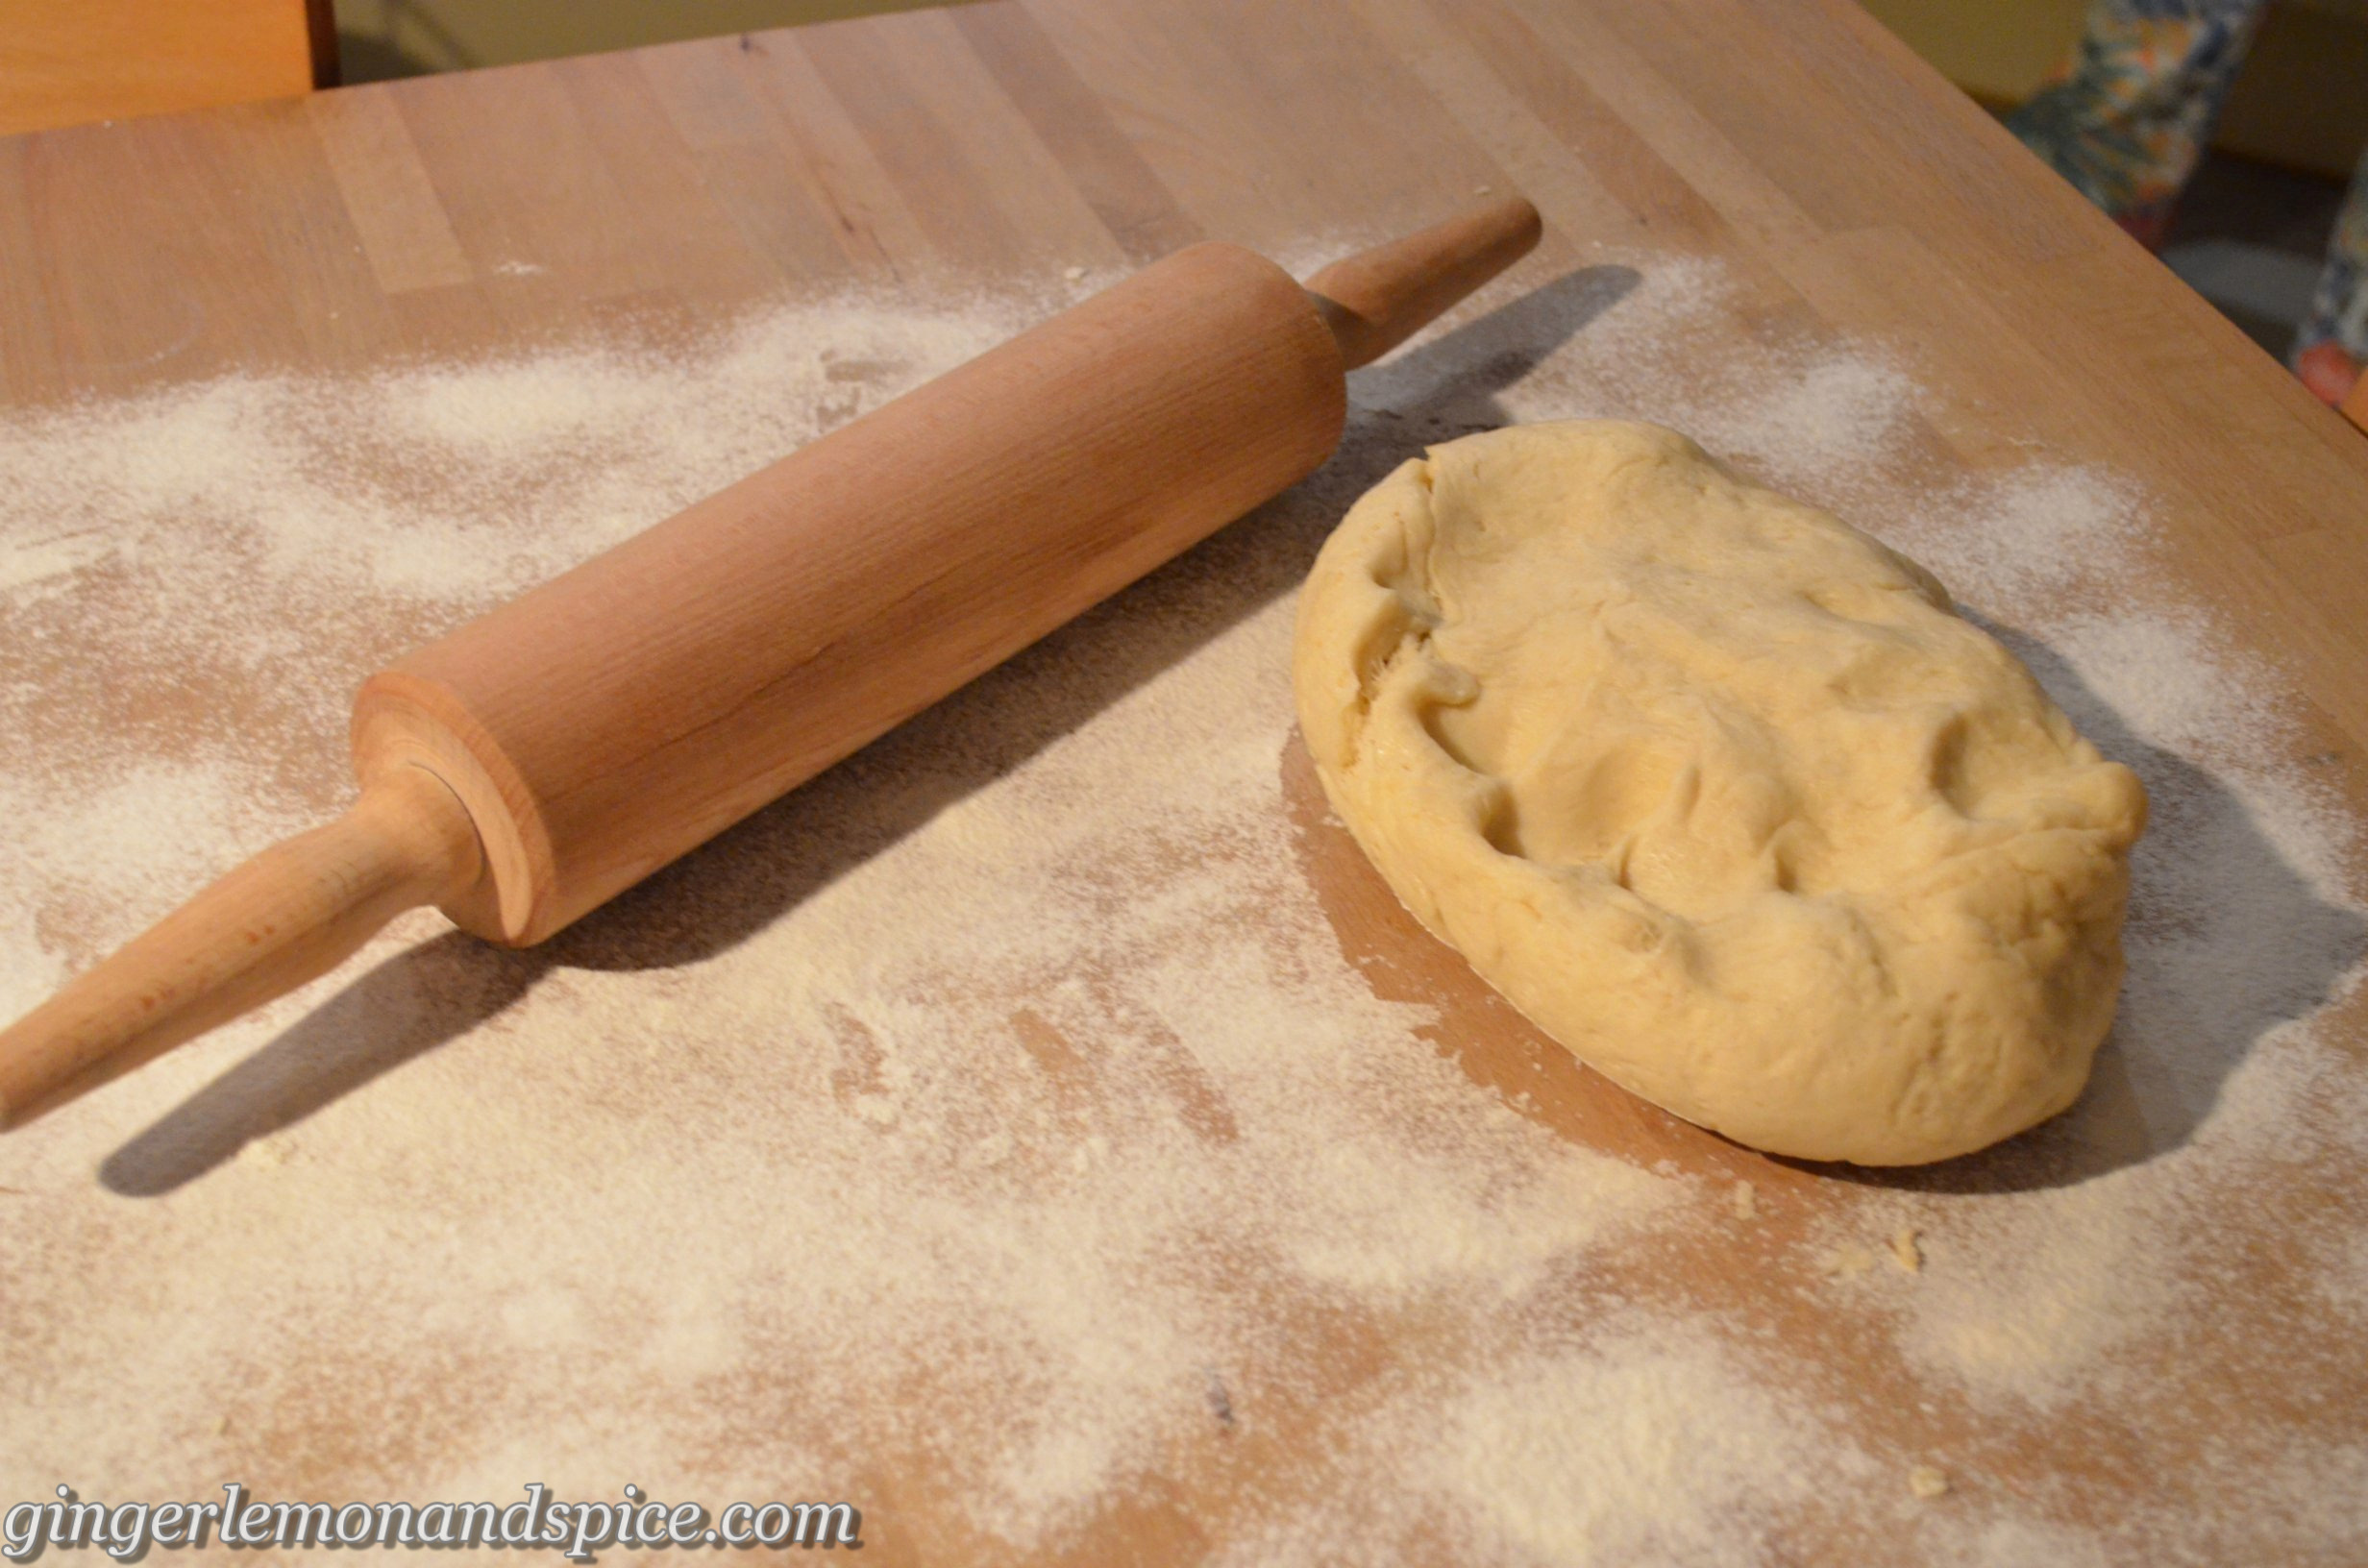
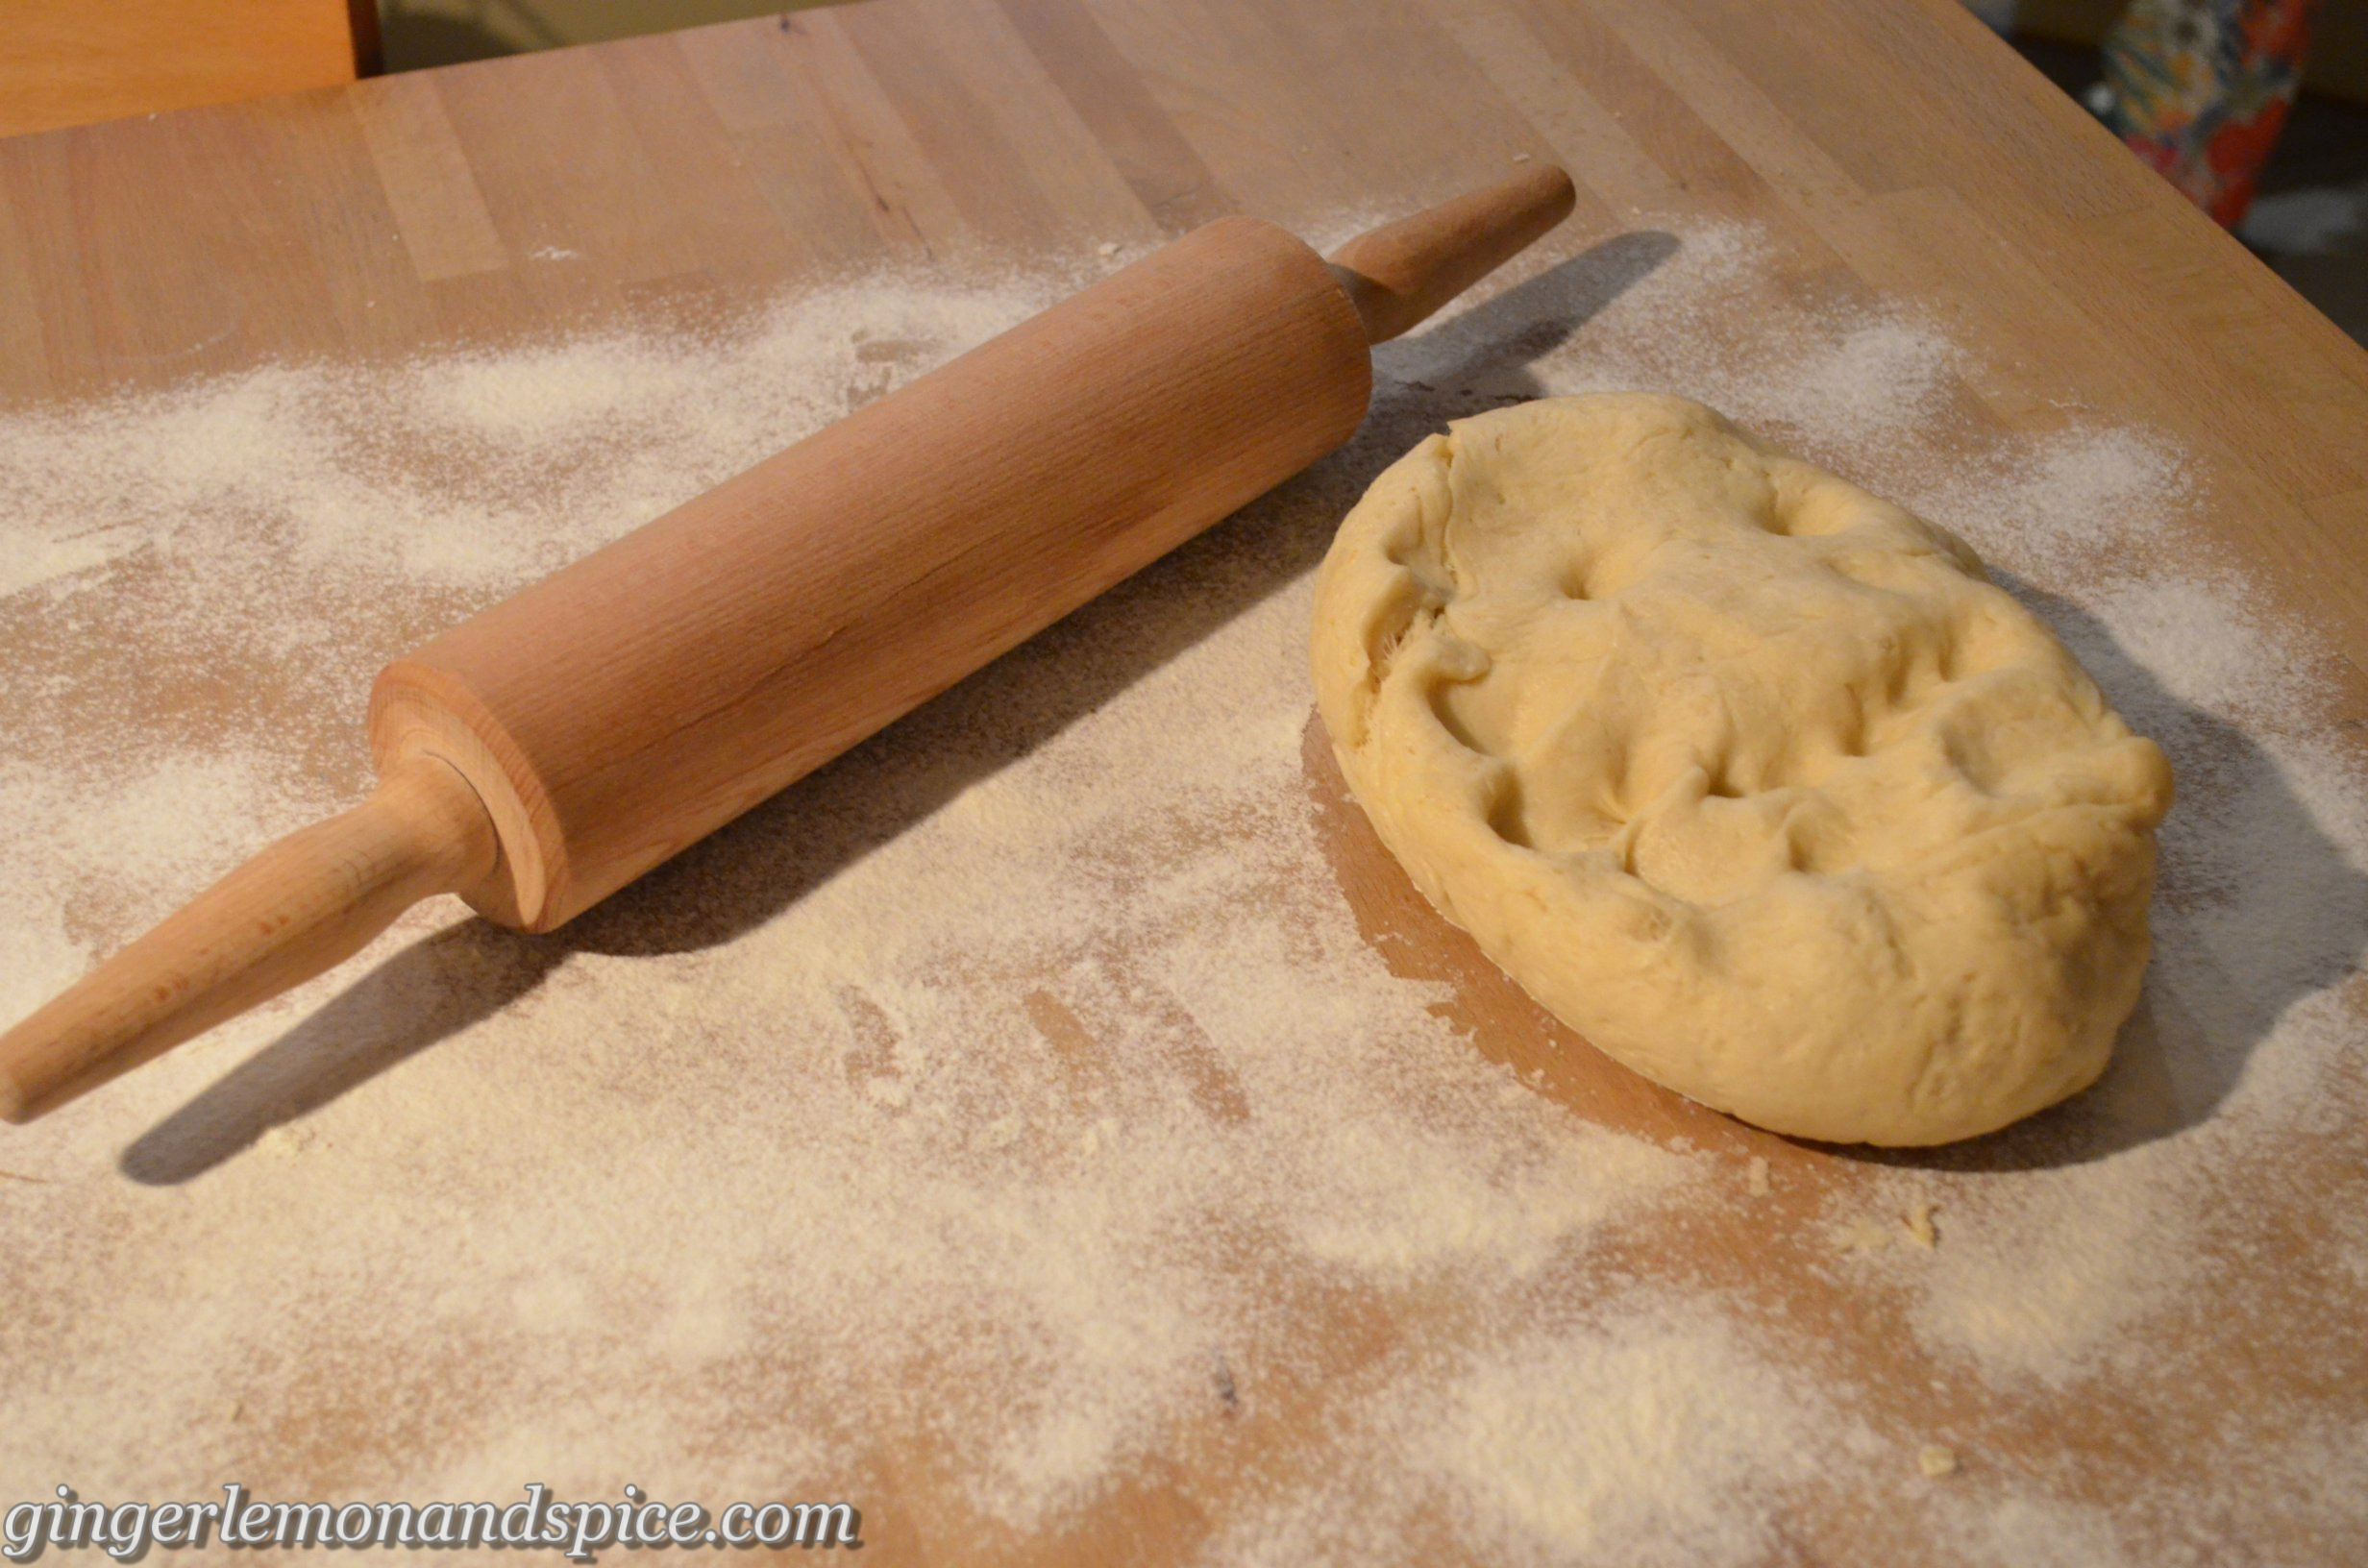
  1. Put flour, dry yeast, salt and sugar into a bowl and mix. Put softened butter in flakes on top. Slowly add warm milk and mix with a dough hook on an electric mixer. When it pulls of the bottom of the bowl take the dough out on a floured surface and knead with your hands for 5 minutes. Put it back into the bowl and cover with a kitchen towel. Let it sit on a warm place until it doubles in size (about 30-45 minutes).
Filling
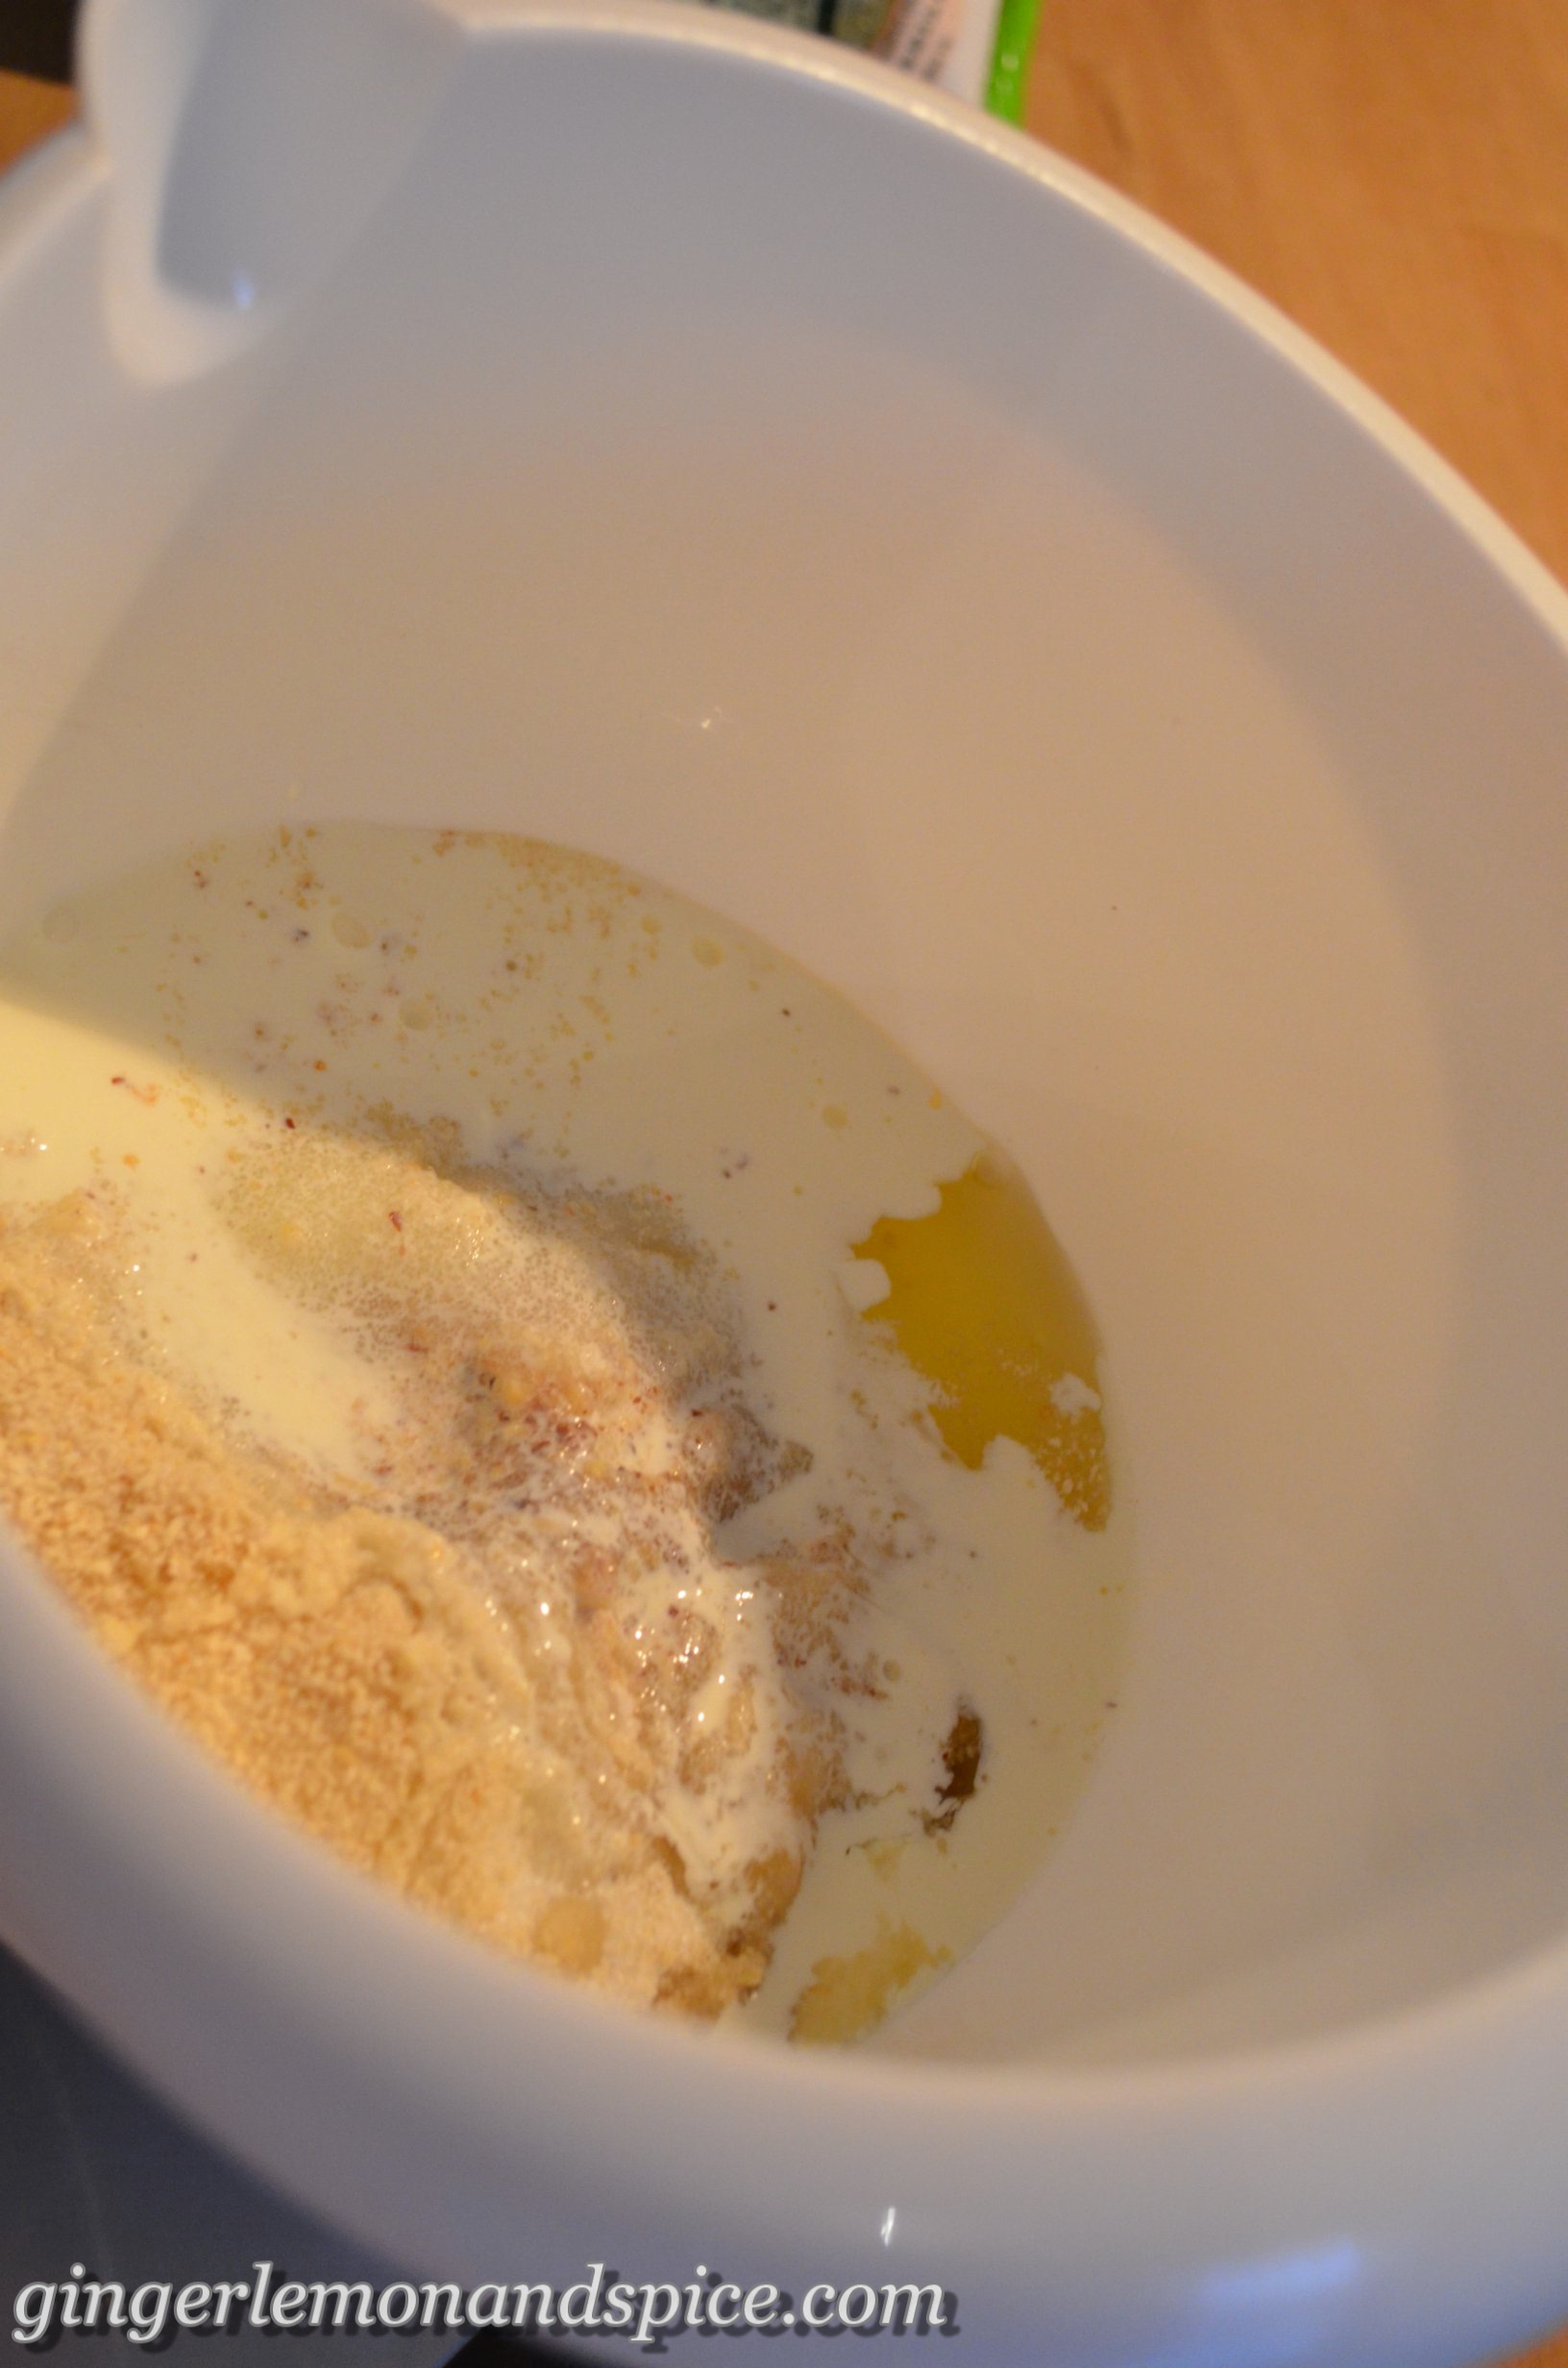
  1. Mix walnuts, sugar, vanilla, bread crumbs, cream, egg white and if you prefer some apricot marmelade to taste.
Assembling
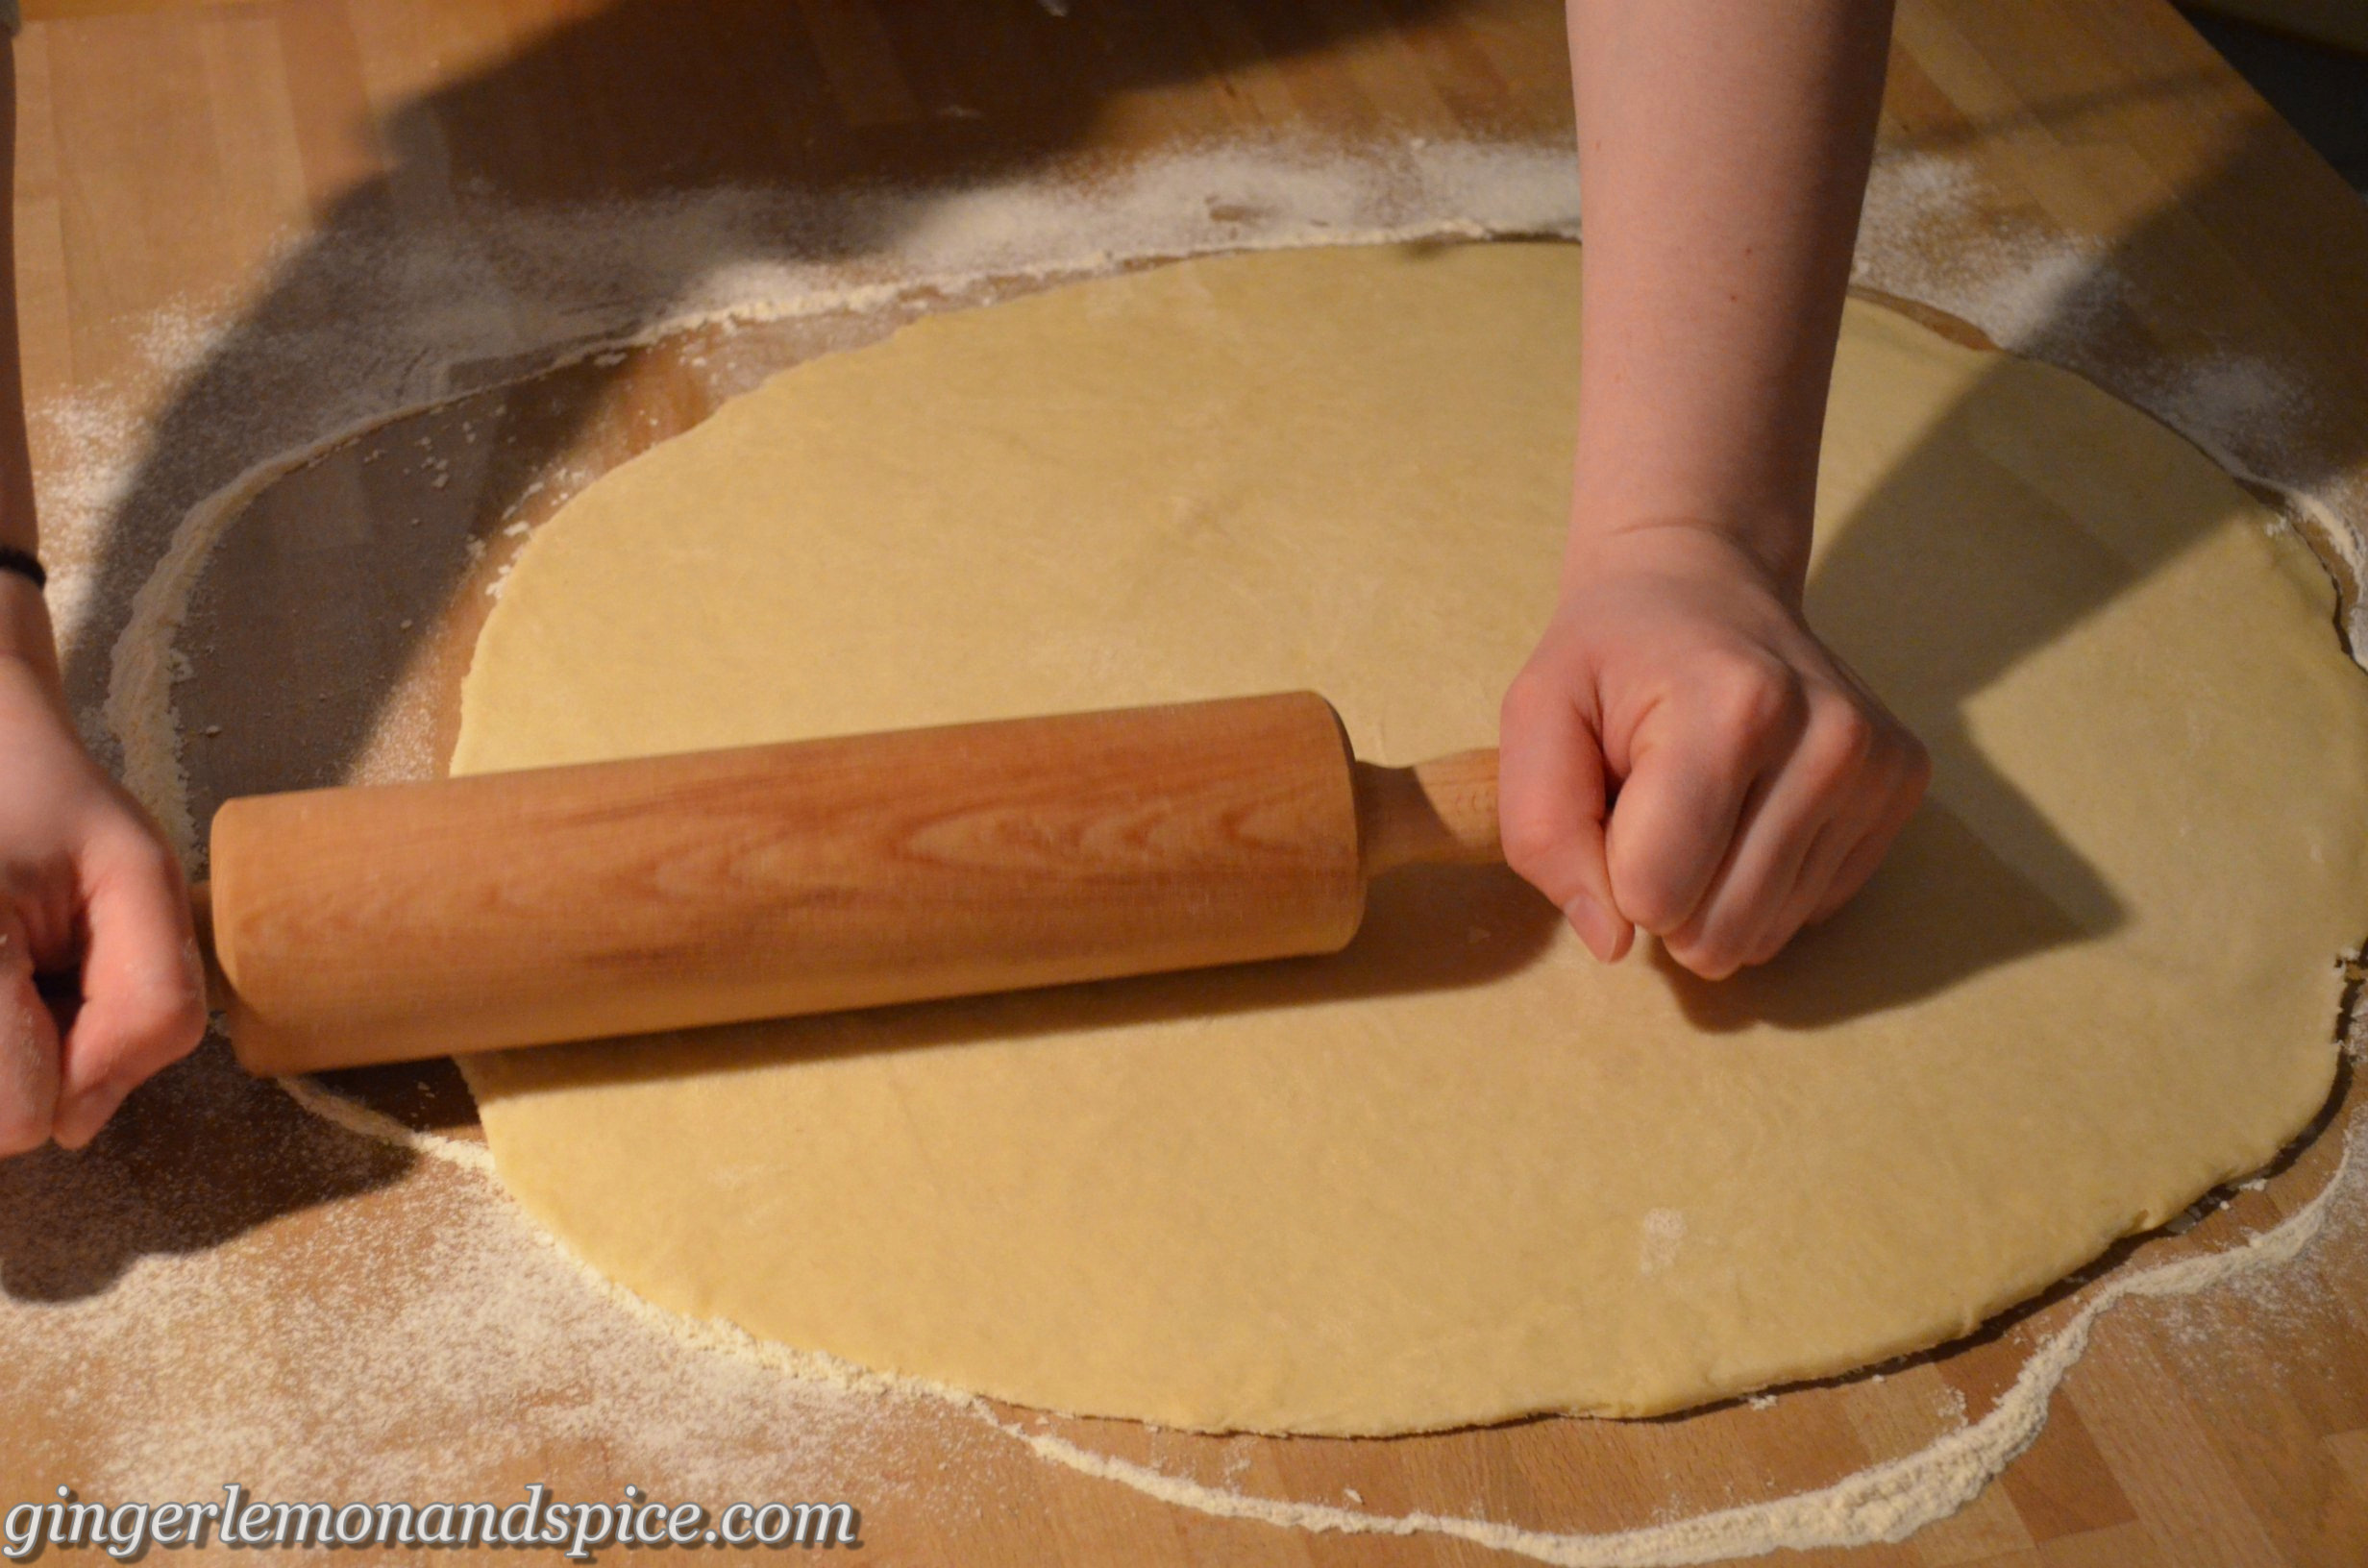
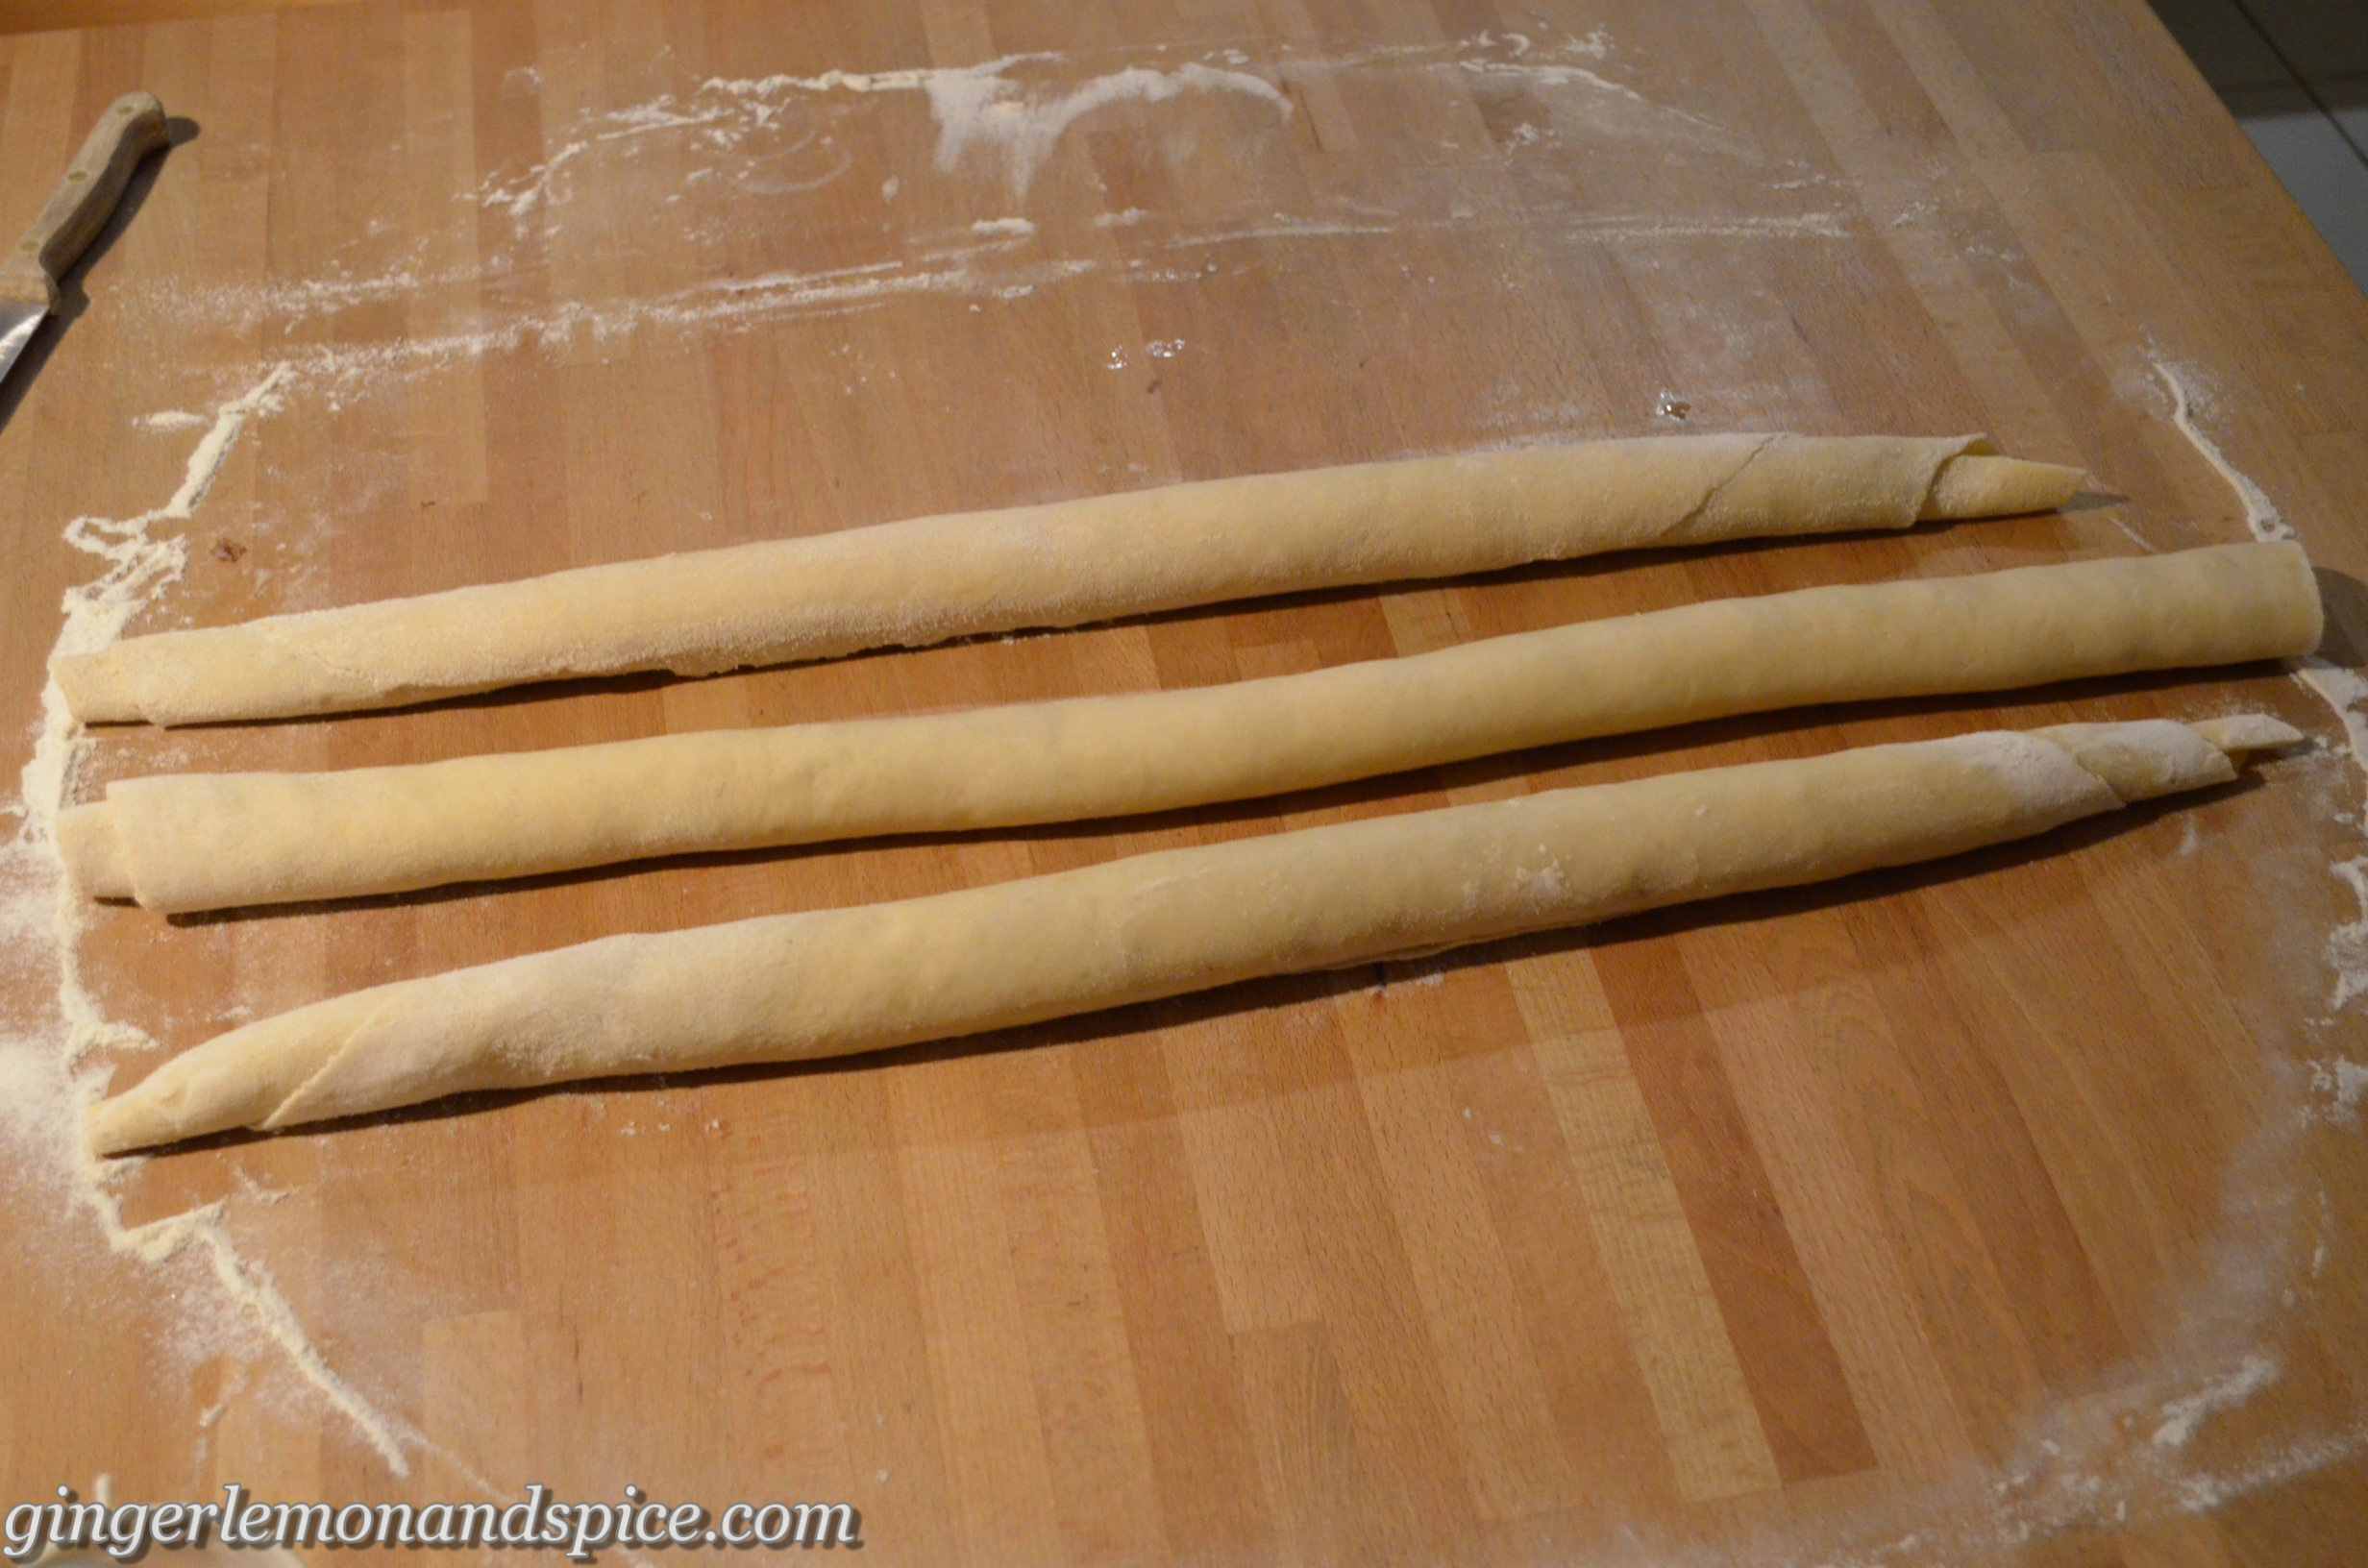
  1. Roll out your dough on a floured surface. You can make it as thick or thin as you like. If you prefer your filling more evenly distributed make it thinner and if you want a thicker layer of filling do it thicker.
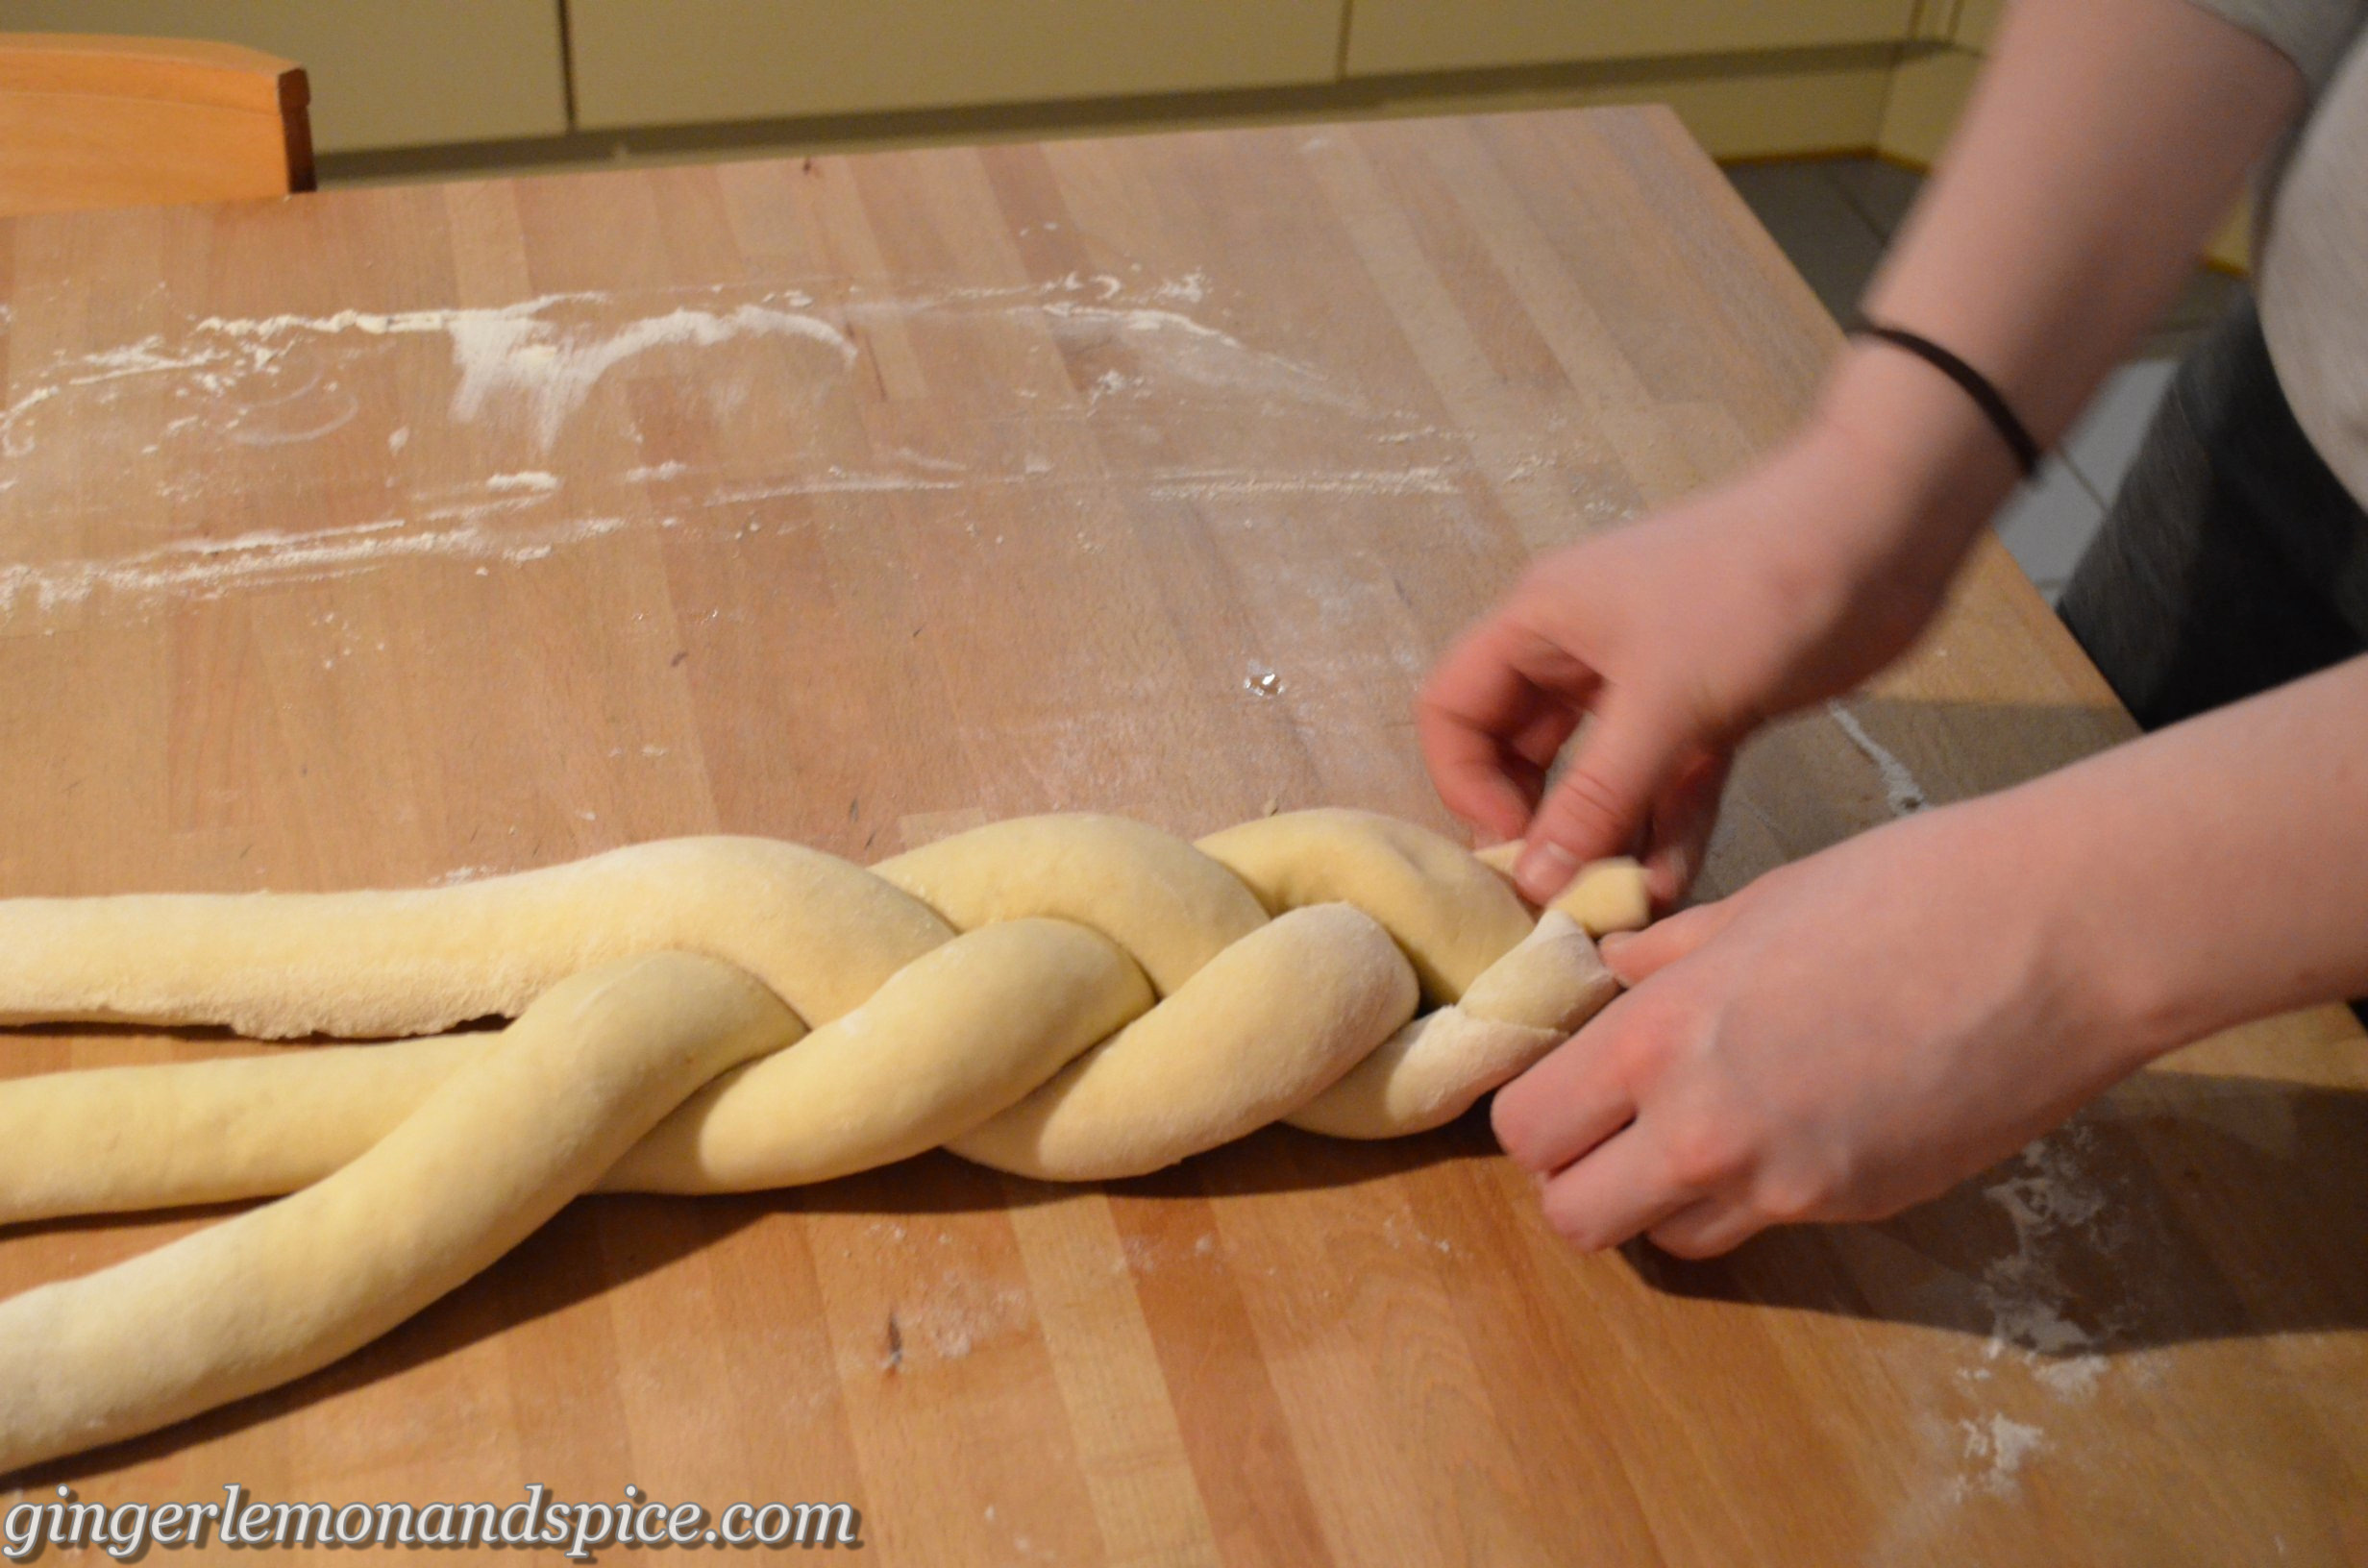
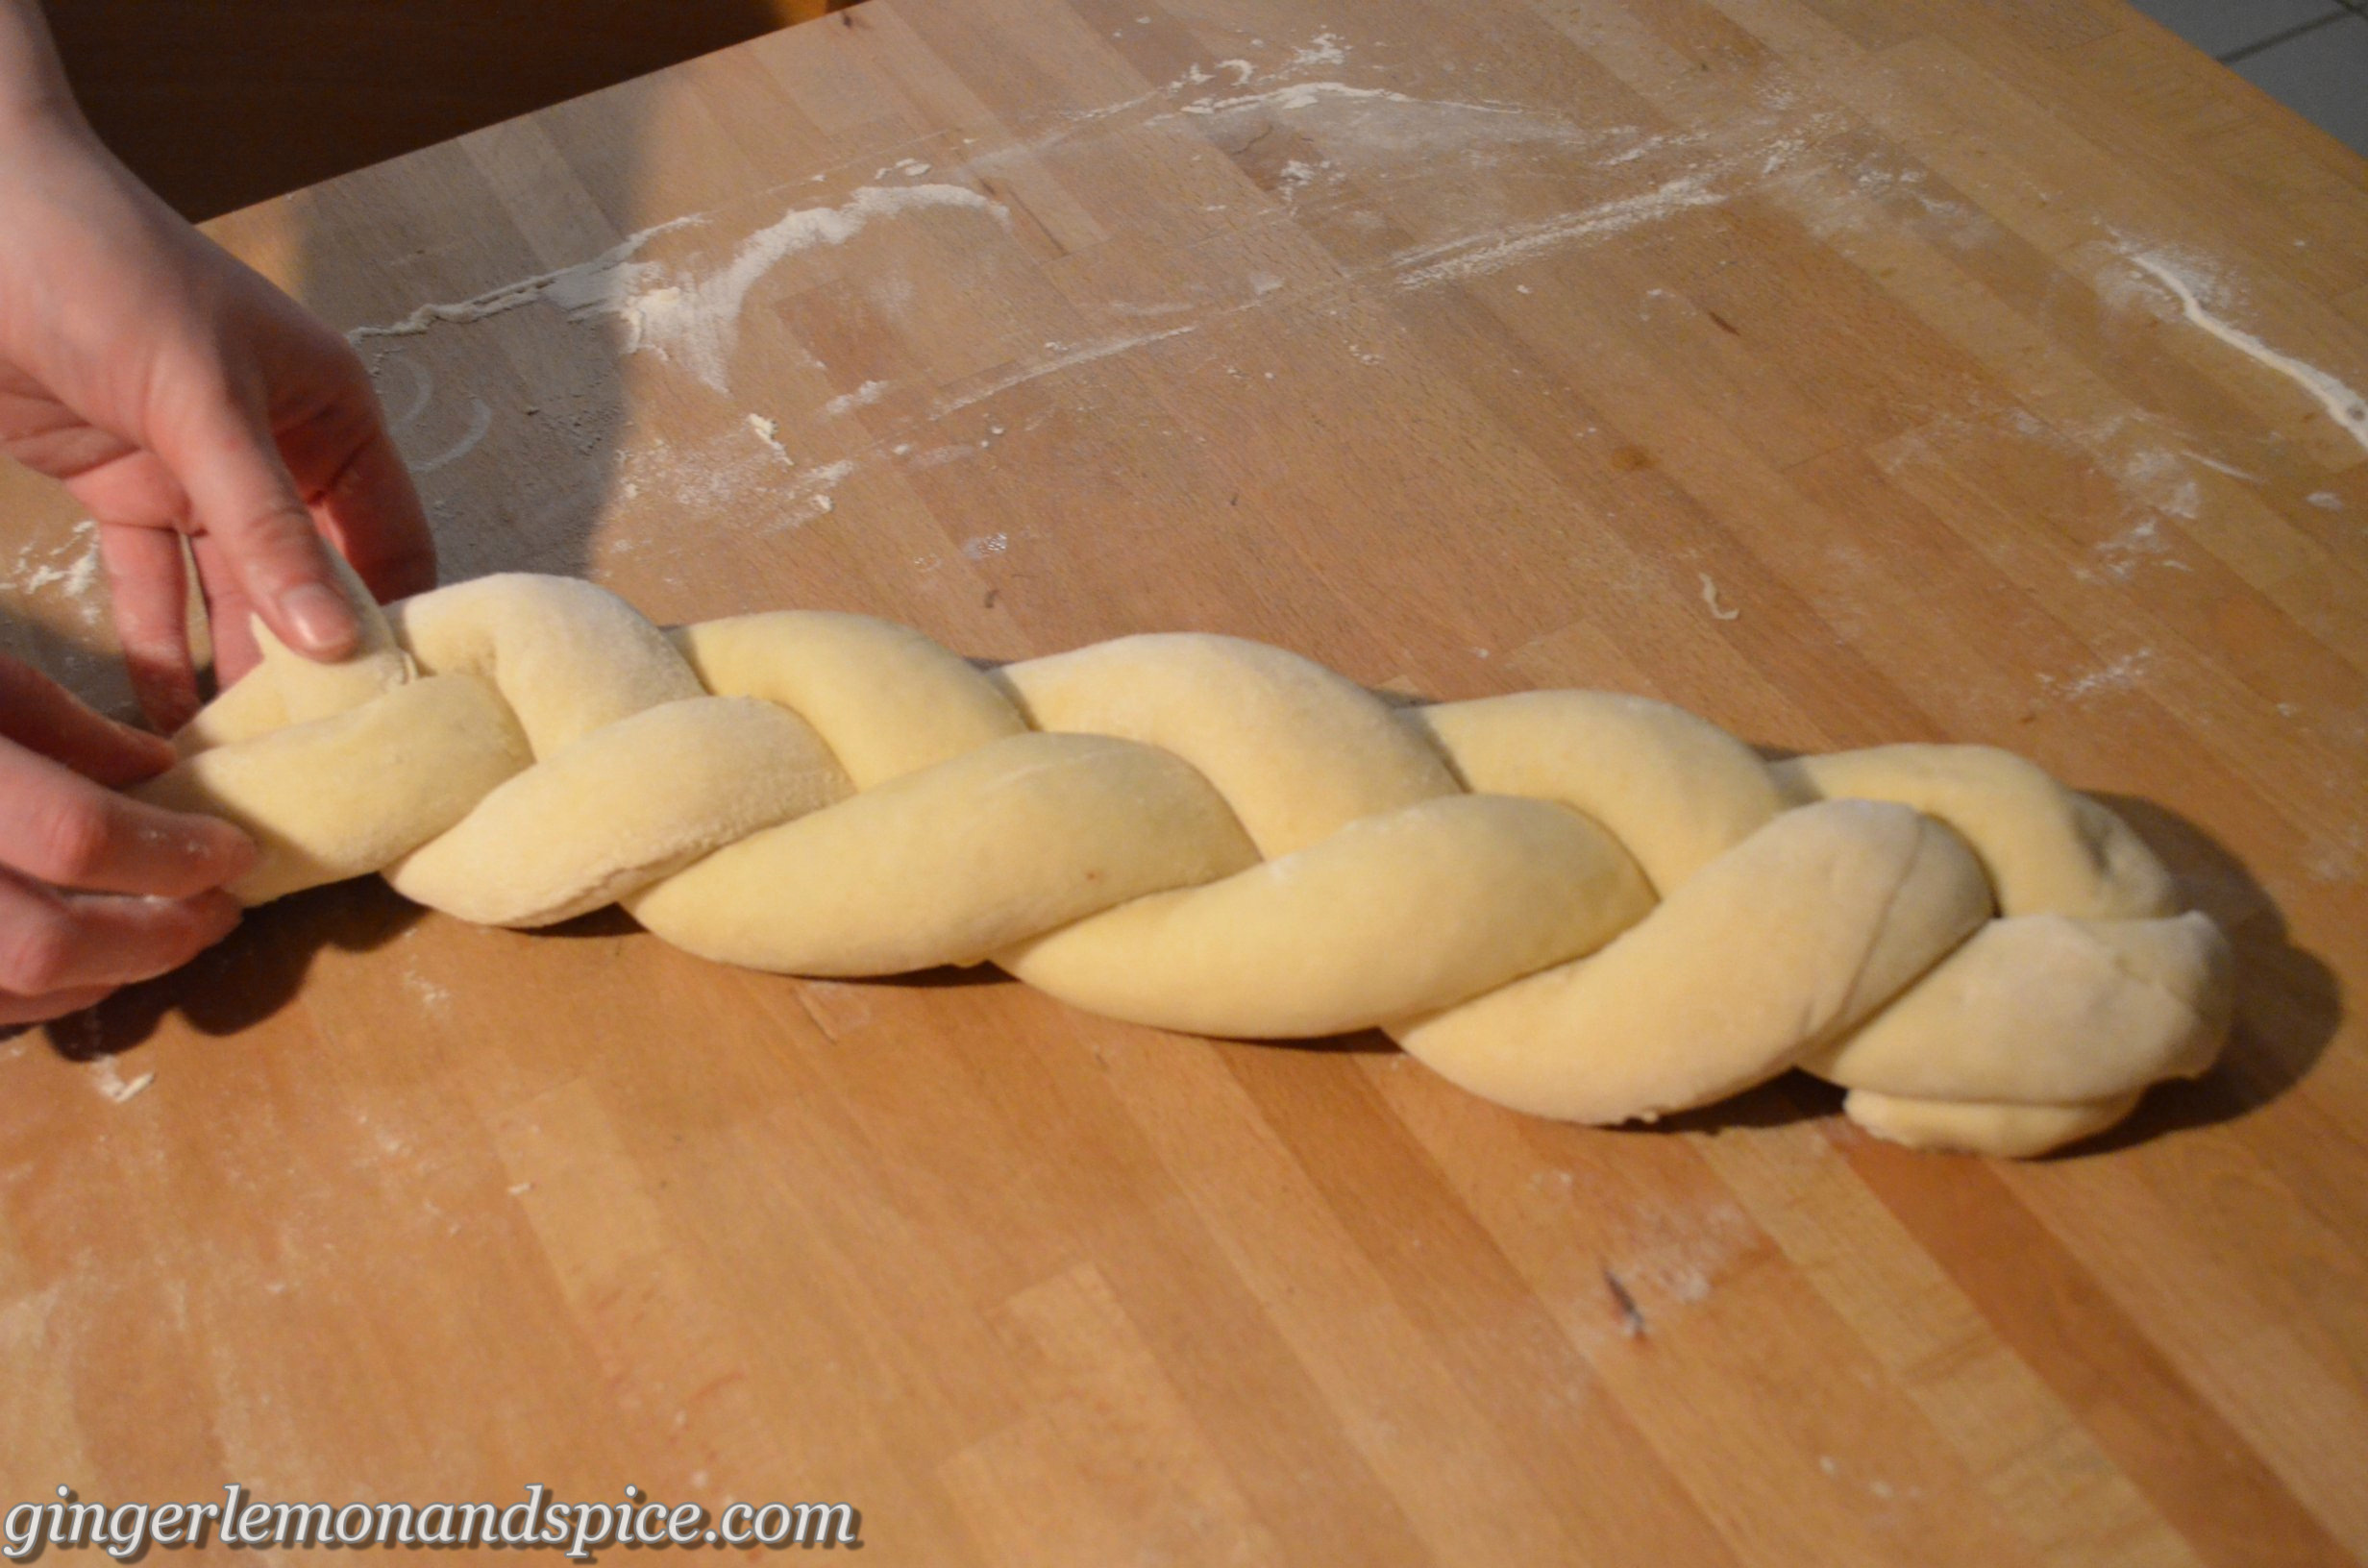
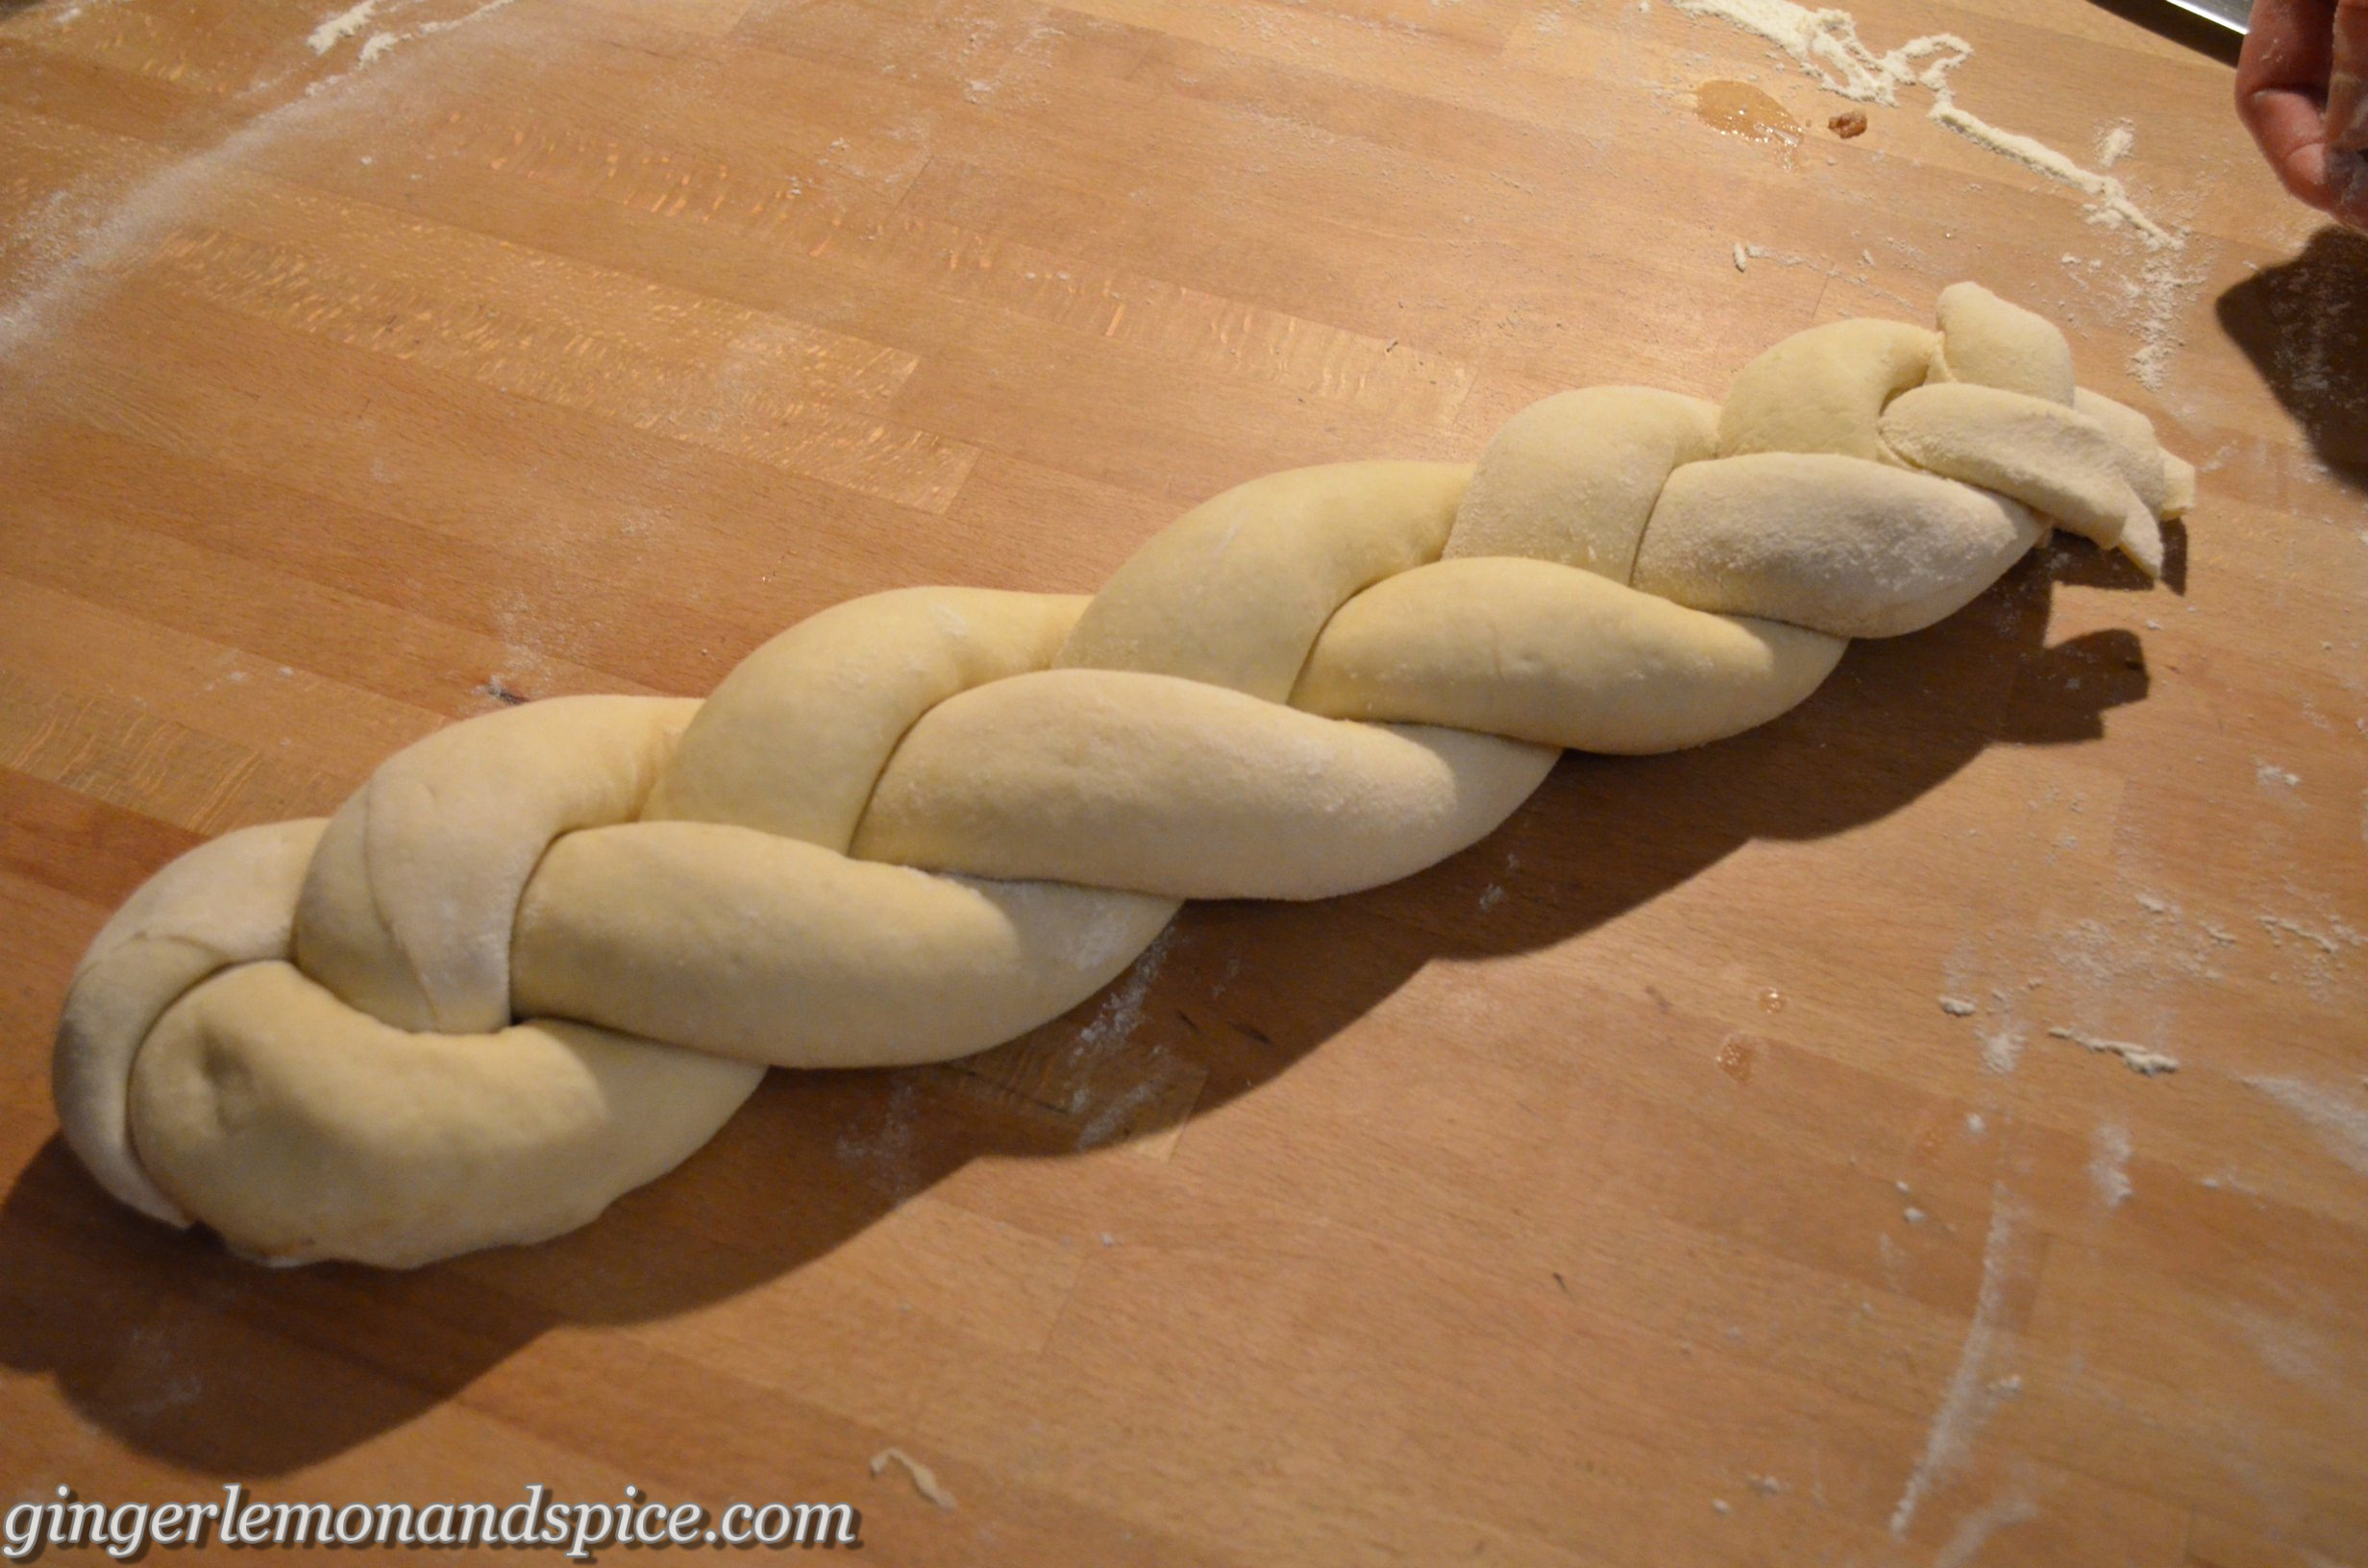
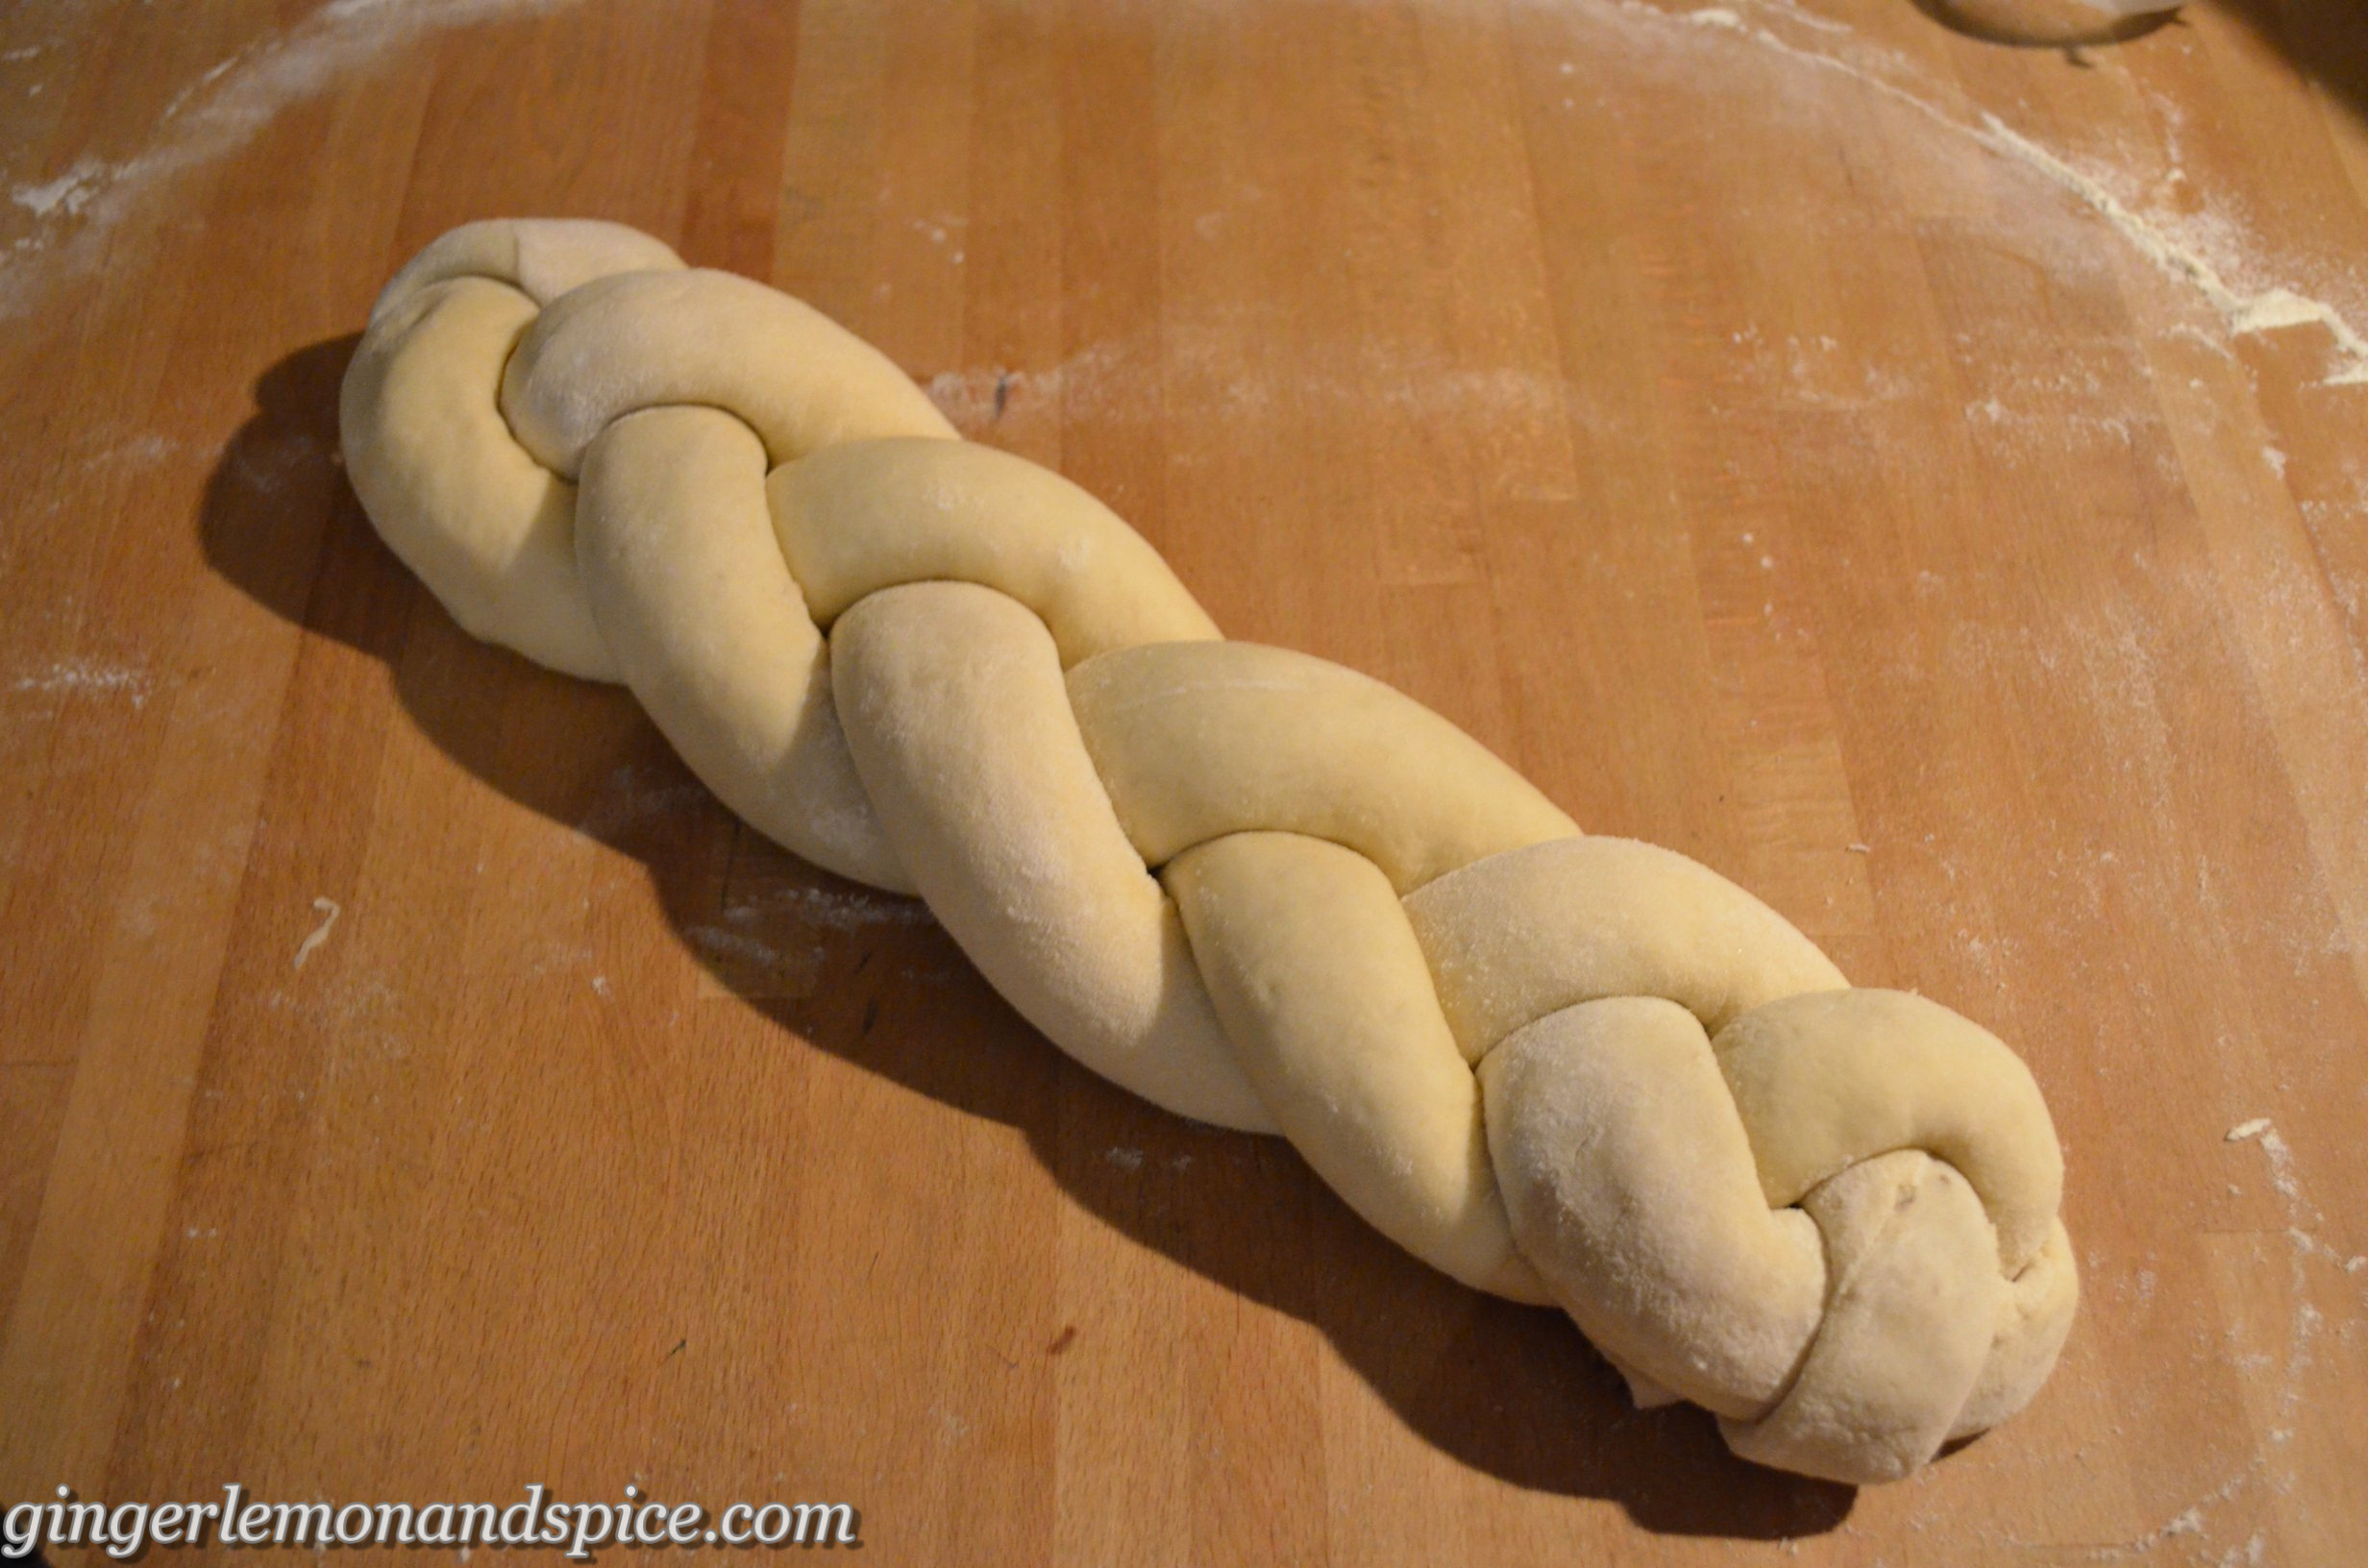
  2. Cut the dough into 3 parts lengthwise. Distribute the filling on all three parts, then roll up each one individually from the larger side. Now you have your three strings and you can start braiding from the middle to each side (look on the fotos for reference). Hide the ends underneath the braid and put the whole thing onto a baking tray that's layered with baking paper.
  3. Let it sit covered with the kitchen towel in the warm place for another 30 mins.
  4. Preheat oven to 180° C (350° F).
Brushing
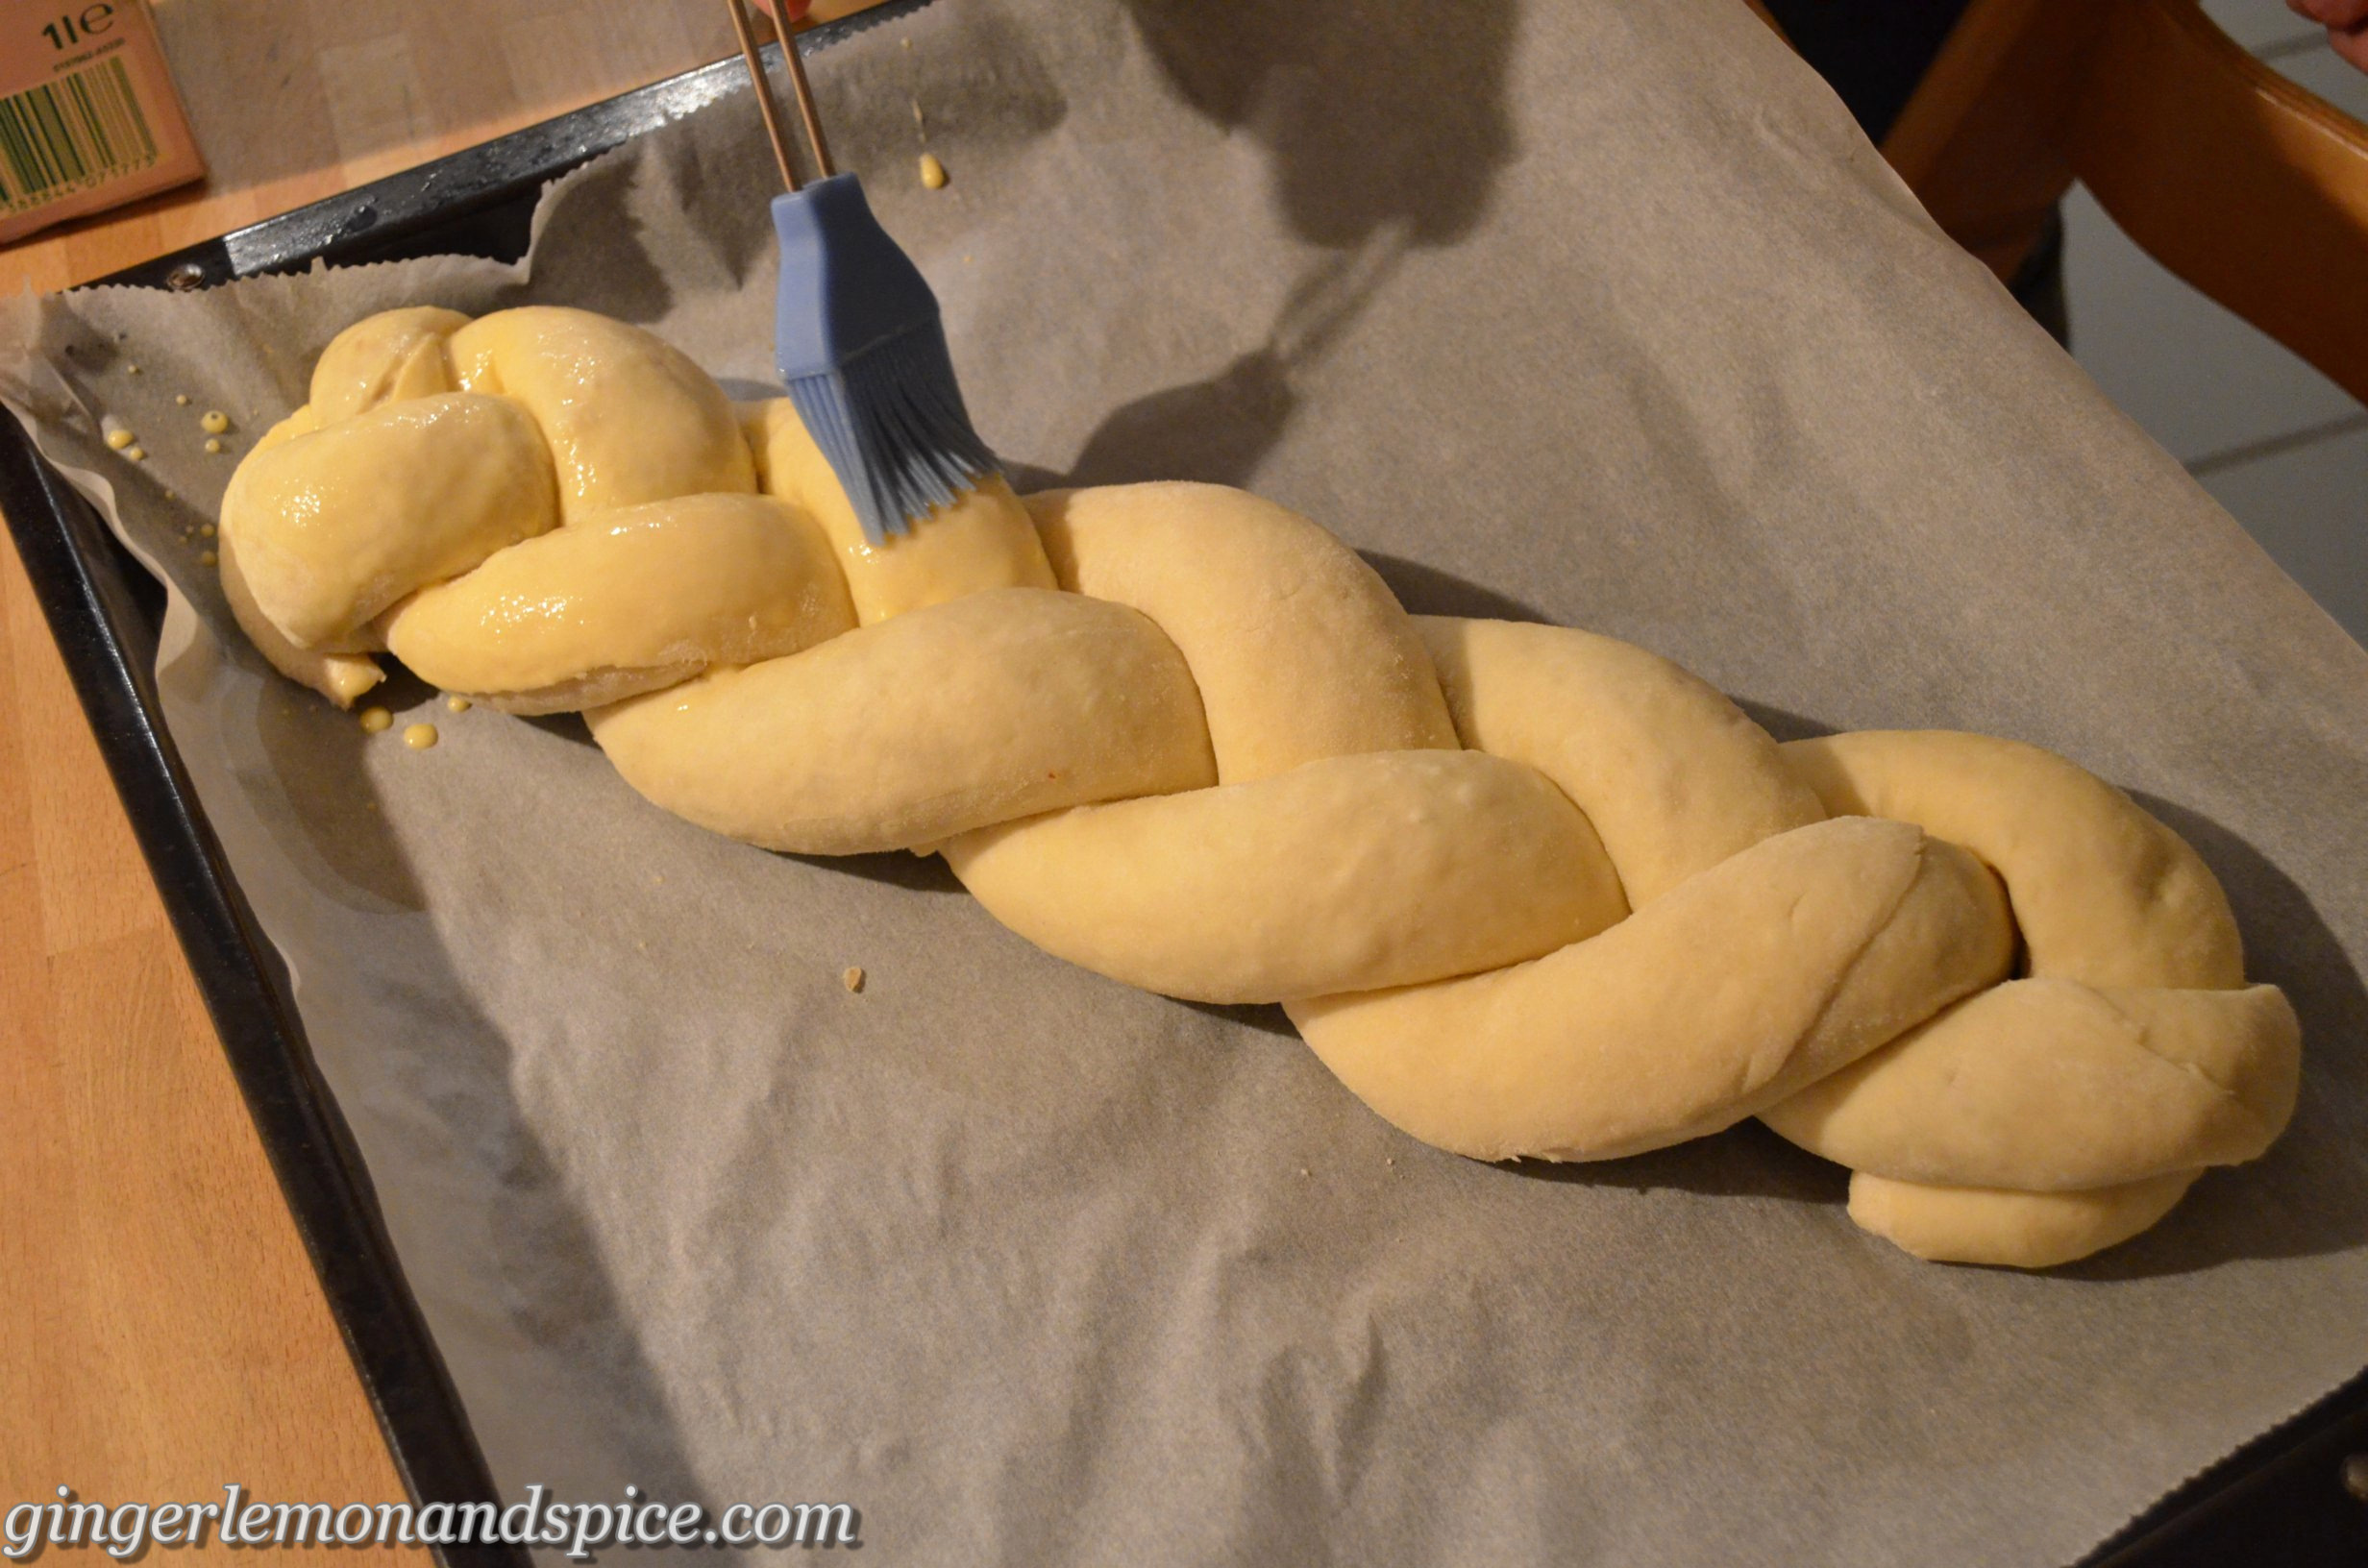
  1. Mix the egg yolk with the milk and brush it on top of the braid. Bake for about 35 minutes.
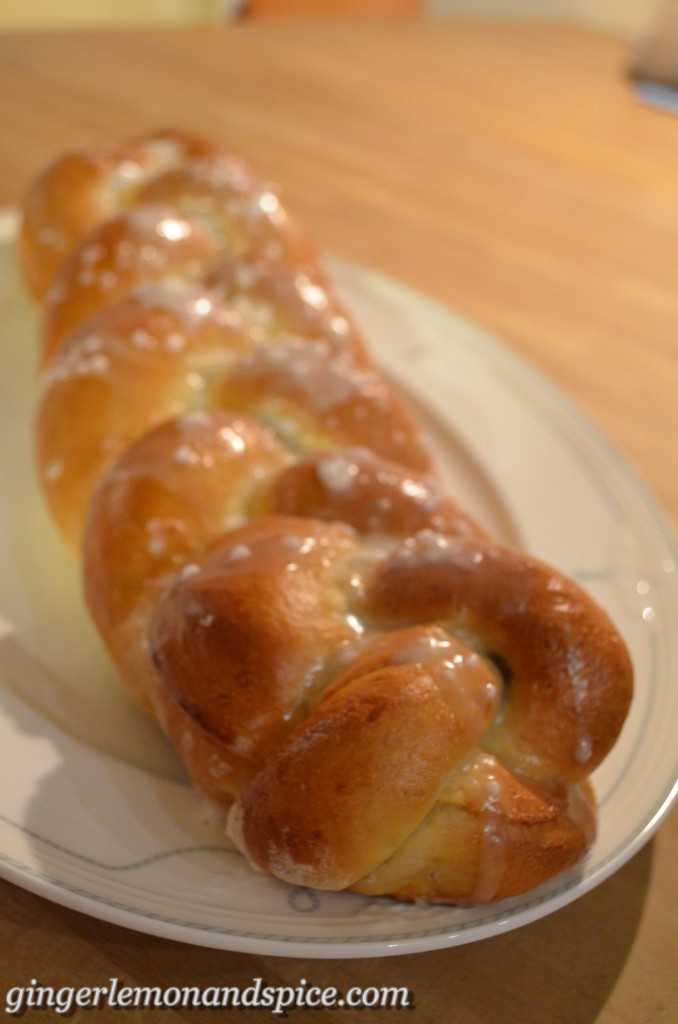
  2. Your braid is finished when the top (and bottom) are golden brown and a wooden skewer inserted into the middle comes out clean.
Glaze
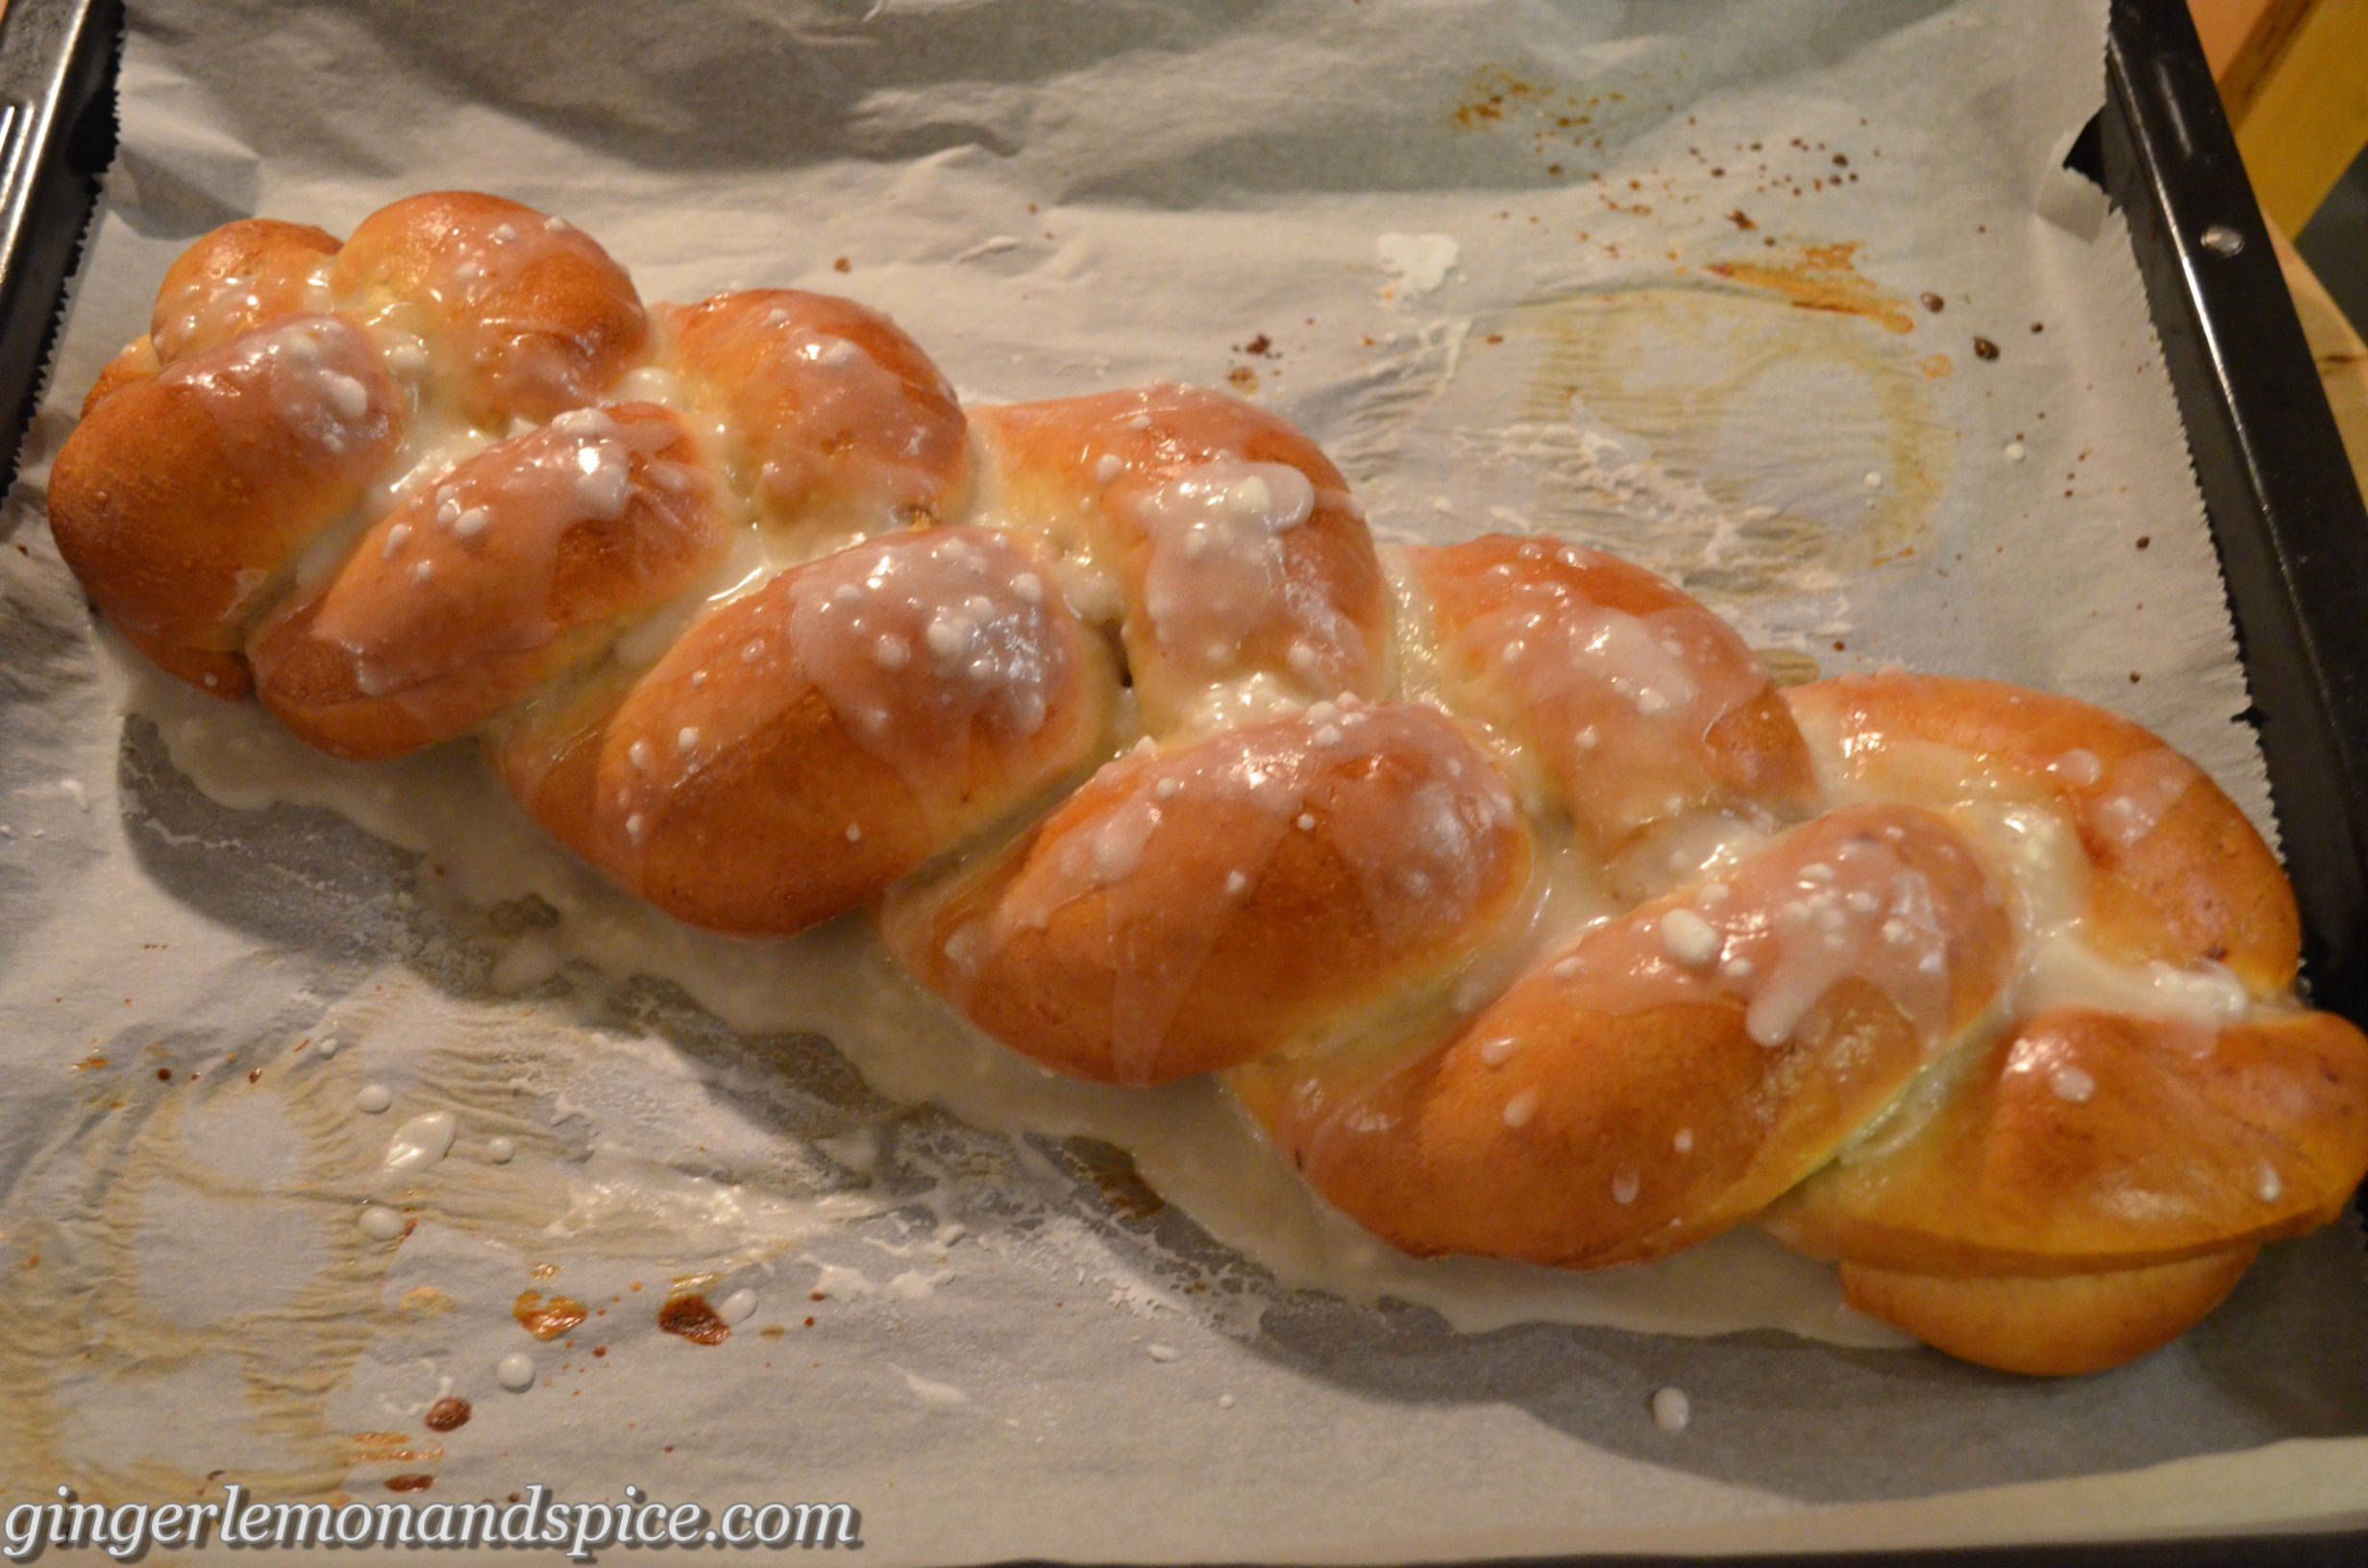
  1. Mix powdered sugar and liquid (little by little!! until you have the consistency you want) and brush on top of hot braid. Let cool and Enjoy!!

Braided Yeast Bread with Walnut Filling – Hefezopf mit Walnussfüllung by gingerlemonandspice 

Have a great day!!

~ Kathrin

Pasta With Mushy Aubergine & Tomato Sauce

Pasta With Mushy Aubergine & Tomato Sauce

Hey there! 

It’s me again 🙂

Pasta With Mushy Aubergine & Tomato Sauce  from gingerlemonandspice.com

We’re planning a big grilling party today with friends! So I’m a bit out of the normal 😉 Usually I am all for planning big and complex, but this started out as just a wish to turn on the grill… I talked to one of the girls I am living with and we decided we wanted to grill since it’s summer and all. Well, needless to say I was all in! I thought yeah, let’s do this as we don’t do it often in the ‘big’ city. We only have a very small backyard.

At my parents we have a big backyard and in summer time we kind of live outside. We grill nearly everyday and it usually goes without planning! When my relatives that live next to us want to do it too, they just come over with their stuff or we go to their house and then we just have a good time. It is all very SIMPLE! The basic ingredients for salads and the stuff that will be grilled we usually have at home or we create something out of the things we have.

Pasta With Mushy Aubergine & Tomato Sauce  from gingerlemonandspice.com

But this thing here in the city with my flat-mates – it got kind of out of hand 😉 It is all very planned out, like a week planned ahead, who brings what so that there won’t be two kinds of pasta salad or something else that ‘horrible’. 😉 We   even hat to delay the party for a week! There are some friends coming too. All this exact planning leaded to me being a wee bit stressed out… At some point I was quite annoyed that it wasn’t the easy thing I was used to!

I feel quite sorry for that now! I know it will be an awesome evening and we will have lots of fun! I guess everybody plans very different and I have to learn to tame myself and be more tolerant! 😉 I just look back on all this with a big smile now.  Can you relate to that? Do you have sometimes feelings you’re not proud of? 😉

Pasta With Mushy Aubergine & Tomato Sauce  from gingerlemonandspice.com

The recipe I have for you today is my newest invention: Mushy Aubergine & Tomato Pasta! I dreamed it up after watching Donal Skehan’s newest episode on Jamie Olivers Foodtube. He was cooking Smashed Tomato Pasta and used the word ‘mushy’ a lot 😉 Watch the video! He really is a great cook and he explains the way that you feel that everybody can do it! And his accent really is the best! So very irish 🙂 Read here why I love Ireland!

Well, I had an aubergine in the fridge to use up. So I started cooking a quick meal and while I went on stiring and stiring I was singing ‘mushy, mushy, mushy’ in my head. 😉 I think the video really got to me! At first I didn’t really plan to take pictures and put the recipe on the blog, but it tasted soo awesome and flavorful, that I just had to take the minute to shoot some pictures!! I don’t like aubergines very much usually. Only since last year when I stayed in Turkey I realized that aubergines really CAN taste great! In this recipe the flavor comes out beautifully, you will love it!

Just give it a try 🙂 Enough talk, on to the recipe we go!


Pasta With Mushy Aubergine & Tomato Sauce
 
Prep time
Cook time
Total time
 
A very tasty and comforting pasta dish made in the time the pasta needs to cook! Tastes like summer because of a secret ingredient!
Author:
Recipe type: Pasta
Cuisine: mediterranean style
Serves: 2
Ingredients
  • 250g spaghetti
  • 1 big aubergine (eggplant)
  • 3 teaspoons salt
  • 2 tablespoons olive oil
  • 1 Bratwurst - optional
  • 3 tomatoes
  • lime juice of 2 limes
  • freshly ground pepper
  • some parmesan if you like
Instructions
  1. Fill your kettle with water and turn it on. If you don't have a kettle heat a pot big enough for the pasta with water on the stove.
  2. Meanwhile preheat a non stick pan to high heat. Chop your aubergine in cubes with sides about one centimetre of length. Put them in the pan and sprinkle with 1 teaspoon of salt and stir until the salt is distributed. Let the aubergine roast (without oil!) and stir often. There will be a bit of a coat on the bottom of the pan - just stir it loose. We want this, it is full of flavor! Just don't let it go black 😉
  3. When the water kettle is finished just pour the water into a pot on the stove and reheat on high heat until it boils. Add 2 teaspoons of salt and the pasta and set your timer on the time it says on the box of the pasta. Turn the heat down to low-medium.
  4. Now you can add the bratwurst (cut into thin slices) if you have it and add the olive oil. mix well. The aubergine should now start to soften up!
  5. Chop your tomatoes roughly in cubes and don't forget to stir your aubergine once in a while.
  6. Add the tomatoes to the pan when you have about 5 minutes left on your timer. You want the aubergine and tomato mixture to get really mushy!!
  7. Just before pasta is cooked, add pepper and lime juice to the pan. Turn the heat off. You don't need to drain the pasta, just put the pot and pan close together, take a pasta fork and fish the pasta out of the pot, let it drain a little and put it directly into the pan. We want a little pasta water to get into the pan!
  8. Now mix it all together well and serve directly. Sprinkle parmesan on top if you like! Dig in 🙂

Pasta With Mushy Aubergine & Tomato Sauce  from gingerlemonandspice.com 

Have a great day!

~ Kathrin

Cheese & Cream Cake with Strawberries and Oreos – Käsesahne-Torte mit Erdbeeren und Oreos

Cheese & Cream Cake with Strawberries and Oreos – Käsesahne-Torte mit Erdbeeren und Oreos

Hello everybody!!

I am so very sorry that it took me so long to get back in posting mood! I had so much stress and worries about university that I couldn’t really think about the ‘nice’ things in life – like updating this food blog, that I have grown to love so much 🙂

Well things with university are still not sorted out and I have to wait until the beginning of next month to get notice if I will be allowed to keep on studying or if I have to quit. This is very nervewracking and it seems to take forever!!

Cheese & Cream Cake with Strawberries and Oreos – Käsesahne-Torte mit Erdbeeren und Oreos from gingerlemonandspice.com

After the first shock and some time of despair when I received the news I am back to seeing things positivly and try not to think about it all the time. In the last weeks I was barly cooking and did no baking at all – that’s how you can see how serious this was! Also I was sick quite some time with a stomach flu, I guess all the stress before just caught up on me…

That’s just how live goes I guess – with all its up and downs…

Cheese & Cream Cake with Strawberries and Oreos – Käsesahne-Torte mit Erdbeeren und Oreos from gingerlemonandspice.com

But I finally brought you something, you all have been waiting for a long time: My mother’s day cake!! It is a creamy and not too heavy Cheese & Cream Cake filled and decorated with strawberries and oreos!! ‘Käsesahne-Torte’ as it is called in Germany is liked very much here. It is a traditional!! Usually it looks quite different, but I gave it my own little twist and spiced it up a bit for the special occasion. Also I like decorating cakes and I don’t get the chance often, so I had to do that too!! 😉 The traditional German Käsesahne-Torte only has one layer of filling and has mandarin oranges and no strawberries or oreos. But that wasn’t fancy enough for me 🙂

You can find the rest of my mother’s day meal here: Steak, Grean Beans and Hasselback Potatoes.

Cheese & Cream Cake with Strawberries and Oreos – Käsesahne-Torte mit Erdbeeren und Oreos from gingerlemonandspice.com

I guess you have waited long enough! Here it comes! Just give it a try yourself, you won’t regret it, it is very yummy 🙂


Cheese & Cream Cake with Strawberries and Oreos - Käsesahne-Torte mit Erdbeeren und Oreos
 
Prep time
Cook time
Total time
 
A cake perfect for mothers day or any other fancy occation! Easy and quick to make - just needs a little time to set.
Author:
Recipe type: Cake (Torte)
Cuisine: German
Serves: 12
Ingredients
Cake Base
  • 5 eggs
  • 5 tablespoons of water (lukewarm)
  • 250g (2 cups) flour
  • 250g (1⅛ cups) sugar
  • 1 sachet of baking powder (1 tablespoon)
Filling
  • 10 sheets of gelatine + cold water for soaking
  • juice of one lemon
  • 100ml (1/2 cup) water
  • 150g (2/3 cup) sugar
  • 500g (18 ounces) of curd cheese (Quark)
  • 500g (17 fl.oz) cream, whipped
  • 15 Oreos
  • 400g (14 ounces) fresh strawberries
Instructions
Cake Base
  1. Preheat oven to 160° C (325° F).
  2. Butter a 28 cm (11 inches) springform pan and line the bottom with baking paper. For this you just put the pan on top of a sheet of baking paper and trace the pan and then cut it out and put on botton of buttered pan!
  3. Beat eggs with water in a bowl until foamy. Add sugar and beat until white, thick and creamy. This takes time! It has to be really creamy! Add flour and baking powder and mix gently until just incorporated. Pour into springform pan and bake on the middle rack for about 20-25 min. Insert skewer to see if it is ready! Skewer then comes out clean when put into the middle of the cake.
Filling
  1. Put gelatine in a small bowl of cold water and soak for 10 min.
  2. Meanwhile heat up sugar, water and lemon juice in a pot on the stove on medium heat. It doesn't have to boil. Take the gelatine out of the water and press gently and then dissolve in the warm liquid.
  3. Stir the curd cheese in a bowl and add the gelatine liquid. Mix until incorporated. Add the whipped cream and mix gently. Reserve ⅓-1/2 of the mixture. Pour it into a box or bowl and cover tightly and put in refrigerator.
  4. Wash strawberries. Reserve 12 pretty small strawberries and 6 oreos for decoration and cut the rest into bits.
Assembling
  1. Take your cake base and cut twice horizontally. Take a plate and put 3 stripes of baking paper in form of a triangle on top. When you put the bottom cake base on top the borders should be sitting on the paper! You can later remove them easily and still have a clean plate! Place a cake ring around the cake base and adjust it to the cakes size.
  2. Half the rest of the filling. Use one batch for the first layer: Distribute just a little bit of the filling on the cake base - just a thin layer. Add half of the cut strawberries and oreos. Make it kind of even and cover with the rest of the first half of the filling.
  3. Now put the middle piece of cake base on top. Repeat the filling layer like you did the first time!
  4. Place the top piece of cake base on top and press down gently. Refrigerate the cake for at least 2 hours, the best is overnight.
Decoration
  1. To finish up the cake loose up the cake ring and remove it carefully. Take the leftover filling out of the fridge and whisk it until it is fluffy again. It will not be as creamy as the day before, but with patience and taking little by little you will be able to cover the whole cake. If you are not known for your patience you could still just use all the filling actually to fill the cake and just frost the cake with some whipped cream with whipped cream stabilizer.
  2. Decorate the cake like you want, you can see how I did it on the pictures 🙂 Remove baking paper stripes and put the cake back into the fridge until you are ready to eat it! Earn a lot of uuuhs and aaahs for all the work you've done! 🙂
Notes
Cake Base can be made a day ahead without any problem! Just wrapp in cling film! You can also use a 26 cm (10.2 inches) sprinform, then you need only a cake base made of 4 eggs (you have to cut down the rest of the ingredients accordingly). If you really can't find curd cheese you could use cream cheese, but you might need a little more liquid in your mix. Traditionally the German Käsesahne-Torte only has one layer of filling and is filled with mandarin oranges. It is not frosted on the outside, just sprinkled with powdered sugar on top!

Cheese & Cream Cake with Strawberries and Oreos – Käsesahne-Torte mit Erdbeeren und Oreos from gingerlemonandspice.com

Bon appetit!

~ Kathrin


Recipe admitted to Gewinnspiel Erdbeerzeit from Party Princess Blog!

Erdbeer-Gewinnspiel_2501