Monthly Archives: January 2013

Roasted Chicken Legs

Roasted Chicken Legs

Good morning world! 🙂


Yesterday and today are the first days here in Germany, where we had at least a little bit of sun. It has been dark, cold and icy for a few weeks now! So this is a very good reason to be happy!! 🙂

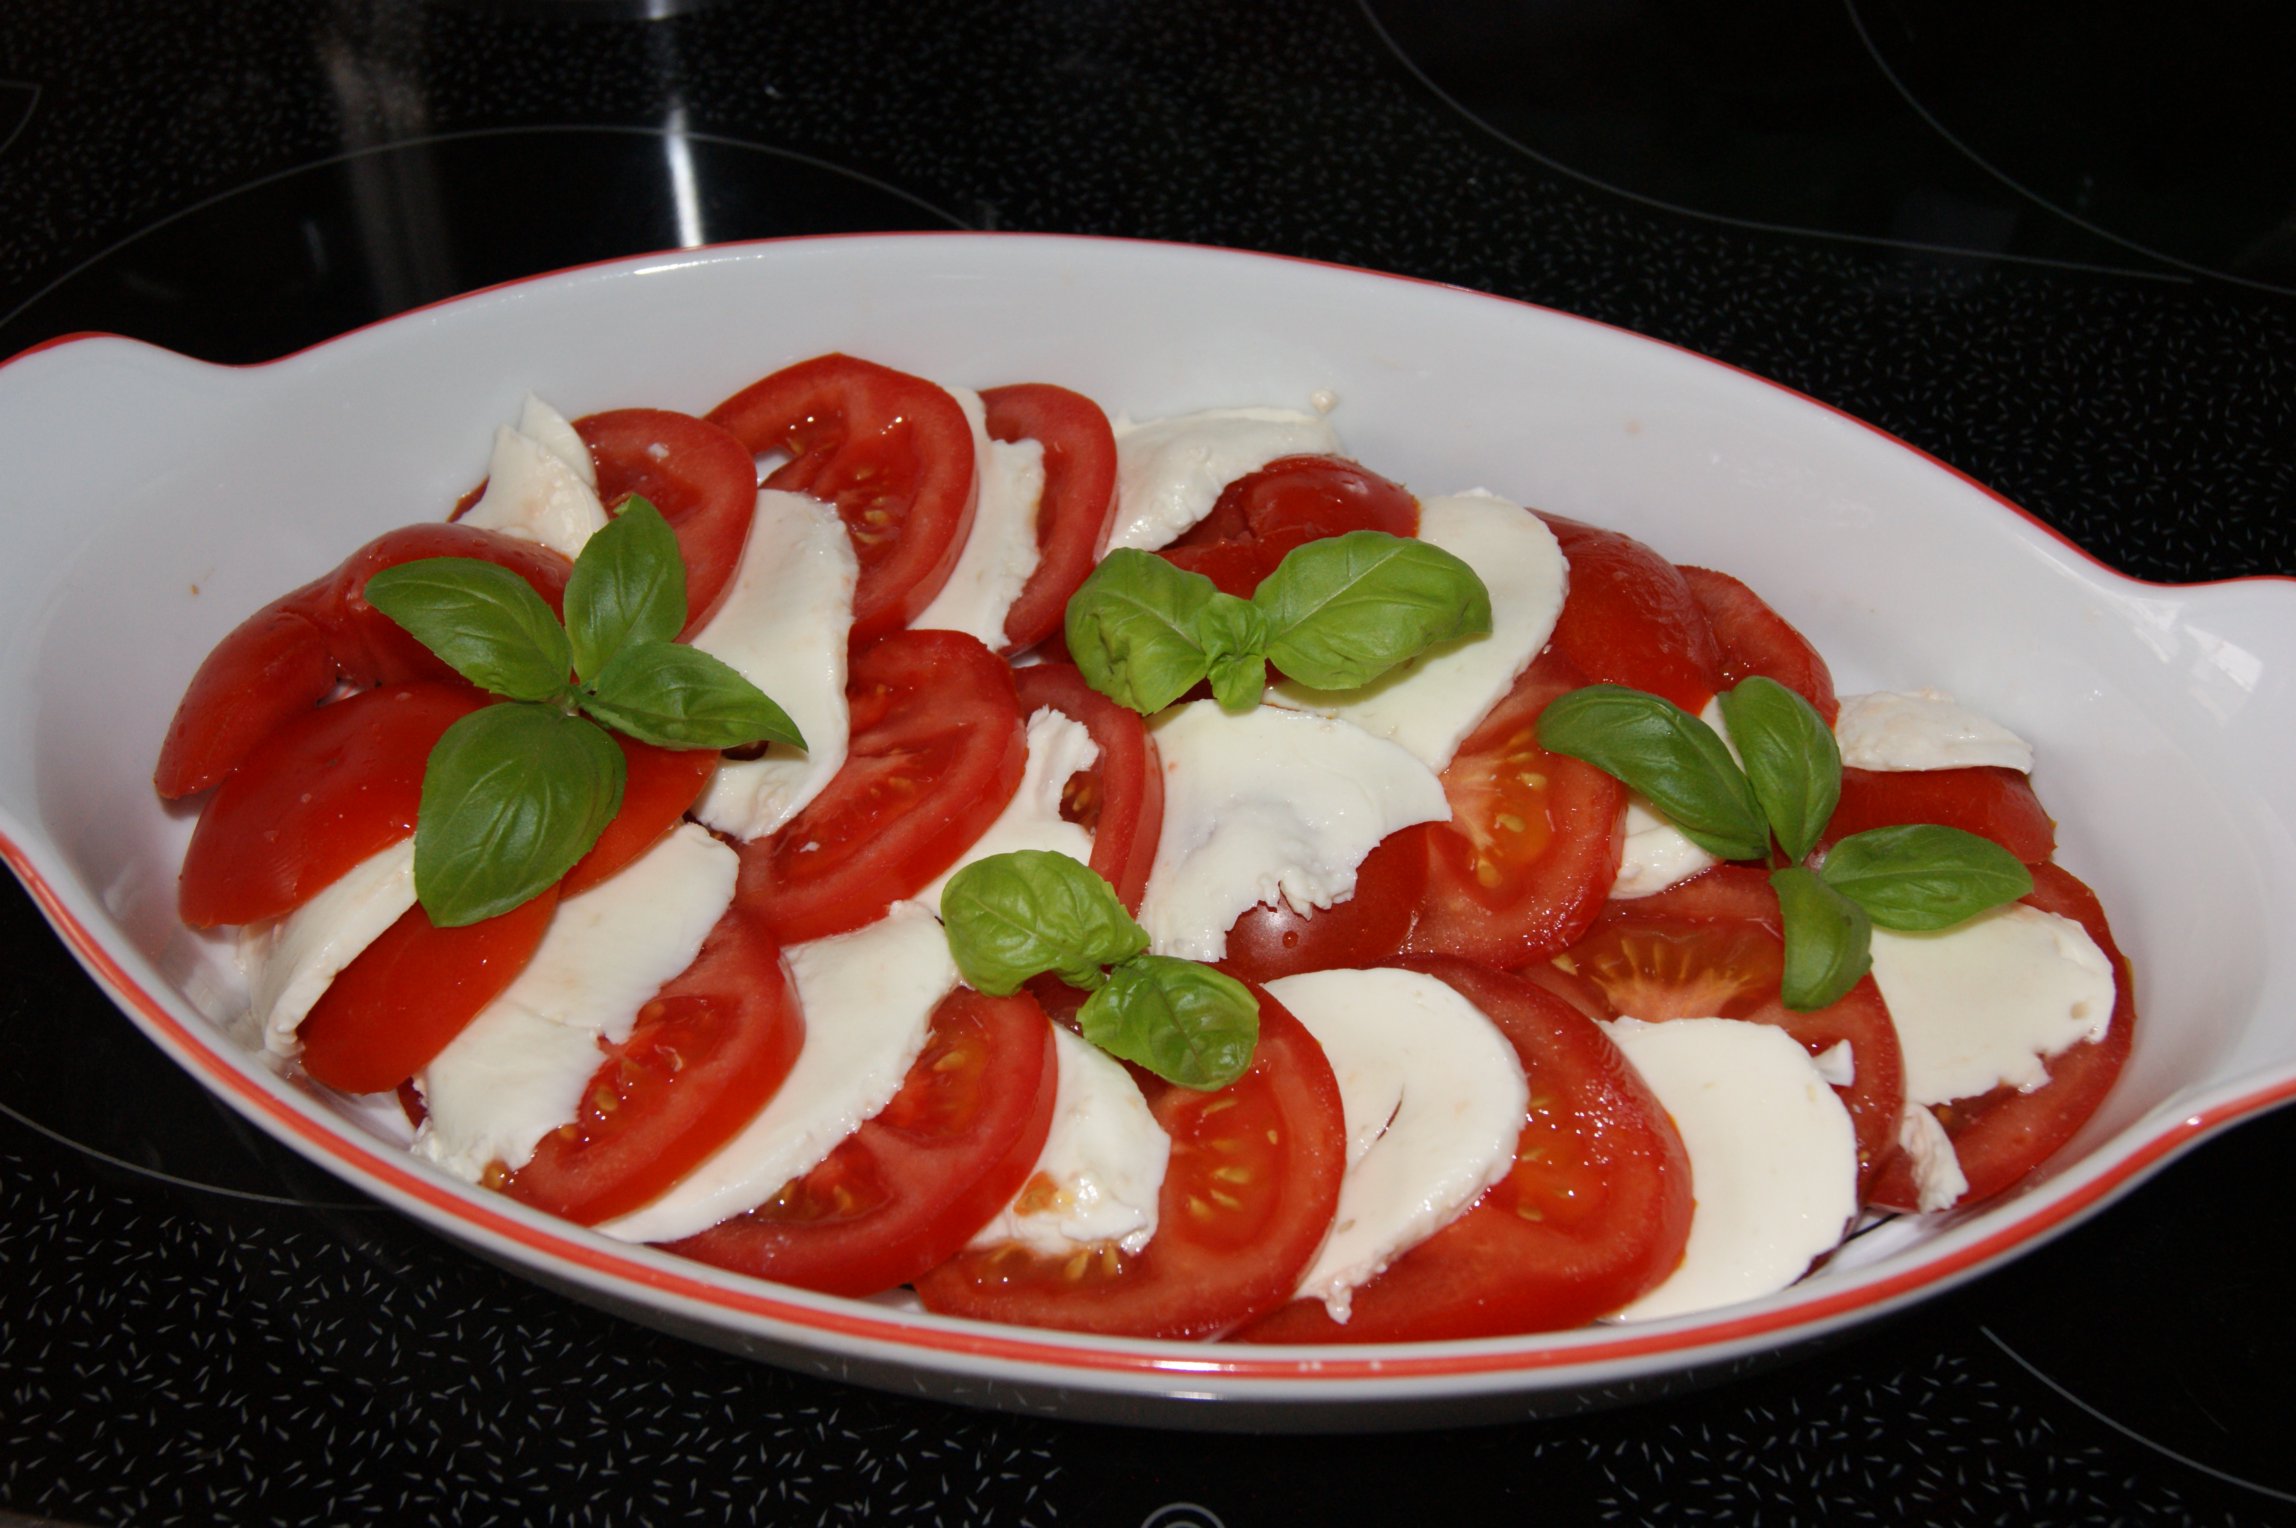
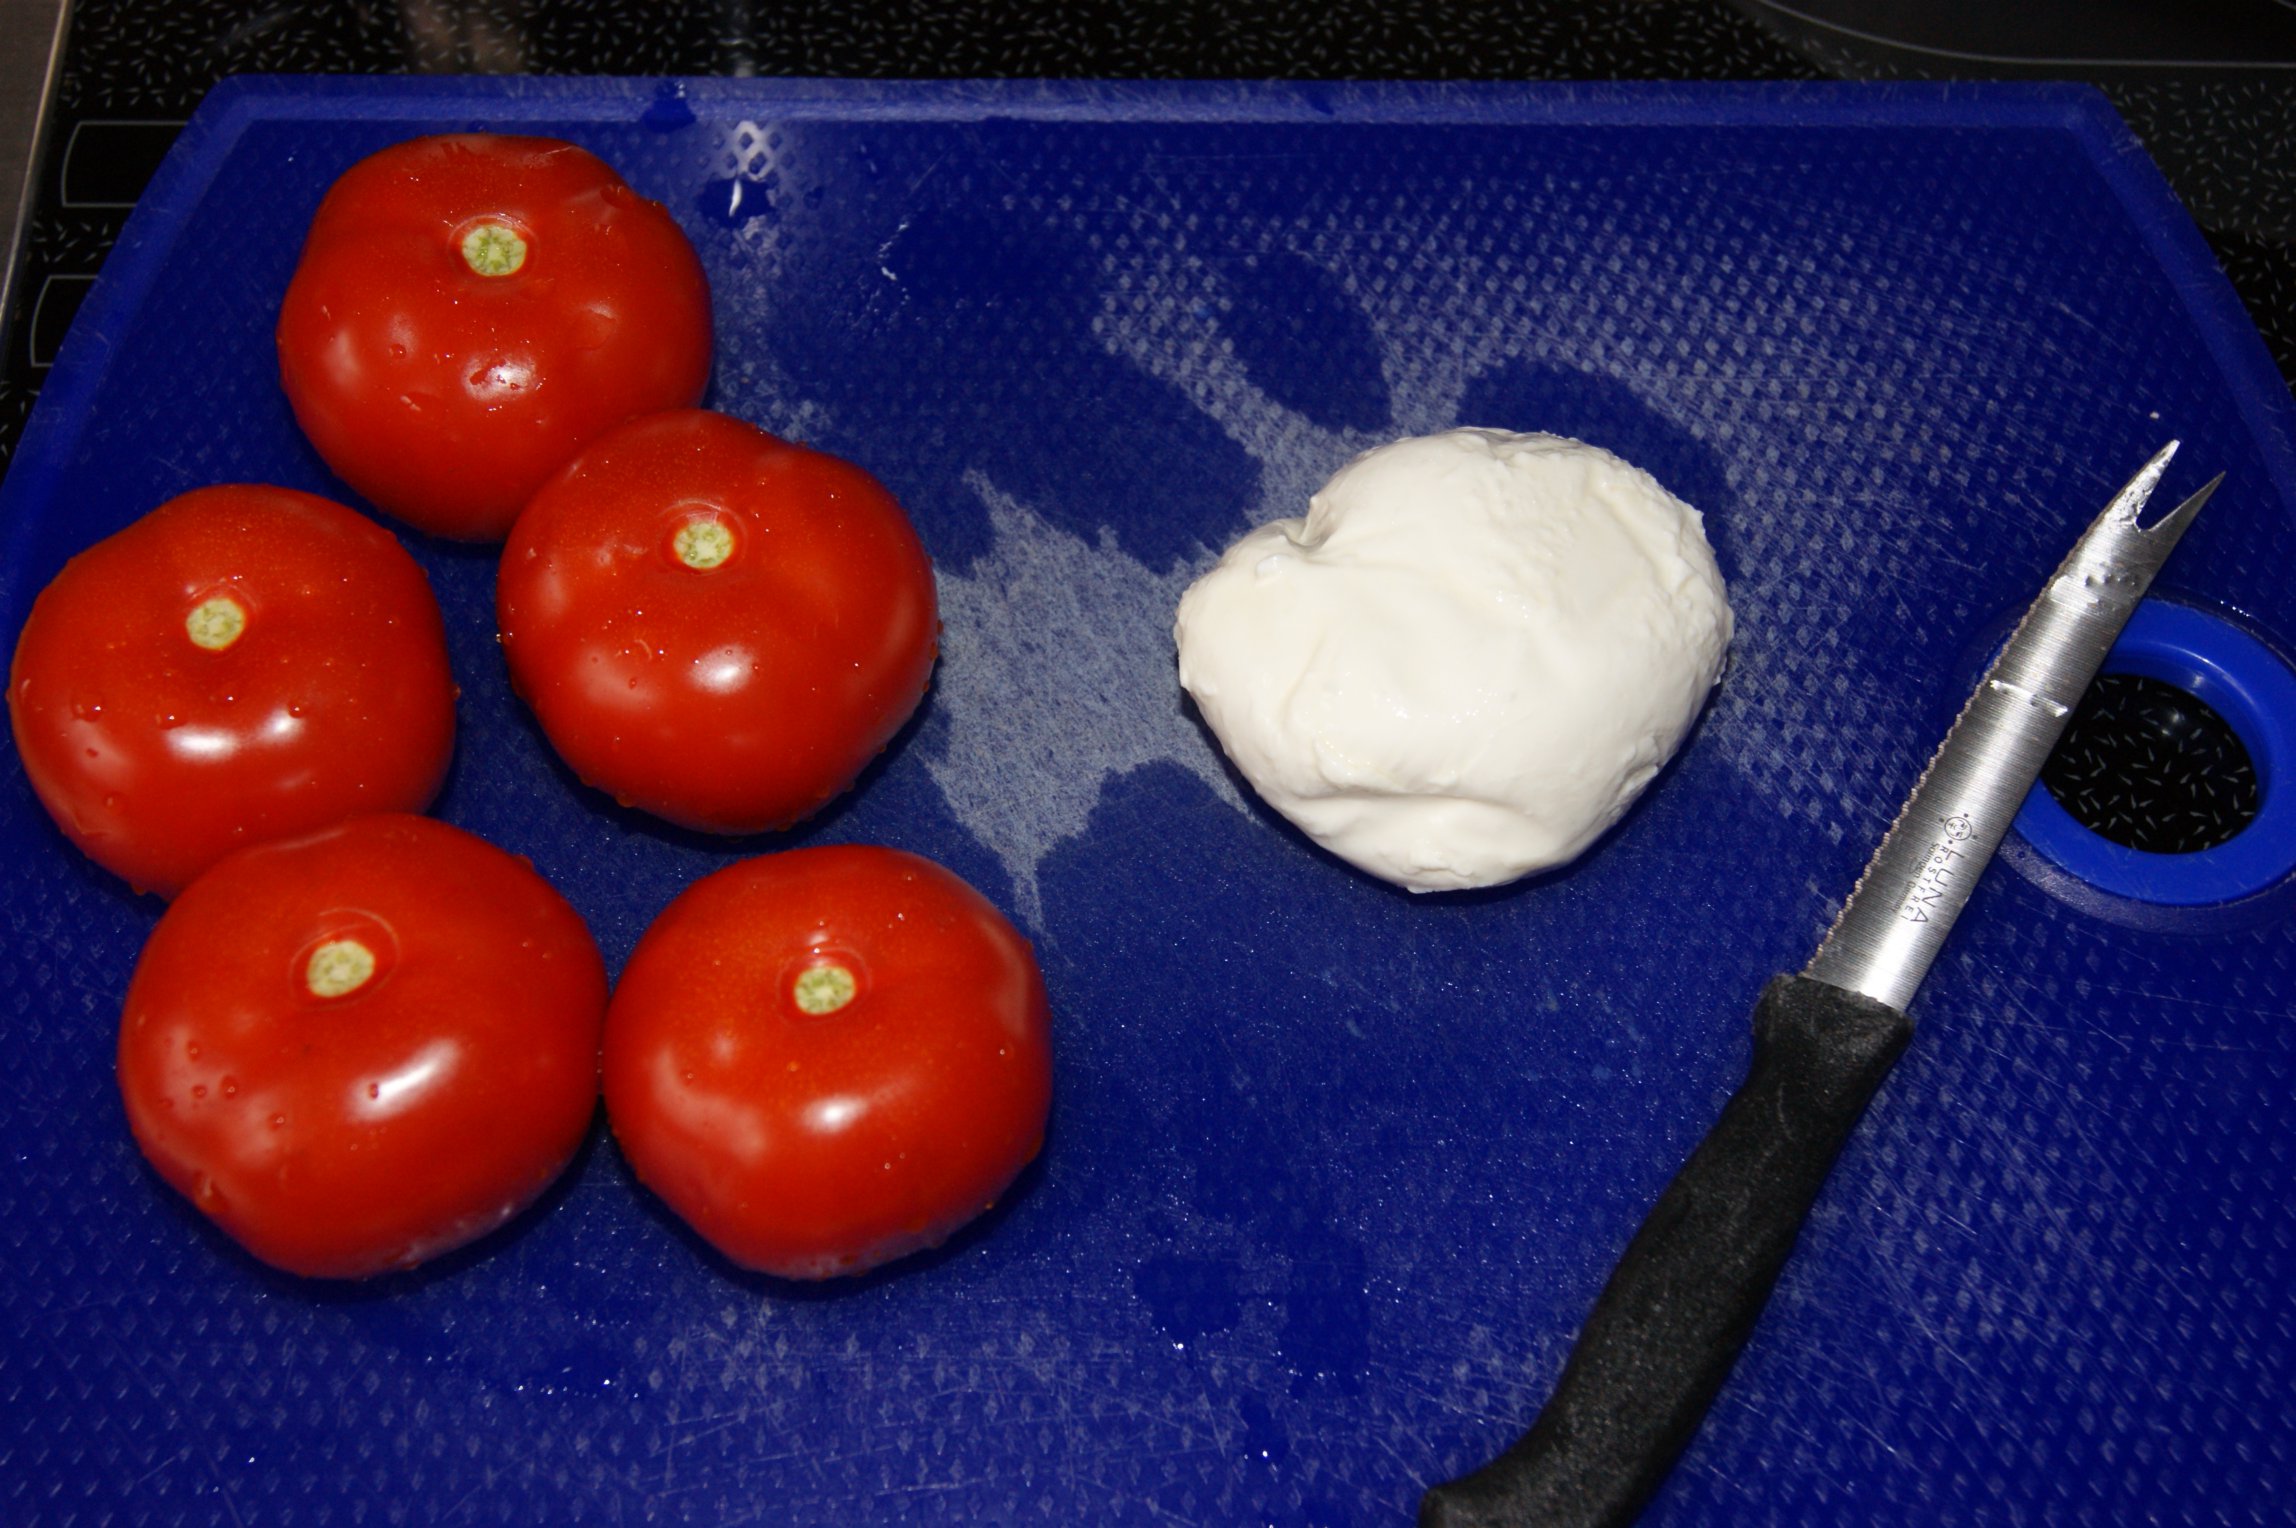
Today I want to show you how to make roasted chicken legs in the oven. I made them as part of a meal I served to my parents on the last weekend! You remember the caprese salad? Yes, it was the side dish to the chicken!

It was the very first time for me to make chicken in the oven like this. Usually I don’t like eating meat of bones very much which is why I have never done it before! But I have seen my brother do it and I know my parents would like it, so I gave it a try. And I really was very surprised!! The chicken legs turned out very soft and tender with a very crispy skin. It really was very delicious!!

But see for yourselves:

DSC07167

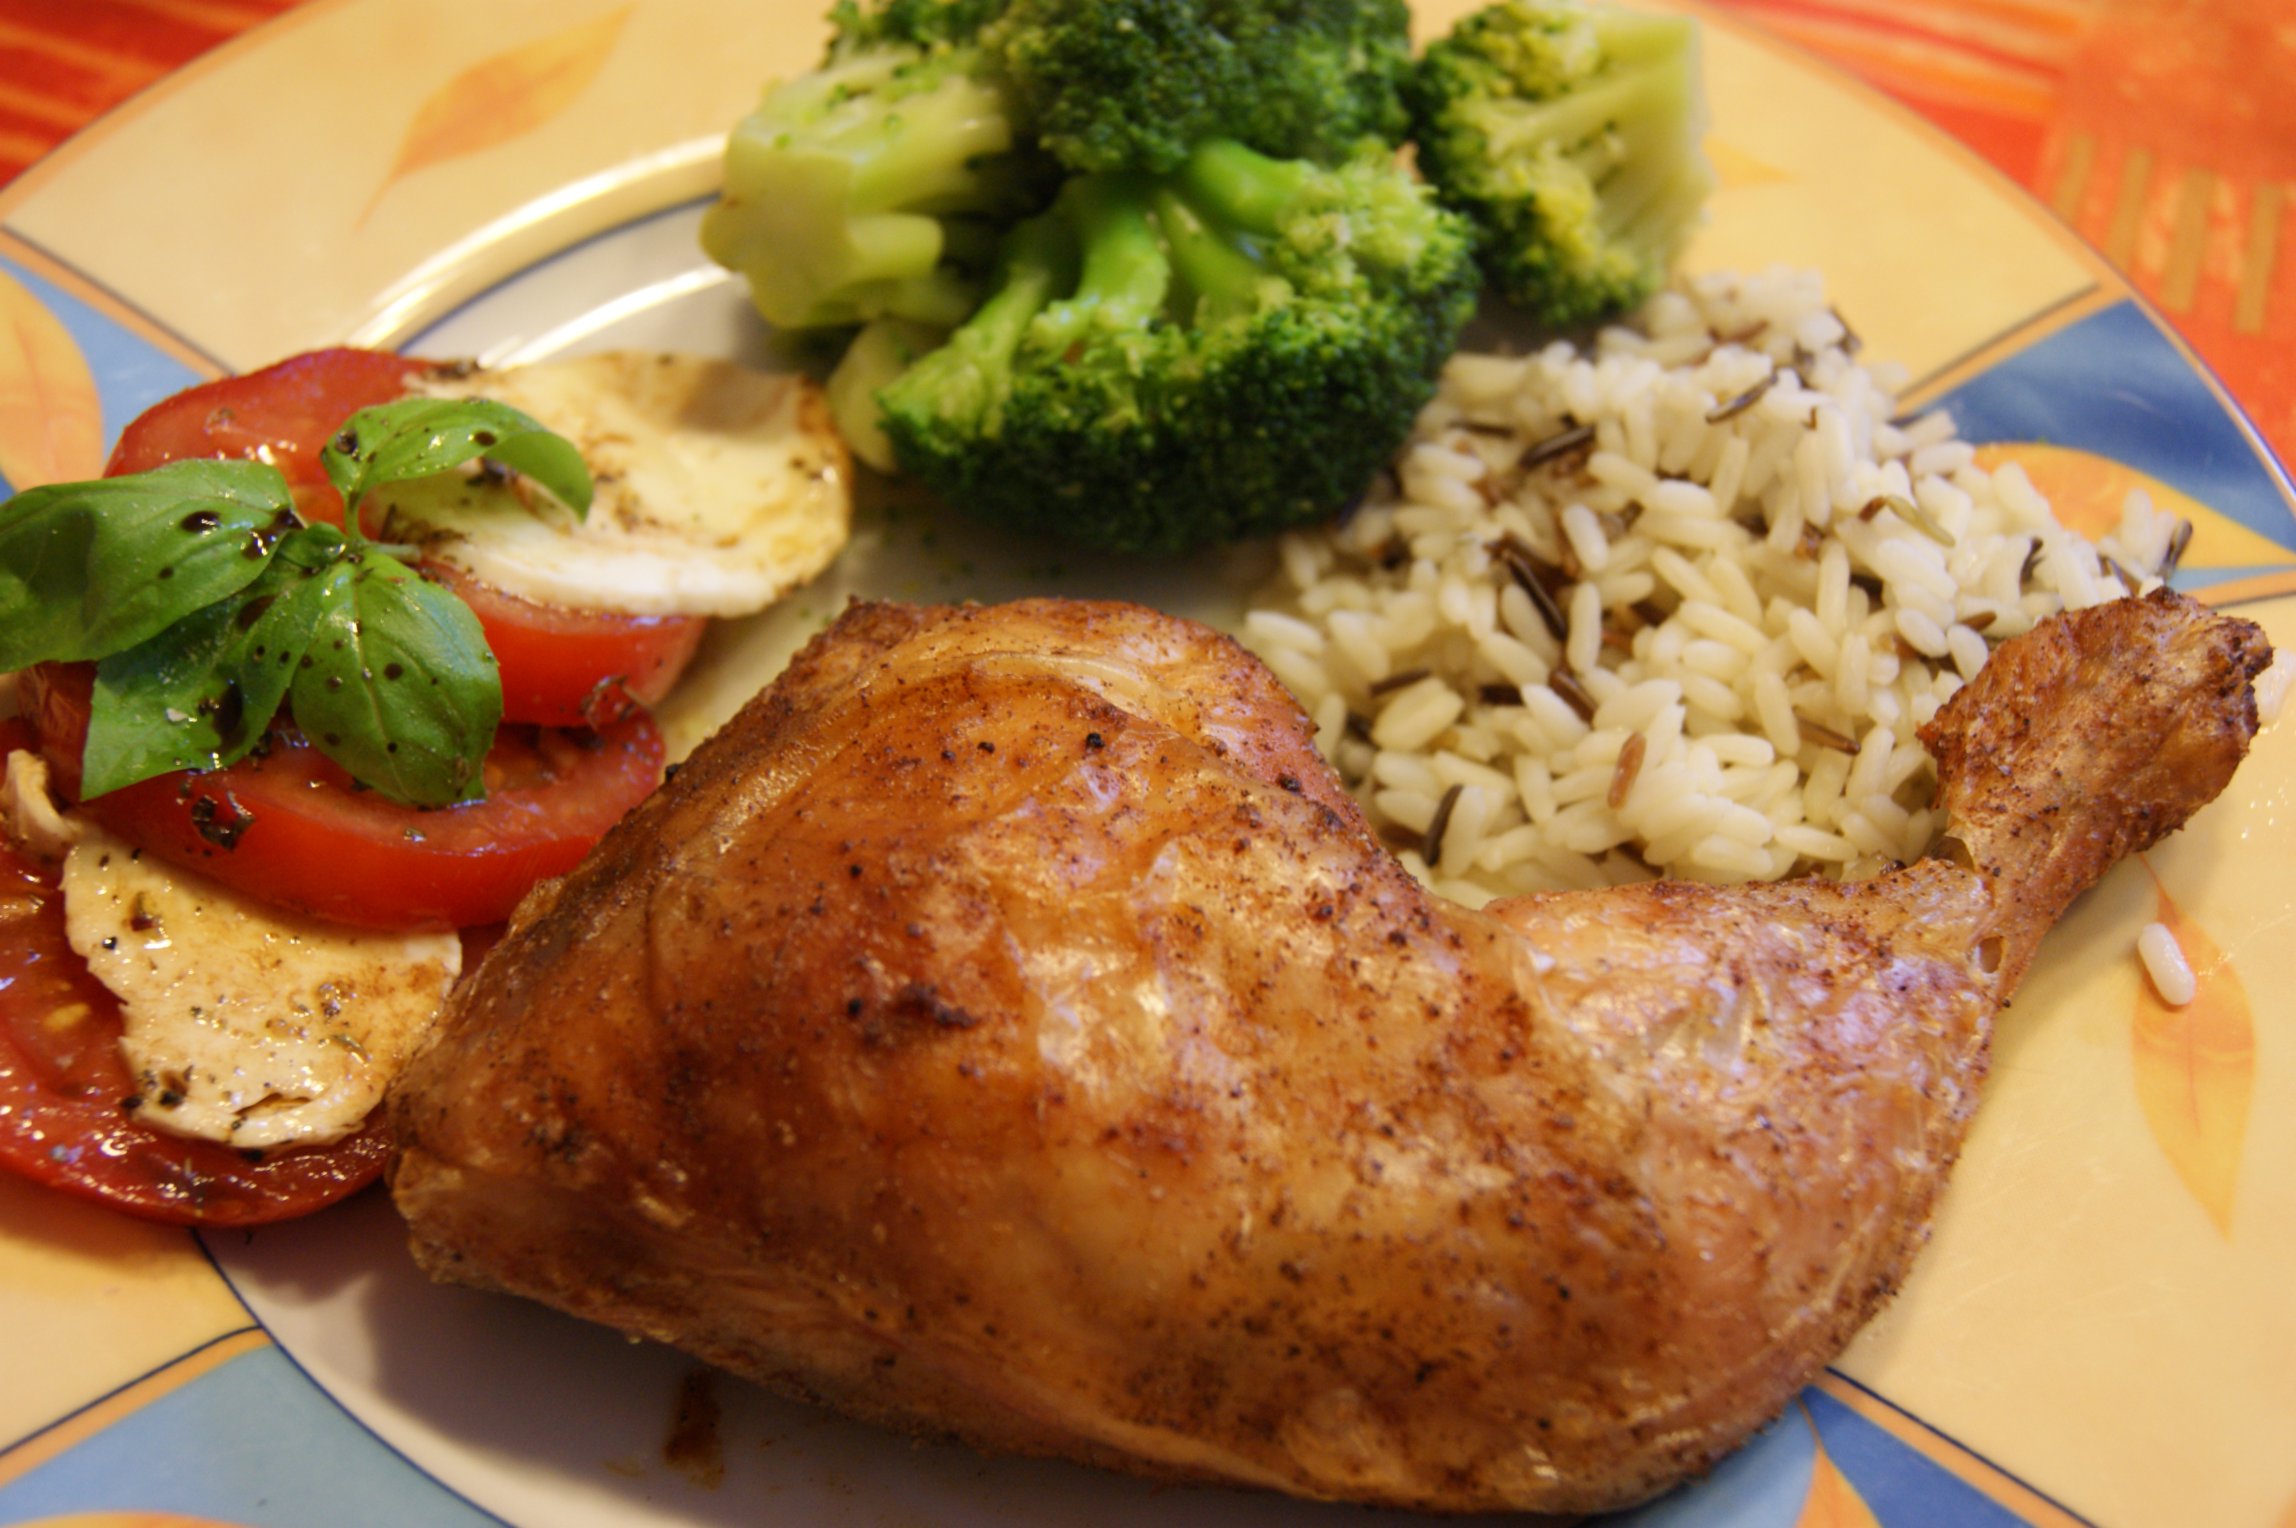
There was wild rice and steamed broccoli as side dishes!


Roasted Chicken Legs

4 chicken legs (2 per adult, 1 per child)

4 tablespoons olive oil

spices: paprika, pepper, salt, chicken salt (a mix of spices that are great with chicken)

DSC07133DSC07136


1. Preheat oven on 200°C. Line a baking sheet with aluminium foil. Put the chicken into a bowl and coat it in olive oil.

2. Put spices on top and rub them in with your hands. You need quite a bit of the spices, you will see how much! The chicken skin will become a little redish because of the paprika and the spices should be visible everywhere too.

3. Put the chicken legs skins up on top of a grid. Place grid into the middle rack of your oven and put the covered baking sheet directly under it to catch the juices that will drop of the chicken legs while roasting. See picture:

DSC07139

4. Roast chicken legs for approx. 45 minutes. The skin will be paperthin, crispy and browned!

5. Enjoy maybe with some caprese salad?

DSC07167

Caprese – Tomatoes, Mozzarella and Basil Salad

Caprese – Tomatoes, Mozzarella and Basil Salad

Hello everybody!


Today I want to share a recipe of the italian salad caprese with you.

DSC07160

I made it this weekend for my parents and I think it was really delicious! Usually I am not at my parents house, as I am studying at a university 110 km north of my hometown. The last times I went to visit my family over the weekend or for some days around christmas and new years, it became a habit for them to pronounce me as their cook 😉 I have free hand – I can cook whatever I want and usually they eat it, so it can’t be too bad. I like being creative and think about what meal they might like and how to make a meal a little less in carbs – as that is what we are trying to change our diets into since the new year. So a little caprese salad really fits well into this plan – and it also looks very delicious because of the italian colours!! And for an extra bonus it is very quick and easy to make.


Also I got to spend the weekend with the beautiful Sony DSLR  camera of my godchild. It was soo fun to work with it! The pictures are just waaaay better then with my own pocket digital one. And all the options!! I am totally in love ♥ ♥ ♥


So enough talk for now – of to the recipe we go!

DSC07150

DSC07142

Caprese salad


About 5 tomatoes (depends on size)

1 ball of mozzarella (about 125 g)

basil leaves

2 tablespoons olive oil

4 tablespoons dark balsamic vinegar

salt, herbs (I used a dry mixture called pizza herbs, it contains thyme, oregano, basil,…)


1. Hold tomato on the side and cut it into 5mm slices from bottom to top. If you do it like that, all the kernels will stay in their place!

2. Cut the mozzarella into very thin slices.

3. Put tomatoes and mozzarella slices diversified and variantly into a dish. Your dish needs to have a rim to hold the oil and vinegar later on! Put as much basi leaves in between the layers as you like! I didn’t have much basil left which is why I only did a little decoration.

4. Mix the vinegar, oil, and herbs in a little bowl. Salt the tomato and mozzarella layers just from the top, that is enough. Take a spoon and drizzle the vinaigrette on top.

5. You can let it sit for half an hour or just eat it straight away! It won’t go bad if it stays for a little while. Enjoy!!

DSC07161

Kathrin

my first steps in starting a sewing business

my first steps in starting a sewing business

Hello everybody! 


Some time has passed since my last entry. You wonder what I have been doing apart from going back to university after the winter holidays?

I was focused on preparing my first steps to share my love in sewing with more people out there.

I think it is quite common in America to buy and sell homemade products on sites like etsy.com . In Germany however those communities exist, but are quite a bit smaller than over there.

After I got a sewing machine for my last birthday I started to teach myself how to sew and I like it a lot!! The problem is: I could be sewing all day long – but what to do with all the things I sew? i definitly can’t use them all by myself!

That is why most of the pouches and things I did in the past I made for somebody special and gave them away as presents. I must say, I was very supprised how much they loved those!! Some said it was very special to them because they got something that was handmade only for themselves. And as bonus – I liked sewing them very much too, so it was a win-win on both sides 🙂

When the new year started, I thought about if it was possible to sell some of those on handmade websites like etsy.com or dawanda.de even in Germany. So I opened up one shop on either of the platforms and started to make some produkt to sell:

IMG_9265

I put one of each pouch on one of the websites to be able to compare the success. Until now I can say that etsy really disappoints! On dawanda I have some views, but on etsy I still have none. I guess one reason might be that I only advertised the products on the german websites. I guess etsy is way more used in America!

As I have a lot to do for university at the moment I have to update my shops time by time.

I did only one more thing, that I want to put on the dawanda page: this cute little owl!

IMG_9316

but more things are in the making 🙂

I am really enjoying this little experiment!! I am excited to see how it works out!!

Do you have any experience in using or selling on handmade websites like etsy?

Have a nice day!

Kathrin


P.S. Link to etsy page: click here , for dawanda page click here

Rumpot – Rumtopf

Rumpot – Rumtopf
Rumpot – Rumtopf

Hello people!

Today I want to show you a picture I came across on the internet. It is a recipe of the german speciality ‘Rumtopf’ which is made by filling up a large pot with different fruits all over the season (one by one and when the fruit is ripe) and sugar and rum.

But look for yourselves!

rumtopf-72-dpi

click on the picture to get to it’s origin!

The creator is Elisandra, and she has even more of those pictures! I will show you my favourites, but if you want to have a look yourself, you can do so here!

elisandra-etwas-wunderbares-71856elisandra-i-love-salad-35273

elisandra-how-to-make-spicy-pickles-33356elisandra-so-gluecklich-sein-89055


They are beautiful, aren’t they?

If anybody has no idea what to give me as a birthday present *wink* 😉

Have a great day!!

Kathrin

Apple and onion swirls – Apfel-Zwiebel Schnecken

Apple and onion swirls – Apfel-Zwiebel Schnecken

Hey everybody!!


The new year hast just started and the New Year’s resolutions are still very much in my mind, so I thought i use the flow and give you some quick words and a new recipe.

How has the new year been so far for you? I slept in very long yesterday, and then spent the whole evening with my family at my grandparents’ to give them all their good wishes!

In Germany it is tradition that all the kids get very big soft prezels (not the Oktoberfest-kind, but sweet ones) from their godparents and money from their relatives. Also, if you want to make sure, that you won’t be out of money anytime in the new year, you will eat Sauerkraut on the new years day. That’s what my parents and I did yesterday!!

Do you have any New-Years’ traditions?

DSCF8873

So let’s come to the recipe. Another great snack to bring to any kind of party or friends house!! It uses apples and onions which are a great combination especially in autumn and this time of year. We still have apples from our own trees in our garage waiting to be used!


Apple and onion swirls  (Apfel-Zwiebel Schnecken)

I took this recipe from here.

DSCF8882

dough:

500g flour

250ml lukewarm Water

1 package (42g) of fresh yeast

5 tablespoons olive oil

1 teaspoon salt

filling:

4 onions

2 big apples

100g speck (or gammon)

2 tablespoons olive oil

salt, pepper and majoran

100g grated cheese (Emmentaler)

coating:

1 egg yolk


1. Dissolve the yeast in the water. Then put all the ingredients for the dough together and knead until it is a nice dough.

2. For the filling peel onions and apples. Cut speck, onions and apples into small cubes and roast gently in a pan. Season to taste with salt, pepper and majoran. Take care with the salt, as the speck usually is quite salty on its own!

3. Halve the dough and coast one into a rectangle shape (about 20×30 cm wide). Sprinkle half the onion-apple mix and half the cheese on top. Roll the dough up starting from on of the smaller sides and cut pieces from 1-2 cm from it. But it on baking paper on a sheet and repeat with the other half of the dough.

4. Whisk the egg yolk with a bit of water and coat the swirls with it.

5. Put the sheets into the oven. Back at 200°C for 25-30 minutes.

DSCF8871

Enjoy!!

~ Kathrin

Lemon & Rosemary Palmiers

Lemon & Rosemary Palmiers

Hello and good evening people of the world wide web!!


So this is me – taking the courage to throw me and myself out there for you to discover and take part in my life, my adventures and my love for food, sewing and traveling!

As you might recognize, English is not my mothertounge. Actually I am from Germany! But I do really love the language and I try my best not to make to many mistakes. Should you find something not understandable or a meaning totally different please don’t hesitate to tell me 😉

I hope you, my dear reader, will have fun here, live through emotions with me and find a lot of inspiration!!

I wish you all the best for the new year – 2013 – i feel that this will be a fantastic year!! Kleeblatt

I am soo looking forward to get to know all of you!!

As a small preview of what you will find here on the blog soon, I’ll share a first recipe with you!


It is the recipe of ‘pigs ears’ (as we say in Germany – I don’t know the real name in English). Pigs ears are very popular especially in Italy and Spain! I made i small twist with the addition of rosemary and lemon and I like them very much! They are a very quick to make snack to bring to a party or nice evening with friends! They also stay fresh for a while in an airtight container.

I hope you like them like I do!

Have a beautiful evening and a fantastic start into the new year!!

Kathrin


Rosemary and lemon pigs ears

IMG_5326

Recipe:

1 big sheet puff pastry

4 Tablespoons sugar

fresh rosemary leaves

lemon zest of one lemon


Roll flat the puff pastry in front of you, preferably on a sheet of baking parchment. Sprinkle 2 Tablespoons Sugar on top of it. Cut rosemary leaves and lemon zest as small as you can and sprinkle it eavenly onto the puff pastry. Use a rolling pin to press the sprinkled goods gently into the dough and flip it over. Treat this side of the dough like the other one. When you are ready, start roling the puff pastry from two opposite sides (the smaller ones if you want bigger pigs ears, the longer ones if you want smaller ones) to the centre. Put the roll into your baking paper and into the fridge for half an hour.

Afterwards cut slices of the roll like 3-5 mm thick and put them on a fresh baking parchment on a baking sheet and into the oven. Temperature needed is 180 °C for approximitly 15-20 minutes. The pigs ears are ready, if they are puffed up nicely and not yet browned. Let them cool for a few minutes on the sheet and then indulge!